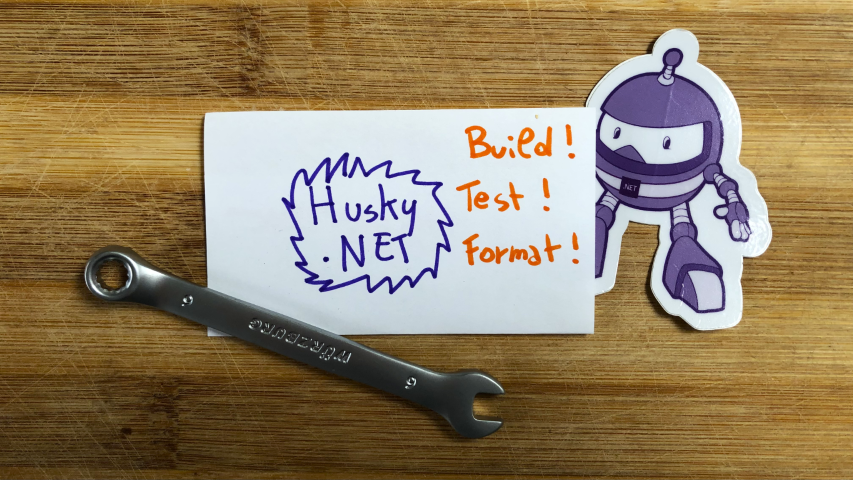
دسته: ذخیره داده‌های موقت

  • 6.48 Million Google Clicks! 💰

    6.48 Million Google Clicks! 💰


    Yesterday Online PNG Tools smashed through 6.47M Google clicks and today it’s smashed through 6.48M Google clicks! That’s 10,000 new clicks in a single day – the smash train keeps on rollin’!

    What Are Online PNG Tools?

    Online PNG Tools offers a collection of easy-to-use web apps that help you work with PNG images right in your browser. It’s like a Swiss Army Knife for anything PNG-related. On this site, you can create transparent PNGs, edit icons, clean up logos, crop stamps, change colors of signatures, and customize stickers – there’s a tool for it all. The best part is that you don’t need to install anything or be a graphic designer. All tools are made for regular people who just want to get stuff done with their images. No sign-ups, no downloads – just quick and easy PNG editing tools.

    Who Created Online PNG Tools?

    Online PNG Tools were created by me and my team at Browserling. We’ve build simple, browser-based tools that anyone can use without needing to download or install anything. Along with PNG tools, we also work on cross-browser testing to help developers make sure their websites work great on all web browsers. Our mission is to make online tools that are fast, easy to use, and that are helpful for everyday tasks like editing icons, logos, and signatures.

    Who Uses Online PNG Tools?

    Online PNG Tools and Browserling are used by everyone – from casual users to professionals and even Fortune 100 companies. Casual users often use them to make memes, edit profile pictures, or remove backgrounds. Professionals use them to clean up logos, design icons, or prepare images for websites and apps.

    Smash too and see you tomorrow at 6.49M clicks! 📈

    PS. Use coupon code SMASHLING for a 30% discount on these tools at onlinePNGtools.com/pricing. 💸


    Source link

  • Postman's pre-request scripts: how to perform HTTP POST requests (with JSON body) and how to set Cookie authentication.

    Postman's pre-request scripts: how to perform HTTP POST requests (with JSON body) and how to set Cookie authentication.


    In Postman, you can define scripts to be executed before the beginning of a request. Can we use them to work with endpoints using Cookie Authentication?

    Table of Contents

    Just a second! 🫷
    If you are here, it means that you are a software developer.
    So, you know that storage, networking, and domain management have a cost .

    If you want to support this blog, please ensure that you have disabled the adblocker for this site.
    I configured Google AdSense to show as few ADS as possible – I don’t want to bother you with lots of ads, but I still need to add some to pay for the resources for my site.

    Thank you for your understanding.
    Davide

    Nowadays, it’s rare to find services that use Cookie Authentication, yet they still exist. How can we configure Cookie Authentication with Postman? How can we centralize the definition using pre-request scripts?

    I had to answer these questions when I had to integrate a third-party system that was using Cookie Authentication. Instead of generating a new token manually, I decided to centralize the Cookie creation in a single place, making it automatically available to every subsequent request.

    In order to generate the token, I had to send a request to the Authentication endpoint, sending a JSON payload with data coming from Postman’s variables.

    In this article, I’ll recap what I learned, teach you some basics of creating pre-request scripts with Postman, and provide a full example of how I used it to centralize the generation and usage of a cookie for a whole Postman collection.

    Introducing Postman’s pre-request scripts

    As you probably know, Postman allows you to create scripts that are executed before and after an HTTP call.

    These scripts are written in JavaScript and can use some objects and methods that come out of the box with Postman.

    You can create such scripts for a single request or the whole collection. In the second case, you write the script once so that it becomes available for all the requests stored within that collection.

    Postman’s pre-request section on a Collection

    The operations defined in the Scripts section of the collection are then executed before (or after) every request in the collection.

    Here, you can either use the standard JavaScript code—like the dear old console.log— or the pm object to reference the context in which the script will be executed.

    For example, you can print the value of a Postman variable by using:

    const tokenUrl = pm.variables.get("TokenUrl")
    console.log(tokenUrl)
    

    How to send a POST request with JSON body in Postman pre-request scripts

    How can we issue a POST request in the pre-request script, specifying a JSON body?

    Postman’s pm object, along with some other methods, exposes the sendRequest function. Its first parameter is the “description” of the request; its second parameter is the callback to execute after the request is completed.

    pm.sendRequest(request, (errorResponse, successfulResponse) => {
      // do something here
    })
    

    You have to carefully craft the request, by specifying the HTTP method, the body, and the content type:

    var authenticationBody = {
      UserName: username,
      Password: password,
    }
    
    const request = {
      method: "POST",
      url: tokenUrl,
      body: {
        mode: "raw",
        raw: JSON.stringify(authenticationBody),
        options: {
          raw: {
            language: "json",
          },
        },
      },
    }
    

    Pay particular attention to the options node: it tells Postman how to treat the body content and what the content type is. Because I was missing this node, I spent too many minutes trying to figure out why this call was badly formed.

    options: {
      raw: {
        language: "json"
      }
    }
    

    Now, the result of the operation is used to execute the callback function. Generally, you want it to be structured like this:

    pm.sendRequest(request, (err, response) => {
      if (err) {
        // handle error
      }
      if (response) {
        // handle success
      }
    })
    

    Storing Cookies in Postman (using a Jar)

    You have received the response with the token, and you have parsed the response to retrieve the value. Now what?

    You cannot store Cookies directly as it they were simple variables. Instead, you must store Cookies in a Jar.

    Postman allows you to programmatically operate with cookies only by accessing them via a Jar (yup, pun intended!), that can be initialized like this:

    const jar = pm.cookies.jar()
    

    From here, you can add, remove or retrieve cookies by working with the jar object.

    To add a new cookie, you must use the set() method of the jar object, specifying the domain the cookie belongs to, its name, its value, and the callback to execute when the operation completes.

    const jar = pm.cookies.jar()
    
    jar.set(
      "add-your-domain-here.com",
      "MyCustomCookieName",
      newToken,
      (error, cookie) => {
        if (error) {
          console.error(`An error occurred: ${error}`)
        } else {
          console.log(`Cookie saved: ${cookie}`)
        }
      }
    )
    

    You can try it now: execute a request, have a look at the console logs, and…

    CookieStore: programmatic access  is denied

    We’ve received a strange error:

    An error occurred: Error: CookieStore: programmatic access to “add-your-domain-here.com” is denied

    Wait, what? What does “programmatic access to X is denied” mean, and how can we solve this error?

    For security reasons, you cannot handle cookies via code without letting Postman know that you explicitly want to operate on the specified domain. To overcome this limitation, you need to whitelist the domain associated with the cookie so that Postman will accept that the operation you’re trying to achieve via code is legit.

    To enable a domain for cookies operations, you first have to navigate to the headers section of any request under the collection and click the Cookies button.

    Headers section in a Postman request

    From here, select Domains Allowlist:

    Cookies list page

    Finally, add your domain to the list of the allowed ones.

    Allowed domains list

    Now Postman knows that if you try to set a cookie via code, it’s because you actively want it, allowing you to add your cookies to the jar.

    If you open again the Cookie section (see above), you will be able to see the current values for the cookies associated with the domain:

    Domain-related cookies in Postman

    Further readings

    Clearly, we’ve just scratched the surface of what you can do with pre-request scripts in Postman. To learn more, have a look at the official documentation:

    🔗 Write pre-request scripts to add dynamic behavior in Postman | Postman docs

    This article first appeared on Code4IT 🐧

    If you want to learn more about how to use the Jar object and what operations are available, you can have a look at the following link:

    🔗 Scripting with request cookie | Postman docs

    Wrapping up (with complete example)

    In this article, we learned what pre-request scripts are, how to execute a POST request passing a JSON object as a body, and how to programmatically add a Cookie in Postman by operating on the Jar object.

    For clarity, here’s the complete code I used in my pre-request script.

    const tokenUrl = pm.variables.get("TokenUrl")
    const username = pm.variables.get("ClientID")
    const password = pm.variables.get("ClientSecret")
    
    var authBody = {
      UserName: username,
      Password: password,
    }
    
    const getTokenRequest = {
      method: "POST",
      url: tokenUrl,
      body: {
        mode: "raw",
        raw: JSON.stringify(authBody),
        options: {
          raw: {
            language: "json",
          },
        },
      },
    }
    
    pm.sendRequest(getTokenRequest, (err, response) => {
      if (err) {
        throw new Error(err)
      }
      if (response) {
        var jresponse = response.json()
    
        var newToken = jresponse["Token"]
    
        console.log("token: ", newToken)
    
        if (newToken) {
          const jar = pm.cookies.jar()
    
          jar.set(
            "add-your-domain-here.com",
            "MyCustomCookieName",
            newToken,
            (error, cookie) => {
              if (error) {
                console.error(`An error occurred: ${error}`)
              } else {
                console.log(`Cookie saved: ${cookie}`)
              }
            }
          )
        } else {
          throw new Error("Token not available")
        }
      }
    })
    

    Notice that to parse the response from the authentication endpoint I used the .json() method, that allows me to access the internal values using the property name, as in jresponse["Token"].

    I hope you enjoyed this article! Let’s keep in touch on Twitter or LinkedIn! 🤜🤛

    Happy coding!

    🐧


    Source link

  • 2 ways to use custom equality rules in a HashSet | Code4IT

    2 ways to use custom equality rules in a HashSet | Code4IT


    With HashSet, you can get a list of different items in a performant way. What if you need a custom way to define when two objects are equal?

    Table of Contents

    Just a second! 🫷
    If you are here, it means that you are a software developer.
    So, you know that storage, networking, and domain management have a cost .

    If you want to support this blog, please ensure that you have disabled the adblocker for this site.
    I configured Google AdSense to show as few ADS as possible – I don’t want to bother you with lots of ads, but I still need to add some to pay for the resources for my site.

    Thank you for your understanding.
    Davide

    Sometimes, object instances can be considered equal even though some of their properties are different. Consider a movie translated into different languages: the Italian and French versions are different, but the movie is the same.

    If we want to store unique values in a collection, we can use a HashSet<T>. But how can we store items in a HashSet when we must follow a custom rule to define if two objects are equal?

    In this article, we will learn two ways to add custom equality checks when using a HashSet.

    Let’s start with a dummy class: Pirate.

    public class Pirate
    {
        public int Id { get; }
        public string Name { get; }
    
        public Pirate(int id, string username)
        {
            Id = id;
            Name = username;
        }
    }
    

    I’m going to add some instances of Pirate to a HashSet. Please, note that there are two pirates whose Id is 4:

    List<Pirate> mugiwara = new List<Pirate>()
    {
        new Pirate(1, "Luffy"),
        new Pirate(2, "Zoro"),
        new Pirate(3, "Nami"),
        new Pirate(4, "Sanji"), // This ...
        new Pirate(5, "Chopper"),
        new Pirate(6, "Robin"),
        new Pirate(4, "Duval"), // ... and this
    };
    
    
    HashSet<Pirate> hashSet = new HashSet<Pirate>();
    
    
    foreach (var pirate in mugiwara)
    {
        hashSet.Add(pirate);
    }
    
    
    _output.WriteAsTable(hashSet);
    

    (I really hope you’ll get the reference 😂)

    Now, what will we print on the console? (ps: output is just a wrapper around some functionalities provided by Spectre.Console, that I used here to print a table)

    HashSet result when no equality rule is defined

    As you can see, we have both Sanji and Duval: even though their Ids are the same, those are two distinct objects.

    Also, we haven’t told HashSet that the Id property must be used as a discriminator.

    Define a custom IEqualityComparer in a C# HashSet

    In order to add a custom way to tell the HashSet that two objects can be treated as equal, we can define a custom equality comparer: it’s nothing but a class that implements the IEqualityComparer<T> interface, where T is the name of the class we are working on.

    public class PirateComparer : IEqualityComparer<Pirate>
    {
        bool IEqualityComparer<Pirate>.Equals(Pirate? x, Pirate? y)
        {
            Console.WriteLine($"Equals: {x.Name} vs {y.Name}");
            return x.Id == y.Id;
        }
    
        int IEqualityComparer<Pirate>.GetHashCode(Pirate obj)
        {
            Console.WriteLine("GetHashCode " + obj.Name);
            return obj.Id.GetHashCode();
        }
    }
    

    The first method, Equals, compares two instances of a class to tell if they are equal, following the custom rules we write.

    The second method, GetHashCode, defines a way to build an object’s hash code given its internal status. In this case, I’m saying that the hash code of a Pirate object is just the hash code of its Id property.

    To include this custom comparer, you must add a new instance of PirateComparer to the HashSet declaration:

    HashSet<Pirate> hashSet = new HashSet<Pirate>(new PirateComparer());
    

    Let’s rerun the example, and admire the result:

    HashSet result with custom comparer

    As you can see, there is only one item whose Id is 4: Sanji.

    Let’s focus a bit on the messages printed when executing Equals and GetHashCode.

    GetHashCode Luffy
    GetHashCode Zoro
    GetHashCode Nami
    GetHashCode Sanji
    GetHashCode Chopper
    GetHashCode Robin
    GetHashCode Duval
    Equals: Sanji vs Duval
    

    Every time we insert an item, we call the GetHashCode method to generate an internal ID used by the HashSet to check if that item already exists.

    As stated by Microsoft’s documentation,

    Two objects that are equal return hash codes that are equal. However, the reverse is not true: equal hash codes do not imply object equality, because different (unequal) objects can have identical hash codes.

    This means that if the Hash Code is already used, it’s not guaranteed that the objects are equal. That’s why we need to implement the Equals method (hint: do not just compare the HashCode of the two objects!).

    Is implementing a custom IEqualityComparer the best choice?

    As always, it depends.

    On the one hand, using a custom IEqualityComparer has the advantage of allowing you to have different HashSets work differently depending on the EqualityComparer passed in input; on the other hand, you are now forced to pass an instance of IEqualityComparer everywhere you use a HashSet — and if you forget one, you’ll have a system with inconsistent behavior.

    There must be a way to ensure consistency throughout the whole codebase.

    Implement the IEquatable interface

    It makes sense to implement the equality checks directly inside the type passed as a generic type to the HashSet.

    To do that, you need to have that class implement the IEquatable<T> interface, where T is the class itself.

    Let’s rework the Pirate class, letting it implement the IEquatable<Pirate> interface.

    public class Pirate : IEquatable<Pirate>
    {
        public int Id { get; }
        public string Name { get; }
    
        public Pirate(int id, string username)
        {
            Id = id;
            Name = username;
        }
    
        bool IEquatable<Pirate>.Equals(Pirate? other)
        {
            Console.WriteLine($"IEquatable Equals: {this.Name} vs {other.Name}");
            return this.Id == other.Id;
        }
    
        public override bool Equals(object obj)
        {
            Console.WriteLine($"Override Equals {this.Name} vs {(obj as Pirate).Name}");
            return Equals(obj as Pirate);
        }
    
        public override int GetHashCode()
        {
            Console.WriteLine($"GetHashCode {this.Id}");
            return (Id).GetHashCode();
        }
    }
    

    The IEquatable interface forces you to implement the Equals method. So, now we have two implementations of Equals (the one for IEquatable and the one that overrides the default implementation). Which one is correct? Is the GetHashCode really used?

    Let’s see what happens in the next screenshot:

    HashSet result with a class that implements IEquatable

    As you could’ve imagined, the Equals method called in this case is the one needed to implement the IEquatable interface.

    Please note that, as we don’t need to use the custom comparer, the HashSet initialization becomes:

    HashSet<Pirate> hashSet = new HashSet<Pirate>();
    

    What has the precedence: IEquatable or IEqualityComparer?

    What happens when we use both IEquatable and IEqualityComparer?

    Let’s quickly demonstrate it.

    First of all, keep the previous implementation of the Pirate class, where the equality check is based on the Id property:

    public class Pirate : IEquatable<Pirate>
    {
        public int Id { get; }
        public string Name { get; }
    
        public Pirate(int id, string username)
        {
            Id = id;
            Name = username;
        }
    
        bool IEquatable<Pirate>.Equals(Pirate? other)
        {
            Console.WriteLine($"IEquatable Equals: {this.Name} vs {other.Name}");
            return this.Id == other.Id;
        }
    
        public override int GetHashCode()
        {
            Console.WriteLine($"GetHashCode {this.Id}");
            return (Id).GetHashCode();
        }
    }
    

    Now, create a new IEqualityComparer where the equality is based on the Name property.

    public class PirateComparerByName : IEqualityComparer<Pirate>
    {
        bool IEqualityComparer<Pirate>.Equals(Pirate? x, Pirate? y)
        {
            Console.WriteLine($"Equals: {x.Name} vs {y.Name}");
            return x.Name == y.Name;
        }
        int IEqualityComparer<Pirate>.GetHashCode(Pirate obj)
        {
            Console.WriteLine("GetHashCode " + obj.Name);
            return obj.Name.GetHashCode();
        }
    }
    

    Now we have custom checks on both the Name and the Id.

    It’s time to add a new pirate to the list, and initialize the HashSet by passing in the constructor an instance of PirateComparerByName.

    List<Pirate> mugiwara = new List<Pirate>()
    {
        new Pirate(1, "Luffy"),
        new Pirate(2, "Zoro"),
        new Pirate(3, "Nami"),
        new Pirate(4, "Sanji"), // Id = 4
        new Pirate(5, "Chopper"), // Name = Chopper
        new Pirate(6, "Robin"),
        new Pirate(4, "Duval"), // Id = 4
        new Pirate(7, "Chopper") // Name = Chopper
    };
    
    
    HashSet<Pirate> hashSet = new HashSet<Pirate>(new PirateComparerByName());
    
    
    foreach (var pirate in mugiwara)
    {
        hashSet.Add(pirate);
    }
    

    We now have two pirates with ID = 4 and two other pirates with Name = Chopper.

    Can you foresee what will happen?

    HashSet items when defining both IEqualityComparare and IEquatable

    The checks on the ID are totally ignored: in fact, the final result contains both Sanji and Duval, even if their IDs are the same. The custom IEqualityComparer has the precedence over the IEquatable interface.

    This article first appeared on Code4IT 🐧

    Wrapping up

    This started as a short article but turned out to be a more complex topic.

    There is actually more to discuss, like performance considerations, code readability, and more. Maybe we’ll tackle those topics in a future article.

    I hope you enjoyed this article! Let’s keep in touch on LinkedIn or Twitter! 🤜🤛

    Happy coding!

    🐧


    Source link

  • 6.46 Million Google Clicks! 💰

    6.46 Million Google Clicks! 💰


    Yesterday Online PNG Tools smashed through 6.45M Google clicks and today it’s smashed through 6.46M Google clicks! That’s 10,000 new clicks in a single day – the smash train keeps on rollin’!

    What Are Online PNG Tools?

    Online PNG Tools offers a collection of easy-to-use web apps that help you work with PNG images right in your browser. It’s like a Swiss Army Knife for anything PNG-related. On this site, you can create transparent PNGs, edit icons, clean up logos, crop stamps, change colors of signatures, and customize stickers – there’s a tool for it all. The best part is that you don’t need to install anything or be a graphic designer. All tools are made for regular people who just want to get stuff done with their images. No sign-ups, no downloads – just quick and easy PNG editing tools.

    Who Created Online PNG Tools?

    Online PNG Tools were created by me and my team at Browserling. We’ve build simple, browser-based tools that anyone can use without needing to download or install anything. Along with PNG tools, we also work on cross-browser testing to help developers make sure their websites work great on all web browsers. Our mission is to make online tools that are fast, easy to use, and that are helpful for everyday tasks like editing icons, logos, and signatures.

    Who Uses Online PNG Tools?

    Online PNG Tools and Browserling are used by everyone – from casual users to professionals and even Fortune 100 companies. Casual users often use them to make memes, edit profile pictures, or remove backgrounds. Professionals use them to clean up logos, design icons, or prepare images for websites and apps.

    Smash too and see you tomorrow at 6.47M clicks! 📈

    PS. Use coupon code SMASHLING for a 30% discount on these tools at onlinePNGtools.com/pricing. 💸


    Source link

  • Night Sale! 🌙

    Night Sale! 🌙


    At Browserling and Online Tools, we love sales.

    We just created a new automated Night Sale.

    Now at random Nights, we show a 50% discount offer to all users who visit our site.

    Buy Now!

    What Is Browserling?

    Browserling is an online service that lets you test how other websites look and work in different web browsers, like Chrome, Firefox, or Safari, without needing to install them. It runs real browsers on real machines and streams them to your screen, kind of like remote desktop but focused on browsers. This helps web developers and regular users check for bugs, suspicious links, and weird stuff that happens in certain browsers. You just go to Browserling, pick a browser and version, and then enter the site you want to test. It’s quick, easy, and works from your browser with no downloads or installs.

    What Are Online Tools?

    Online Tools is a website that offers free, browser-based productivity tools for everyday tasks like editing text, converting files, editing images, working with code, and way more. It’s an all-in-one Digital Swiss Army Knife with 1500+ utilities, so you can find the exact tool you need without installing anything. Just open the site, use what you need, and get things done fast.

    Who Uses Browserling and Online Tools?

    Browserling and Online Tools are used by millions of regular internet users, developers, designers, students, and even Fortune 100 companies. Browserling is handy for testing websites in different browsers without having to install them. Online Tools are used for simple tasks like resizing or converting images, or even fixing small file problems quickly without downloading any apps.

    Buy a subscription now and see you next time!


    Source link

  • Morning Sale! ☀️

    Morning Sale! ☀️


    At Browserling and Online Tools, we love sales.

    We just created a new automated Morning Sale.

    Now on random Mornings, we show a 50% discount offer to all users who visit our site.

    Buy Now!

    What Is Browserling?

    Browserling is an online service that lets you test how other websites look and work in different web browsers, like Chrome, Firefox, or Safari, without needing to install them. It runs real browsers on real machines and streams them to your screen, kind of like remote desktop but focused on browsers. This helps web developers and regular users check for bugs, suspicious links, and weird stuff that happens in certain browsers. You just go to Browserling, pick a browser and version, and then enter the site you want to test. It’s quick, easy, and works from your browser with no downloads or installs.

    What Are Online Tools?

    Online Tools is a website that offers free, browser-based productivity tools for everyday tasks like editing text, converting files, editing images, working with code, and way more. It’s an all-in-one Digital Swiss Army Knife with 1500+ utilities, so you can find the exact tool you need without installing anything. Just open the site, use what you need, and get things done fast.

    Who Uses Browserling and Online Tools?

    Browserling and Online Tools are used by millions of regular internet users, developers, designers, students, and even Fortune 100 companies. Browserling is handy for testing websites in different browsers without having to install them. Online Tools are used for simple tasks like resizing or converting images, or even fixing small file problems quickly without downloading any apps.

    Buy a subscription now and see you next time!


    Source link

  • How to use IHttpClientFactory and WireMock.NET together using Moq

    How to use IHttpClientFactory and WireMock.NET together using Moq


    WireMock.NET is a popular library used to simulate network communication through HTTP. But there is no simple way to integrate the generated in-memory server with an instance of IHttpClientFactory injected via constructor. Right? Wrong!

    Table of Contents

    Just a second! 🫷
    If you are here, it means that you are a software developer.
    So, you know that storage, networking, and domain management have a cost .

    If you want to support this blog, please ensure that you have disabled the adblocker for this site.
    I configured Google AdSense to show as few ADS as possible – I don’t want to bother you with lots of ads, but I still need to add some to pay for the resources for my site.

    Thank you for your understanding.
    Davide

    Testing the integration with external HTTP clients can be a cumbersome task, but most of the time, it is necessary to ensure that a method is able to perform correct operations – not only sending the right information but also ensuring that we are able to read the content returned from the called API.

    Instead of spinning up a real server (even if in the local environment), we can simulate a connection to a mock server. A good library for creating temporary in-memory servers is WireMock.NET.

    Many articles I read online focus on creating a simple HttpClient, using WireMock.NET to drive its behaviour. In this article, we are going to do a little step further: we are going to use WireMock.NET to handle HttpClients generated, using Moq, via IHttpClientFactory.

    Explaining the dummy class used for the examples

    As per every practical article, we must start with a dummy example.

    For the sake of this article, I’ve created a dummy class with a single method that calls an external API to retrieve details of a book and then reads the returned content. If the call is successful, the method returns an instance of Book; otherwise, it throws a BookServiceException exception.

    Just for completeness, here’s the Book class:

    public class Book
    {
        public int Id { get; set; }
        public string Title { get; set; }
    }
    

    And here’s the BookServiceException definition:

    [Serializable]
    public class BookServiceException: Exception
    {
        public BookServiceException(string message, Exception inner) : base(message, inner) { }
        protected BookServiceException(
          System.Runtime.Serialization.SerializationInfo info,
          System.Runtime.Serialization.StreamingContext context) : base(info, context) { }
    }
    

    Finally, we have our main class:

    public class BookService
    {
        private readonly IHttpClientFactory _httpClientFactory;
    
        public BookService(IHttpClientFactory httpClientFactory)
        {
            _httpClientFactory = httpClientFactory;
        }
    
        public async Task<Book> GetBookById(int id)
        {
    
            string url = $"/api/books/{id}";
            HttpClient httpClient = _httpClientFactory.CreateClient("books_client");
    
            try
            {
                    Book? book = await httpClient.GetFromJsonAsync<Book>(url);
                    return book;
            }
            catch (Exception ex)
            {
                    throw new BookServiceException($"There was an error while getting info about the book {id}", ex);
            }
        }
    }
    

    There are just two things to notice:

    • We are injecting an instance of IHttpClientFactory into the constructor.
    • We are generating an instance of HttpClient by passing a name to the CreateClient method of IHttpClientFactory.

    Now that we have our cards on the table, we can start!

    WireMock.NET, a library to simulate HTTP calls

    WireMock is an open-source platform you can install locally to create a real mock server. You can even create a cloud environment to generate and test HTTP endpoints.

    However, for this article we are interested in the NuGet package that takes inspiration from the WireMock project, allowing .NET developers to generate disposable in-memory servers: WireMock.NET.

    To add the library, you must add the WireMock.NET NuGet package to your project, for example using dotnet add package WireMock.Net.

    Once the package is ready, you can generate a test server in your Unit Tests class:

    public class WireMockTests
    {
        private WireMockServer _server;
    
        [OneTimeSetUp]
        public void OneTimeSetUp()
        {
            _server = WireMockServer.Start();
        }
    
        [SetUp]
        public void Setup()
        {
            _server.Reset();
        }
    
        [OneTimeTearDown]
        public void OneTimeTearDown()
        {
            _server.Stop();
        }
    }
    

    You can instantiate a new instance of WireMockServer in the OneTimeSetUp step, store it in a private field, and make it accessible to every test in the test class.

    Before each test run, you can reset the internal status of the mock server by running the Reset() method. I’d suggest you reset the server to avoid unintentional internal status, but it all depends on what you want to do with the server instance.

    Finally, remember to free up resources by calling the Stop() method in the OneTimeTearDown phase (but not during the TearDown phase: you still need the server to be on while running your tests!).

    Basic configuration of HTTP requests and responses with WireMock.NET

    The basic structure of the definition of a mock response using WireMock.NET is made of two parts:

    1. Within the Given method, you define the HTTP Verb and URL path whose response is going to be mocked.
    2. Using RespondWith you define what the mock server must return when the endpoint specified in the Given step is called.

    In the next example, you can see that the _server instance (the one I instantiated in the OneTimeSetUp phase, remember?) must return a specific body (responseBody) and the 200 HTTP Status Code when the /api/books/42 endpoint is called.

    string responseBody = @"
    {
    ""Id"": 42,
    ""Title"": ""Life, the Universe and Everything""
    }
    ";
    
    _server
     .Given(Request.Create().WithPath("/api/books/42").UsingGet())
     .RespondWith(
      Response.Create()
     .WithStatusCode(200)
     .WithBody(responseBody)
     );
    

    Similarly, you can define that an endpoint will return an error by changing its status code:

    _server
    .Given(Request.Create().WithPath("/api/books/42").UsingGet())
    .RespondWith(
      Response.Create()
     .WithStatusCode(404)
    );
    

    All in all, both the request and the response are highly customizable: you can add HTTP Headers, delays, cookies, and much more.

    Look closely; there’s one part that is missing: What is the full URL? We have declared only the path (/api/books/42) but have no info about the hostname and the port used to communicate.

    How to integrate WireMock.NET with a Moq-driven IHttpClientFactory

    In order to have WireMock.NET react to an HTTP call, we have to call the exact URL – even the hostname and port must match. But when we create a mocked HttpClient – like we did in this article – we don’t have a real hostname. So, how can we have WireMock.NET and HttpClient work together?

    The answer is easy: since WireMockServer.Start() automatically picks a free port in your localhost, you don’t have to guess the port number, but you can reference the current instance of _server.

    Once the WireMockServer is created, internally it contains the reference to one or more URLs it will use to listen for HTTP requests, intercepting the calls and replying in place of a real server. You can then use one of these ports to configure the HttpClient generated by the HttpClientFactory.

    Let’s see the code:

    [Test]
    public async Task GetBookById_Should_HandleBadRequests()
    {
        string baseUrl = _server.Url;
    
        HttpClient myHttpClient = new HttpClient() { BaseAddress = new Uri(baseUrl) };
    
        Mock<IHttpClientFactory> mockFactory = new Mock<IHttpClientFactory>();
        mockFactory.Setup(_ => _.CreateClient("books_client")).Returns(myHttpClient);
    
        _server
            .Given(Request.Create().WithPath("/api/books/42").UsingGet())
            .RespondWith(
                Response.Create()
                .WithStatusCode(404)
            );
    
        BookService service = new BookService(mockFactory.Object);
    
        Assert.CatchAsync<BookServiceException>(() => service.GetBookById(42));
    }
    

    First we access the base URL used by the mock server by accessing _server.Url.

    We use that URL as a base address for the newly created instance of HttpClient.

    Then, we create a mock of IHttpClientFactory and configure it to return the local instance of HttpClient whenever we call the CreateClient method with the specified name.

    In the meanwhile, we define how the mock server must behave when an HTTP call to the specified path is intercepted.

    Finally, we can pass the instance of the mock IHttpClientFactory to the BookService.

    So, the key part to remember is that you can simply access the Url property (or, if you have configured it to handle many URLs, you can access the Urls property, that is an array of strings).

    Let WireMock.NET create the HttpClient for you

    As suggested by Stef in the comments to this post, there’s actually another way to generate the HttpClient with the correct URL: let WireMock.NET do it for you.

    Instead of doing

    string baseUrl = _server.Url;
    
    HttpClient myHttpClient = new HttpClient() { BaseAddress = new Uri(baseUrl) };
    

    you can simplify the process by calling the CreateClient method:

    HttpClient myHttpClient = _server.CreateClient();
    

    Of course, you will still have to pass the instance to the mock of IHttpClientFactory.

    Further readings

    It’s important to notice that WireMock and WireMock.NET are two totally distinct things: one is a platform, and one is a library, owned by a different group of people, that mimics some functionalities from the platform to help developers write better tests.

    WireMock.NET is greatly integrated with many other libraries, such as xUnit, FluentAssertions, and .NET Aspire.

    You can find the official repository on GitHub:

    🔗 WireMock.Net | Github

    This article first appeared on Code4IT 🐧

    It’s important to remember that using an HttpClientFactory is generally more performant than instantiating a new HttpClient. Ever heard of socket exhaustion?

    🔗 Use IHttpClientFactory to generate HttpClient instances | Code4IT

    Finally, for the sake of this article I’ve used Moq. However, there’s a similar library you can use: NSubstitute. The learning curve is quite flat: in the most common scenarios, it’s just a matter of syntax usage.

    🔗 Moq vs NSubstitute: syntax cheat sheet | Code4IT

    Wrapping up

    In this article, we almost skipped all the basic stuff about WireMock.NET and tried to go straight to the point of integrating WireMock.NET with IHttpClientFactory.

    There are lots of articles out there that explain how to use WireMock.NET – just remember that WireMock and WireMock.NET are not the same thing!

    I hope you enjoyed this article! Let’s keep in touch on LinkedIn or Twitter! 🤜🤛

    Happy coding!

    🐧


    Source link

  • 6.45 Million Google Clicks! 💸

    6.45 Million Google Clicks! 💸


    Yesterday Online PNG Tools smashed through 6.44M Google clicks and today it’s smashed through 6.45M Google clicks! That’s 10,000 new clicks in a single day – the smash train keeps on rollin’!

    What Are Online PNG Tools?

    Online PNG Tools offers a collection of easy-to-use web apps that help you work with PNG images right in your browser. It’s like a Swiss Army Knife for anything PNG-related. On this site, you can create transparent PNGs, edit icons, clean up logos, crop stamps, change colors of signatures, and customize stickers – there’s a tool for it all. The best part is that you don’t need to install anything or be a graphic designer. All tools are made for regular people who just want to get stuff done with their images. No sign-ups, no downloads – just quick and easy PNG editing tools.

    Who Created Online PNG Tools?

    Online PNG Tools were created by me and my team at Browserling. We’ve build simple, browser-based tools that anyone can use without needing to download or install anything. Along with PNG tools, we also work on cross-browser testing to help developers make sure their websites work great on all web browsers. Our mission is to make online tools that are fast, easy to use, and that are helpful for everyday tasks like editing icons, logos, and signatures.

    Who Uses Online PNG Tools?

    Online PNG Tools and Browserling are used by everyone – from casual users to professionals and even Fortune 100 companies. Casual users often use them to make memes, edit profile pictures, or remove backgrounds. Professionals use them to clean up logos, design icons, or prepare images for websites and apps.

    Smash too and see you tomorrow at 6.46M clicks! 📈

    PS. Use coupon code SMASHLING for a 30% discount on these tools at onlinePNGtools.com/pricing. 💸


    Source link

  • 6.44 Million Google Clicks! 💸

    6.44 Million Google Clicks! 💸


    Yesterday Online PNG Tools smashed through 6.43M Google clicks and today it’s smashed through 6.44M Google clicks! That’s 10,000 new clicks in a single day – the smash train keeps on rollin’!

    What Are Online PNG Tools?

    Online PNG Tools offers a collection of easy-to-use web apps that help you work with PNG images right in your browser. It’s like a Swiss Army Knife for anything PNG-related. On this site, you can create transparent PNGs, edit icons, clean up logos, crop stamps, change colors of signatures, and customize stickers – there’s a tool for it all. The best part is that you don’t need to install anything or be a graphic designer. All tools are made for regular people who just want to get stuff done with their images. No sign-ups, no downloads – just quick and easy PNG editing tools.

    Who Created Online PNG Tools?

    Online PNG Tools were created by me and my team at Browserling. We’ve build simple, browser-based tools that anyone can use without needing to download or install anything. Along with PNG tools, we also work on cross-browser testing to help developers make sure their websites work great on all web browsers. Our mission is to make online tools that are fast, easy to use, and that are helpful for everyday tasks like editing icons, logos, and signatures.

    Who Uses Online PNG Tools?

    Online PNG Tools and Browserling are used by everyone – from casual users to professionals and even Fortune 100 companies. Casual users often use them to make memes, edit profile pictures, or remove backgrounds. Professionals use them to clean up logos, design icons, or prepare images for websites and apps.

    Smash too and see you tomorrow at 6.45M clicks! 📈

    PS. Use coupon code SMASHLING for a 30% discount on these tools at onlinePNGtools.com/pricing. 💸


    Source link

  • IEnumerable vs ICollection, and why it matters &vert; Code4IT

    IEnumerable vs ICollection, and why it matters | Code4IT


    Just a second! 🫷
    If you are here, it means that you are a software developer.
    So, you know that storage, networking, and domain management have a cost .

    If you want to support this blog, please ensure that you have disabled the adblocker for this site.
    I configured Google AdSense to show as few ADS as possible – I don’t want to bother you with lots of ads, but I still need to add some to pay for the resources for my site.

    Thank you for your understanding.
    Davide

    Defining the best return type is crucial to creating a shared library whose behaviour is totally under your control.

    You should give the consumers of your libraries just the right amount of freedom to integrate and use the classes and structures you have defined.

    That’s why it is important to know the differences between interfaces like IEnumerable<T> and ICollection<T>: these interfaces are often used together but have totally different meanings.

    IEnumerable: loop through the items in the collection

    Suppose that IAmazingInterface is an interface you expose so that clients can interact with it without knowing the internal behaviour.

    You have defined it this way:

    public interface IAmazingInterface
    {
        IEnumerable<int> GetNumbers(int[] numbers);
    }
    

    As you can see, the GetNumbers returns an IEnumerable<int>: this means that (unless they do some particular tricks like using reflection), clients will only be able to loop through the collection of items.

    Clients don’t know that, behind the scenes, AmazingClass uses a custom class MySpecificEnumberable.

    public class AmazingClass: IAmazingInterface
    {
        public IEnumerable<int> GetNumbers(int[] numbers)
            => new MySpecificEnumberable(numbers);
    }
    

    MySpecificEnumberable is a custom class whose purpose is to store the initial values in a sorted way. It implements IEnumerable<int>, so the only operations you have to support are the two implementations of GetEnumerator() – pay attention to the returned data type!

    public class MySpecificEnumberable : IEnumerable<int>
    {
        private readonly int[] _numbers;
    
        public MySpecificEnumberable(int[] numbers)
        {
            _numbers = numbers.OrderBy(_ => _).ToArray();
        }
    
        public IEnumerator<int> GetEnumerator()
        {
            foreach (var number in _numbers)
            {
                yield return number;
            }
        }
    
        IEnumerator IEnumerable.GetEnumerator()
            => _numbers.GetEnumerator();
    }
    

    Clients will then be able to loop all the items in the collection:

    IAmazingInterface something = new AmazingClass();
    var numbers = something.GetNumbers([1, 5, 6, 9, 8, 7, 3]);
    
    foreach (var number in numbers)
    {
        Console.WriteLine(number);
    }
    

    But you cannot add or remove items from it.

    ICollection: list, add, and remove items

    As we saw, IEnumerable<T> only allows you to loop through all the elements. However, you cannot add or remove items from an IEnumerable<T>.

    To do so, you need something that implements ICollection<T>, like the following class (I haven’t implemented any of these methods: I want you to focus on the operations provided, not on the implementation details).

    class MySpecificCollection : ICollection<int>
    {
        public int Count => throw new NotImplementedException();
    
        public bool IsReadOnly => throw new NotImplementedException();
    
        public void Add(int item) => throw new NotImplementedException();
    
        public void Clear() => throw new NotImplementedException();
    
        public bool Contains(int item) => throw new NotImplementedException();
    
        public void CopyTo(int[] array, int arrayIndex) => throw new NotImplementedException();
    
        public IEnumerator<int> GetEnumerator() => throw new NotImplementedException();
    
        public bool Remove(int item) => throw new NotImplementedException();
    
        IEnumerator IEnumerable.GetEnumerator() => throw new NotImplementedException();
    }
    

    ICollection<T> is a subtype of IEnumerable<T>, so everything we said before is still valid.

    However, having a class that implements ICollection<T> gives you full control over how items can be added or removed from the collection, allowing you to define custom behaviour. For instance, you can define that the Add method adds an integer only if it’s an odd number.

    Why knowing the difference actually matters

    Classes and interfaces are meant to be used. If you are like me, you work on both the creation of the class and its consumption.

    So, if an interface must return a sequence of items, you most probably use the List shortcut: define the return type of the method as List<Item>, and then use it, regardless of having it looped through or having the consumer add items to the sequence.

    // in the interface
    public interface ISomething
    {
        List<Item> PerformSomething(int[] numbers);
    }
    
    
    // in the consumer class
    ISomething instance = //omitted
    List<Item> myItems = instance.PerformSomething([2, 3, 4, 5]);
    

    Everything works fine, but it works because we are in control of both the definition and the consumer.

    What if you have to expose the library to something outside your control?

    You have to consider two elements:

    • consumers should not be able to tamper with your internal implementation (for example, by adding items when they are not supposed to);
    • you should be able to change the internal implementation as you wish without breaking changes.

    So, if you want your users to just enumerate the items within a collection, you may start this way:

    // in the interface
    public interface ISomething
    {
        IEnumerable<Item> PerformSomething(int[] numbers);
    }
    
    // in the implementation
    
    IEnumerable<Item> PerformSomething(int[] numbers)
    {
        return numbers.Select(x => new Item(x)).ToList();
    }
    
    // in the consumer class
    
    ISomething instance = //omitted
    IEnumerable<Item> myItems = instance.PerformSomething([2, 3, 4, 5]);
    

    Then, when the time comes, you can change the internal implementation of PerformSomething with a more custom class:

    // custom IEnumerable definition
    public class MyCustomEnumberable : IEnumerable<Item> { /*omitted*/ }
    
    // in the interface
    IEnumerable<Item> PerformSomething(int[] numbers)
    {
        MyCustomEnumberable customEnumerable = new MyCustomEnumberable();
        customEnumerable.DoSomething(numbers);
        return customEnumerable;
    }
    

    And the consumer will not notice the difference. Again, unless they try to use tricks to tamper with your code!

    This article first appeared on Code4IT 🐧

    Wrapping up

    While understanding the differences between IEnumerable and ICollection is trivial, understanding why you should care about them is not.

    IEnumerable and ICollection hierarchy

    I hope this article helped you understand that yeah, you can take the easy way and return everywhere a List, but it’s a choice that you cannot always apply to a project, and that probably will make breaking changes more frequent in the long run.

    I hope you enjoyed this article! Let’s keep in touch on LinkedIn or Twitter! 🤜🤛

    Happy coding!

    🐧


    Source link