When performing a talk, the audience experience is as important as the content. They must be focused on what you say, and not get distracted by external outputs. So, here’s 10 tips to rock your next virtual talk.
Table of Contents
Just a second! 🫷 If you are here, it means that you are a software developer.
So, you know that storage, networking, and domain management have a cost .
If you want to support this blog, please ensure that you have disabled the adblocker for this site. I configured Google AdSense to show as few ADS as possible – I don’t want to bother you with lots of ads, but I still need to add some to pay for the resources for my site.
Thank you for your understanding. – Davide
More and more developers crave to be also tech speakers. We can see every day dozens of meetups, live streaming, and YouTube videos by developers from all over the world. But regardless of the topic and the type of talk you’re doing, there are a few tips you should keep in mind to rock the execution.
Those tips are not about the content, but about the presentation itself. So, maybe, consider re-reading this checklist about 30 minutes before your next virtual conference.
1- Hide desktop icons
Many of you have lots of icons on your desktop, right? Me too. I often save on Desktop temporary files (that I always forget to move or delete) and many program icons, like Postman, Fiddler, Word, and so on.
They are just a distraction to your audience. You should keep the desktop as clean as possible.
You can do it in 2 ways: hide all the icons (on Windows: right-click > View > untick Show desktop icons) or just remove the ones that are not necessary.
The second option is better if you have lots of content to show from different sources, like images, plots, demo with different tools, and so on.
If you have everything under a single folder, you can simply hide all icons and pin that folder on Quick Access.
2- Choose a neutral desktop background
Again, your audience should focus on your talk, not on your desktop. So just remove funny or distracting background images.
Even more, if you use memes or family photos as desktop background.
A good idea is to create a custom desktop background for the event you are participating in: a simple image with the name of the talk, your name, and your social contacts.
3- Mute your phone
Avoid all the possible distractions. WhatsApp notifications, calls from Call Centres, alarm clocks you forgot to turn off…
So, just use Airplane mode.
4- Remove useless bookmarks (or use a different browser)
Just as desktop icons, bookmarks can distract your audience.
You don’t want to show everyone which social networks are you using, what are the projects you’re currently working on, and other private info about you.
A good alternative is to use a different browser. But remember to do a rehearsal with that browser: sometimes some JavaScript and CSS functionalities are not available on every browser, so don’t take anything for granted.
5- Close background processes
What if you get an awkward message on Skype or Slack while you’re sharing your screen?
So, remember to close all useless background processes: all the chats (Skype, Discord, Telegram…) and all the backup platforms (OneDrive, Dropbox, and so on).
A risk: unwanted notifications that appear while sharing your screen. And even worse, all those programs require network bandwidth and use CPU and Memory: shutting them down will boost the other applications and make everything run smoother.
6- Check font size and screen resolution
You don’t know the device your audience will use. Some of them will watch you talk on a smartphone, some others on a 60″ TV.
So, even if you’re used to small fonts and icons, make everything bigger. Start with screen resolution. If it is OK, now increase the font size for both your slides and your IDE.
Make sure everyone can read it. If you can, during the rehearsals share your screen with a smartphone and a big TV, and find the balance.
7- Disable dark mode
Accessibility is the key, even more for virtual events. And not everyone can see everything as you do. So, switch everything to light mode: IDEs, websites, tools. Everything that natively comes with light mode.
8- Check mic volume
This is simple: if your mic volume is too low, your audience won’t hear a word from you. So, instead of screaming for one hour, just put your mic near you or increase the volume.
9- Use ZoomIt to draw on your screen
«Ok, now, I click on this button on the top-left corner with the Home icon».
How many times have you heard this phrase? It’s not wrong to say so, but you can simply show it. Remember, show, don’t tell!
For Windows, you can install a small tool, ZoomIt, that allows you to draw lines, arrows, and shapes on your screen.
You can read more on this page by Microsoft, where you can find the download file, some shortcuts, and more info.
So, download it, try out some shortcuts (eg: R, G, B to use a red, green, or blue pen, and Hold Ctrl + Shift to draw an arrow) and use it to help your audience see what you’re indicating with your mouse.
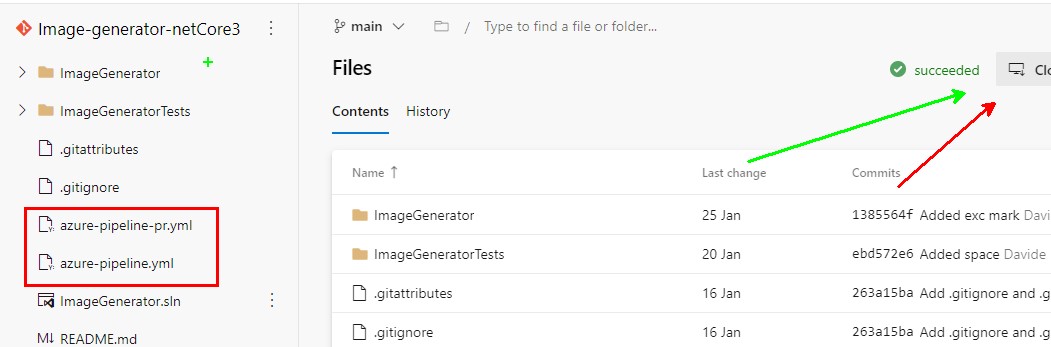
10- Have a backup in case of network failures
Your internet connection goes down during the live. First reaction: shock. But then, you remember you have everything under control: you can use your smartphone as a hotspot and use that connection to move on with your talk. So, always have a plan B.
And what if the site you’re showing for your demos goes down? Say that you’re explaining what are Azure Functions, and suddenly the Azure Dashboard becomes unavailable. How to prevent this situation?
You can’t. But you can have a backup plan: save screenshots and screencasts, and show them if you cannot access the original sites.
Wrapping up
We’ve seen that there are lots of things to do to improve the quality of your virtual talks. If you have more tips to share, share them in the comment section below or on this discussion on Twitter.
Performing your first talks is really challenging, I know. But it’s worth a try. If you want to read more about how to be ready for it, here’s the recap of what I’ve learned after my very first public speech.
Let’s dive a bit deeper into the heart of our WebAssembly integration by exploring the key segments of our Go-based WASM code.
involves preparing and specifying our Go code to be compiled for a WebAssembly runtime.
// go:build wasm
// +build wasm
These lines serve as directives to the Go compiler, signaling that the following code is designated for a WebAssembly runtime environment. Specifically:
//go:build wasm: A build constraint ensuring the code is compiled only for WASM targets, adhering to modern syntax.
// +build wasm: An analogous constraint, utilizing older syntax for compatibility with prior Go versions.
In essence, these directives guide the compiler to include this code segment only when compiling for a WebAssembly architecture, ensuring an appropriate setup and function within this specific runtime.
package main
import ( "context" "encoding/json" "syscall/js"
"google.golang.org/protobuf/encoding/protojson"
"github.com/Permify/permify/pkg/development" )
var dev *development.Development
func run() js.Func { // The `run` function returns a new JavaScript function // that wraps the Go function. return js.FuncOf(func(this js.Value, args []js.Value) interface{} {
// t will be used to store the unmarshaled JSON data. // The use of an empty interface{} type means it can hold any type of value. var t interface{}
// Unmarshal JSON from JavaScript function argument (args[0]) to Go's data structure (map). // args[0].String() gets the JSON string from the JavaScript argument, // which is then converted to bytes and unmarshaled (parsed) into the map `t`. err := json.Unmarshal([]byte(args[0].String()), &t)
// If an error occurs during unmarshaling (parsing) the JSON, // it returns an array with the error message "invalid JSON" to JavaScript. if err != nil { return js.ValueOf([]interface{}{"invalid JSON"}) }
// Attempt to assert that the parsed JSON (`t`) is a map with string keys. // This step ensures that the unmarshaled JSON is of the expected type (map). input, ok := t.(map[string]interface{})
// If the assertion is false (`ok` is false), // it returns an array with the error message "invalid JSON" to JavaScript. if !ok { return js.ValueOf([]interface{}{"invalid JSON"}) }
// Run the main logic of the application with the parsed input. // It’s assumed that `dev.Run` processes `input` in some way and returns any errors encountered during that process. errors := dev.Run(context.Background(), input)
// If no errors are present (the length of the `errors` slice is 0), // return an empty array to JavaScript to indicate success with no errors. if len(errors) == 0 { return js.ValueOf([]interface{}{}) }
// If there are errors, each error in the `errors` slice is marshaled (converted) to a JSON string. // `vs` is a slice that will store each of these JSON error strings. vs := make([]interface{}, 0, len(errors))
// Iterate through each error in the `errors` slice. for _, r := range errors { // Convert the error `r` to a JSON string and store it in `result`. // If an error occurs during this marshaling, it returns an array with that error message to JavaScript. result, err := json.Marshal(r) if err != nil { return js.ValueOf([]interface{}{err.Error()}) } // Add the JSON error string to the `vs` slice. vs = append(vs, string(result)) }
// Return the `vs` slice (containing all JSON error strings) to JavaScript. return js.ValueOf(vs) }) }
Within the realm of Permify, the run function stands as a cornerstone, executing a crucial bridging operation between JavaScript inputs and Go’s processing capabilities. It orchestrates real-time data interchange in JSON format, safeguarding that Permify’s core functionalities are smoothly and instantaneously accessible via a browser interface.
Digging into run:
JSON Data Interchange: Translating JavaScript inputs into a format utilizable by Go, the function unmarshals JSON, transferring data between JS and Go, assuring that the robust processing capabilities of Go can seamlessly manipulate browser-sourced inputs.
Error Handling: Ensuring clarity and user-awareness, it conducts meticulous error-checking during data parsing and processing, returning relevant error messages back to the JavaScript environment to ensure user-friendly interactions.
Contextual Processing: By employing dev.Run, it processes the parsed input within a certain context, managing application logic while handling potential errors to assure steady data management and user feedback.
Bidirectional Communication: As errors are marshaled back into JSON format and returned to JavaScript, the function ensures a two-way data flow, keeping both environments in synchronized harmony.
Thus, through adeptly managing data, error-handling, and ensuring a fluid two-way communication channel, run serves as an integral bridge, linking JavaScript and Go to ensure the smooth, real-time operation of Permify within a browser interface. This facilitation of interaction not only heightens user experience but also leverages the respective strengths of JavaScript and Go within the Permify environment.
// Continuing from the previously discussed code...
func main() { // Instantiate a channel, 'ch', with no buffer, acting as a synchronization point for the goroutine. ch := make(chan struct{}, 0)
// Create a new instance of 'Container' from the 'development' package and assign it to the global variable 'dev'. dev = development.NewContainer()
// Attach the previously defined 'run' function to the global JavaScript object, // making it callable from the JavaScript environment. js.Global().Set("run", run())
// Utilize a channel receive expression to halt the 'main' goroutine, preventing the program from terminating. <-ch }
ch := make(chan struct{}, 0): A synchronization channel is created to coordinate the activity of goroutines (concurrent threads in Go).
dev = development.NewContainer(): Initializes a new container instance from the development package and assigns it to dev.
js.Global().Set("run", run()): Exposes the Go run function to the global JavaScript context, enabling JavaScript to call Go functions.
<-ch: Halts the main goroutine indefinitely, ensuring that the Go WebAssembly module remains active in the JavaScript environment.
In summary, the code establishes a Go environment running within WebAssembly that exposes specific functionality (run function) to the JavaScript side and keeps itself active and available for function calls from JavaScript.
Before we delve into Permify’s rich functionalities, it’s paramount to elucidate the steps of converting our Go code into a WASM module, priming it for browser execution.
For enthusiasts eager to delve deep into the complete Go codebase, don’t hesitate to browse our GitHub repository: Permify Wasm Code.
Kickstart the transformation of our Go application into a WASM binary with this command:
GOOS=js GOARCH=wasm go build -o permify.wasm main.go
This directive cues the Go compiler to churn out a .wasm binary attuned for JavaScript environments, with main.go as the source. The output, permify.wasm, is a concise rendition of our Go capabilities, primed for web deployment.
In conjunction with the WASM binary, the Go ecosystem offers an indispensable JavaScript piece named wasm_exec.js. It’s pivotal for initializing and facilitating our WASM module within a browser setting. You can typically locate this essential script inside the Go installation, under misc/wasm.
However, to streamline your journey, we’ve hosted wasm_exec.js right here for direct access: wasm_exec.
cp "$(go env GOROOT)/misc/wasm/wasm_exec.js" .
Equipped with these pivotal assets — the WASM binary and its companion JavaScript — the stage is set for its amalgamation into our frontend.
To kick things off, ensure you have a directory structure that clearly separates your WebAssembly-related code from the rest of your application. Based on your given structure, the loadWasm folder seems to be where all the magic happens:
loadWasm/
│
├── index.tsx            // Your main React component that integrates WASM.
├── wasm_exec.js         // Provided by Go, bridges the gap between Go's WASM and JS.
└── wasmTypes.d.ts       // TypeScript type declarations for WebAssembly.
To view the complete structure and delve into the specifics of each file, refer to the Permify Playground on GitHub.
Inside the wasmTypes.d.ts, global type declarations are made which expand upon the Window interface to acknowledge the new methods brought in by Go’s WebAssembly:
WebAssembly Initialization: The asynchronous function loadWasm takes care of the entire process:
async function loadWasm(): Promise<void> {
const goWasm = new window.Go();
const result = await WebAssembly.instantiateStreaming(
fetch("play.wasm"),
goWasm.importObject
);
goWasm.run(result.instance);
}
Here, new window.Go() initializes the Go WASM environment. WebAssembly.instantiateStreaming fetches the WASM module, compiles it, and creates an instance. Finally, goWasm.run activates the WASM module.
React Component with Loader UI: The LoadWasm component uses the useEffect hook to asynchronously load the WebAssembly when the component mounts:
While loading, SVG rocket is displayed to indicate that initialization is ongoing. This feedback is crucial as users might otherwise be uncertain about what’s transpiring behind the scenes. Once loading completes, children components or content will render.
Given your Go WASM exposes a method named run, you can invoke it as follows:
function Run(shape) {
return new Promise((resolve) => {
let res = window.run(shape);
resolve(res);
});
}
This function essentially acts as a bridge, allowing the React frontend to communicate with the Go backend logic encapsulated in the WASM.
To integrate a button that triggers the WebAssembly function when clicked, follow these steps:
Creating the Button Component
First, we’ll create a simple React component with a button:
In the code above, the RunButton component accepts two props:
shape: The shape argument to pass to the WebAssembly run function.
onResult: A callback function that receives the result of the WebAssembly function and can be used to update the state or display the result in the UI.
Integrating the Button in the Main Component
Now, in your main component (or wherever you’d like to place the button), integrate the RunButton:
import React, { useState } from "react"; import RunButton from "./path_to_RunButton_component"; // Replace with the actual path
function App() { const [result, setResult] = useState<any[]>([]);
// Define the shape content const shapeContent = { schema: `|- entity user {}
In this example, App is a component that contains the RunButton. When the button is clicked, the result from the WebAssembly function is displayed in a list below the button.
Throughout this exploration, the integration of WebAssembly with Go was unfolded, illuminating the pathway toward enhanced web development and optimal user interactions within browsers.
The journey involved setting up the Go environment, converting Go code to WebAssembly, and executing it within a web context, ultimately giving life to the interactive platform showcased at play.permify.co.
This platform stands not only as an example but also as a beacon, illustrating the concrete and potent capabilities achievable when intertwining these technological domains.
Let’s be real—building a WordPress site with traditional page builders can feel like assembling IKEA furniture with missing pieces.
You install a page builder only to find out it doesn’t do half the things you need. So you pile on plugins to fill the gaps, and they end up conflicting with one another.
Your site slows down, SEO takes a hit, and suddenly, you’re knee-deep in subscription fees, support tickets, and messy workarounds.
It’s 2025. We deserve better.
That era of outdated page builders and plugin-heavy setups is over.
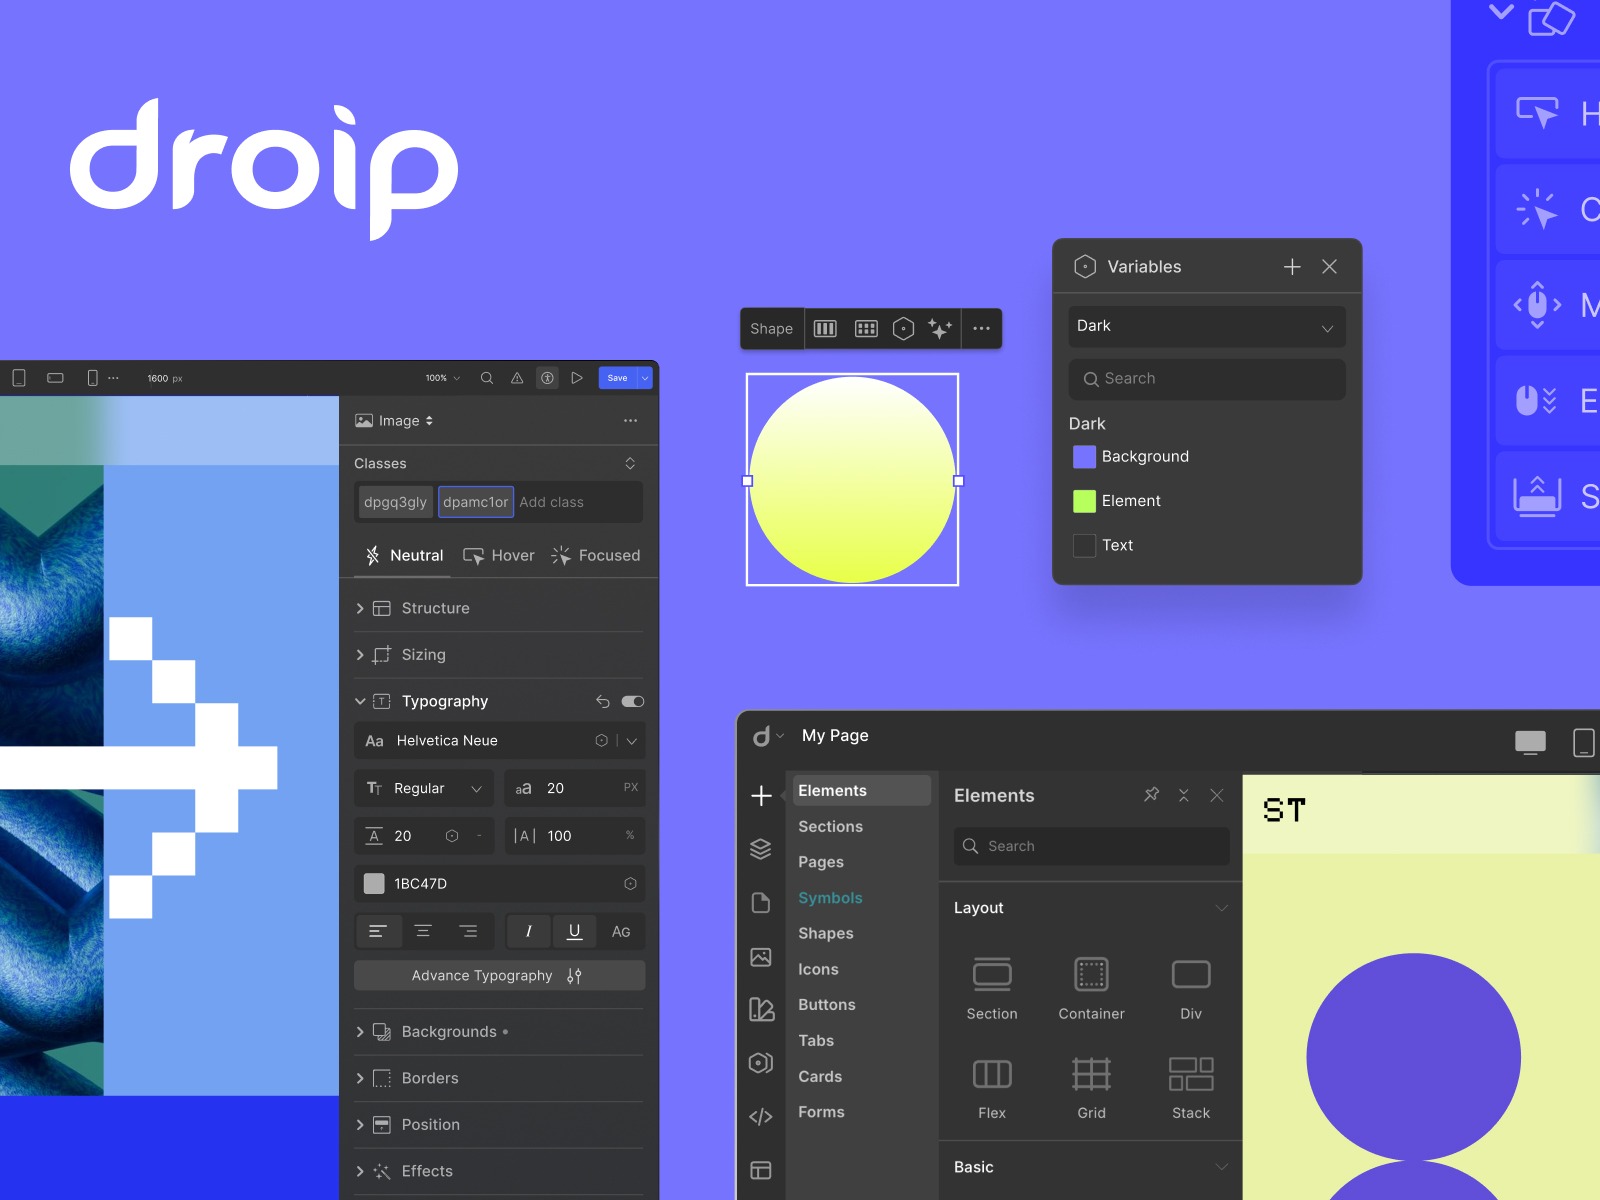
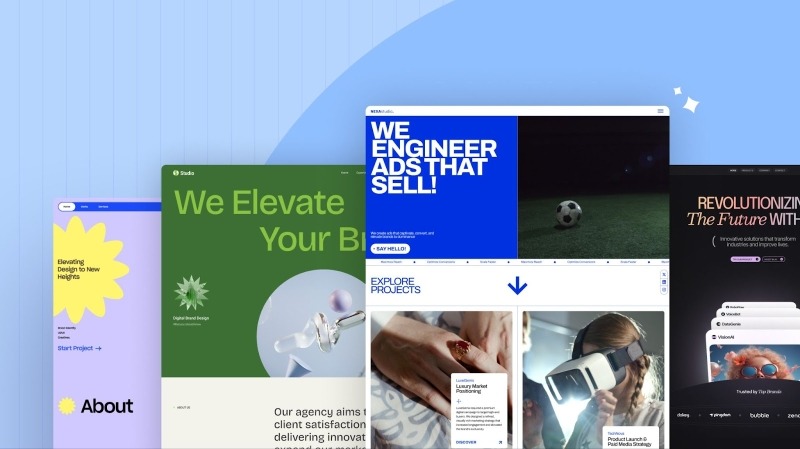
Today’s web demands speed, flexibility, and full creative control—minus the bloat and the added costs. That’s where Droip comes in. A new kind of builder made for modern creators.
But what makes it unique? Let’s break it down.
All-in-One Web Building Ecosystem
Droip is a full-fledged, no-code ecosystem that lets you build smarter.
Whether it’s SEO, forms, popups, dynamic content, or even image editing, Droip handles it natively.
Because it’s all native, your site stays lean, fast, and conflict-free. Oh, and your wallet? It stays happy too.
What that means for you:
No surprise costs or upgrade traps.
Faster load times and better performance.
One support team, one solution.
Scales with your business—whether you’re a solo creator or running a full agency.
Pricing: It’s transparent, with no hidden upsells. Check the Pricing page for the details.
To learn how Droip works, watch a quick video overview of Droip in action.
Modern UI With Maximum Control
Let’s start with the UI.
The moment you open the editor, everything feels intuitive.
It’s sleek. It’s modern. It’s not that stiff, clunky layout you’ve seen in other WordPress builders.
Instead, the editor gives you an interface that feels familiar, like the modern major web builders you already know, but packs the kind of power only Droip can deliver.
Everything’s exactly where you expect it to be.
The menu panels are clean and concise. Element settings are instantly accessible.
The UX flows effortlessly from dragging elements to switching panels, it’s all frictionless.
And yes, it also has both dark and light modes for your comfort.
Overall, it provides a clean, smooth workspace designed to help you move fast and build without barriers.
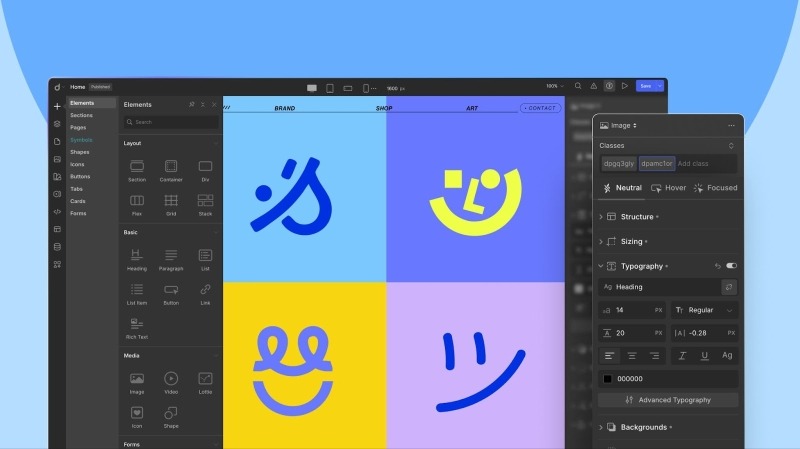
Design Freedom For Everyone
When it comes to design, Droip hands you the keys to total design freedom.
Whether you’re starting from scratch or using predesigned layouts, you have all the flexibility and options.
A Growing Collection of Stunning Templates
Start with Droip’s growing collection of stunning templates, from sleek portfolios to bold business sites. They’re professionally designed, fully customizable, and included in your subscription (no sneaky extra fees)!
Pre-Made Sections, Pages, and Components
Mix and match ready-made sections, pages, and components like contact forms, testimonials, cards, and more. It’s like having a design toolkit at your fingertips. Just drag, drop, customize if needed, and you’re all set.
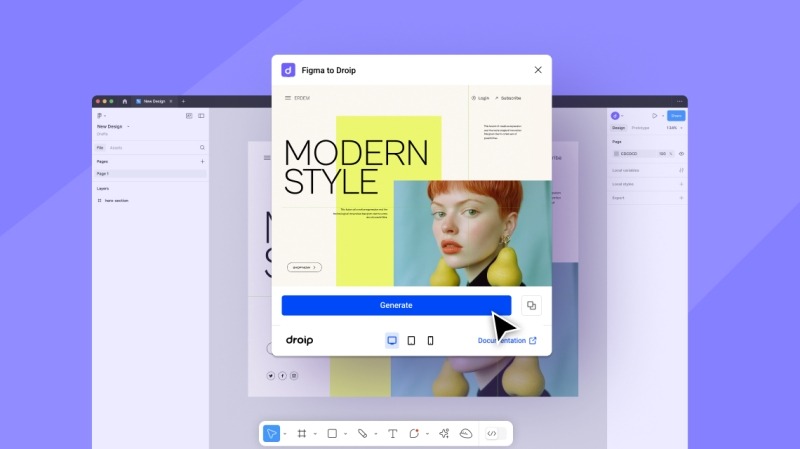
Turn Figma Designs into Fully Editable Pages—In Seconds
Imagine dragging in your Figma mockup and watching it become a live, editable page in seconds. If you have got your site designed in Figma, you can just copy and paste it into Droip—yes, literally.
The builder instantly converts it into a fully editable, auto-responsive page with a single click. And the best part? It automatically adapts to all breakpoints, including any custom ones you define.
Want to Start from Scratch? Go for It!
If you’re the “I want full control” type, Droip’s intuitive drag-and-drop canvas is all yours. Build pixel-perfect layouts, experiment, and make it yours.
Droip was built with the atomic approach to give you granular control over every aspect of your website. With deep element editing, you can adjust every detail, from typography to layouts, to fit your exact vision.
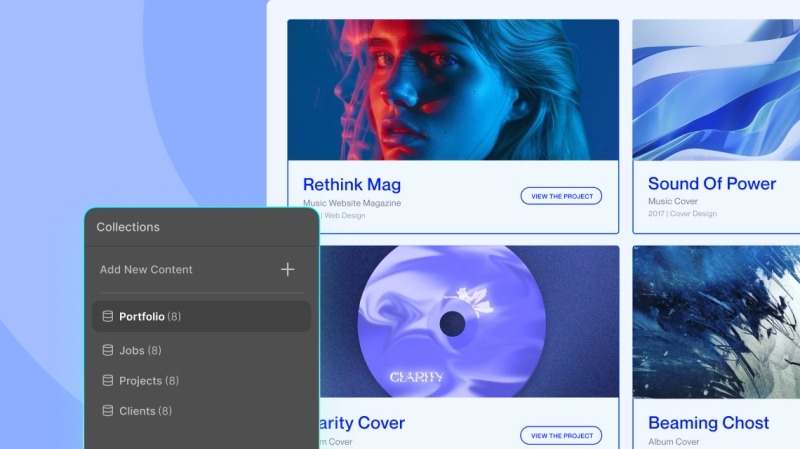
Native Dynamic Content. No ACF Required.
Managing dynamic content in WordPress usually means extra plugins like ACF. Not anymore.
Droip lets you create, manage, and style dynamic content like listings, directories, and portfolios right out of the box.
Connect your content, customize it visually, and even set dynamic SEO for every item’s detail page. All built-in and all visual.
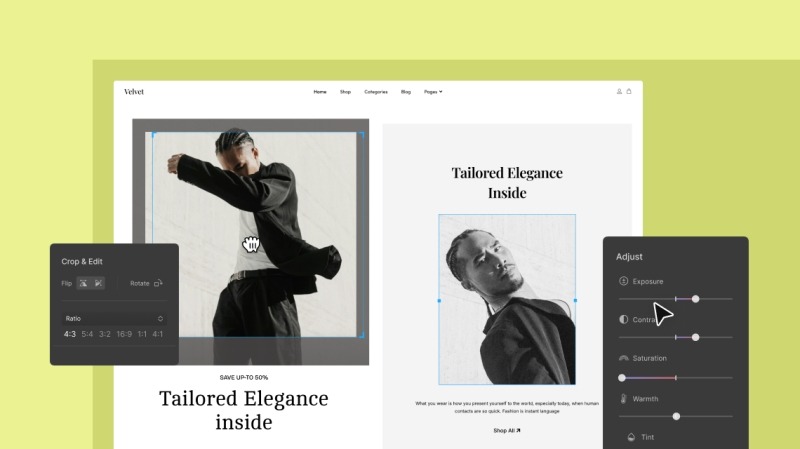
A Smarter Media Manager That Works Like a Design Tool
Droip’s media manager is not just for organizing images.
You can crop, resize, add filters, or create custom text paths all inside Droip’s powerful native media manager.
Image Editing Tools
One of the standout features of Droip’s media manager is its advanced image editing capabilities.
Edit your images directly within Droip, from basic cropping and resizing to applying advanced filters, without relying on third-party tools.
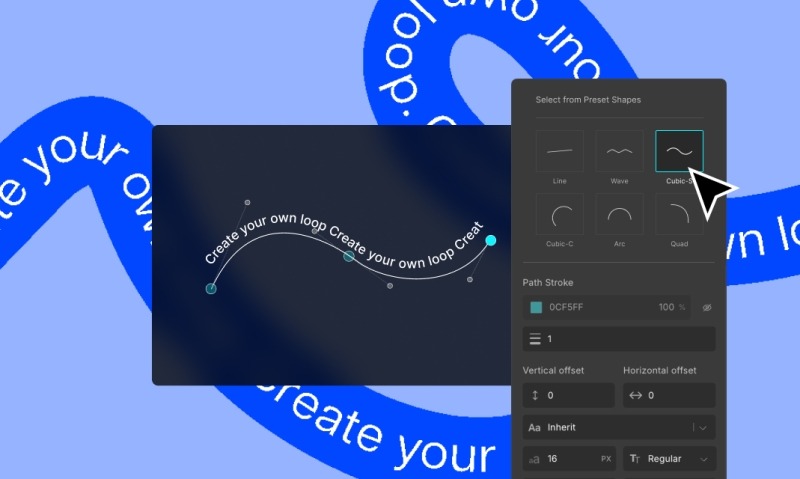
Text Path Creation
Another innovative feature is the ability to create text paths. This allows you to design text that follows any path or shape for that extra creative edge.
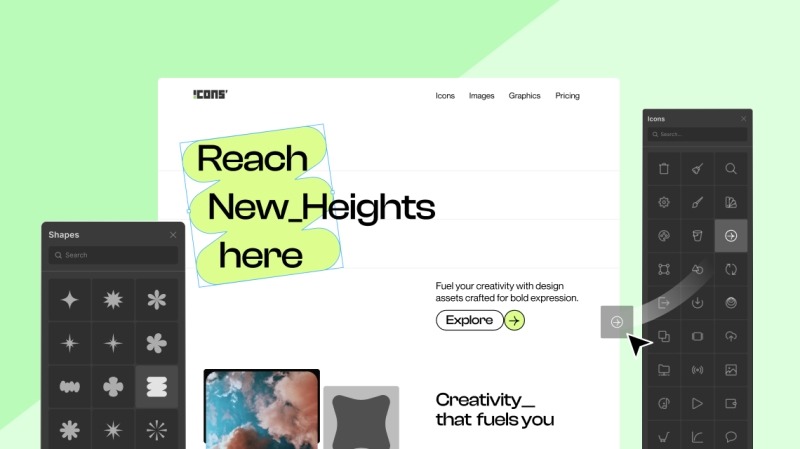
Extensive Icons & Shapes library
Droip has an extensive library of shapes so you can do more than ever.
You can leverage an array of distinctive shapes, customize them to create unique visuals, and effortlessly add them to any part of your website.
Plus, it also houses a vast collection of high-quality icons, all ready to be refined to perfection.
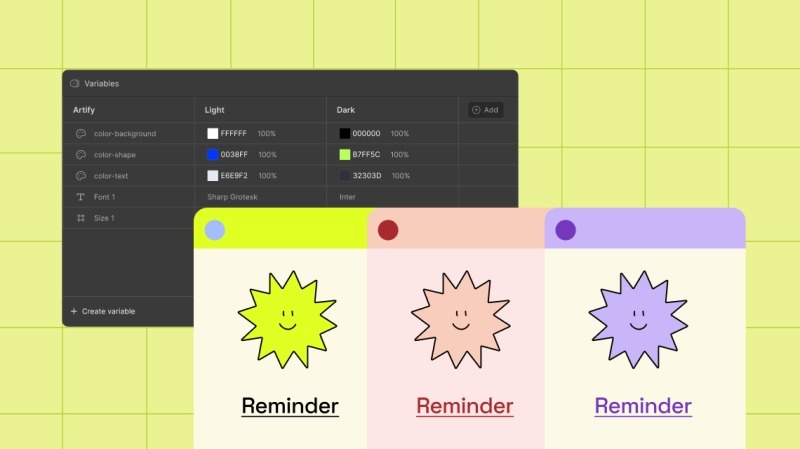
Instant Global Styling Sync with Variables
Most builders make global styling difficult with scattered controls. But this WordPress builder has a dedicated feature called Variables that allows you to save and apply reusable styles across your entire site.
The system is centralized and features a real-time preview, meaning you can update your design in seconds. Say you want to tweak your brand’s primary color. Change it once, and Droip updates every button, heading, and section styled with that variable instantly.
You can also create multiple styling modes, such as light and dark themes, and switch between them with a single click—perfect for seasonal refreshers or theme updates.
Reusable Components with Symbols
Droip also comes with a feature called Symbols, which lets you turn any element along with all of its nested children into a reusable component.
That means if you build something once like a button, a pricing card, or even an entire section, you can reuse it throughout the site
You can even set your global header and footer as Symbols, which makes keeping everything consistent across your site way easier.
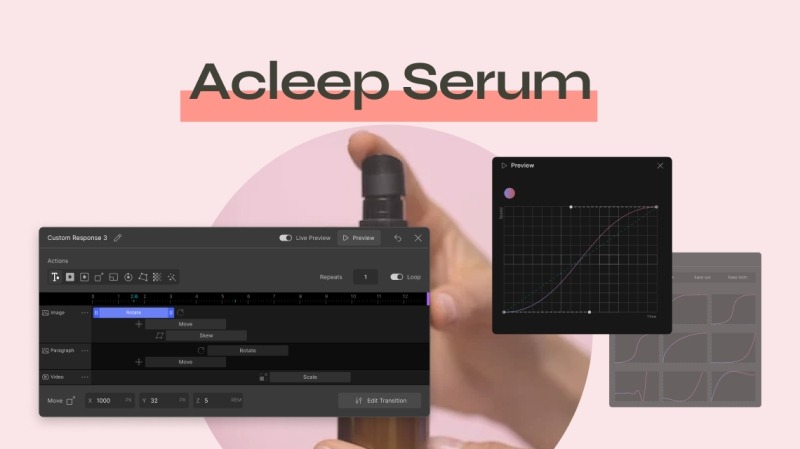
Immersive Interactions and Animations
If you have been settling for basic motion, a few hover effects, maybe a fade-in or two, it’s time to achieve more.
Droip has rich interactions and animation capabilities. You can create immersive, responsive experiences that feel polished and purposeful—not just flashy. From hover effects to scroll-based reveals, you’re free to build any web interactions.
And when you’re ready to go beyond simple effects, it has an interaction timeline that gives you a visual playground to choreograph complex, multi-step animations with ease. Paired with the custom timing editor, you can shape how your animation flows down to the finest detail.
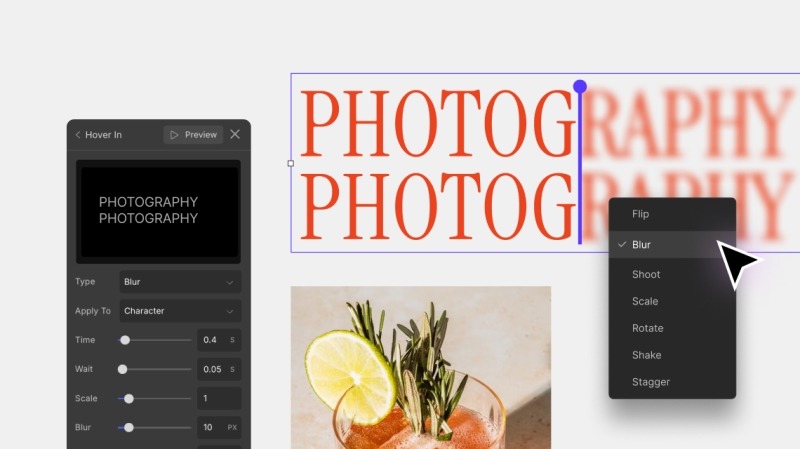
Text Animations
It also approaches Text Animations with the same depth and flexibility. You can choose your trigger, select transition styles, and animate at the character, word, or element level.
You can fine-tune every movement, like speed, direction, intensity, delay, and duration, until it’s just right.
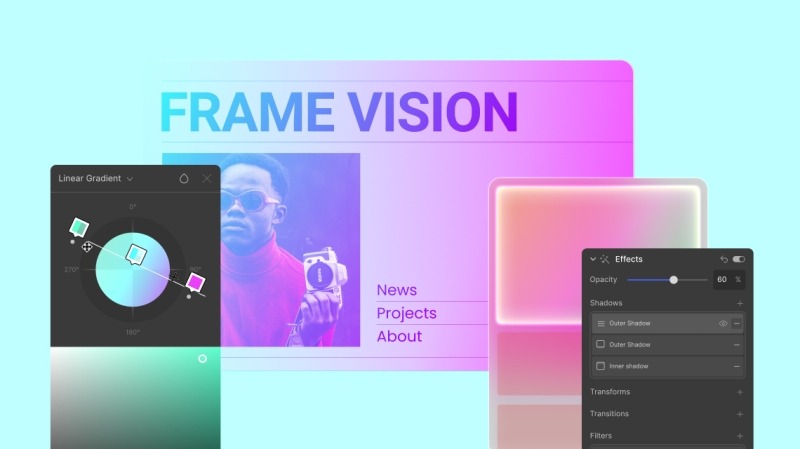
Multiple Backgrounds & Effects
Droip offers robust options for layering multiple backgrounds and shadow effects.
You can layer multiple backgrounds from solid colors to gradients (linear, radial, conic) or images for dynamic, vibrant designs.
Combine that with shadow effects for added depth and dimension, and you can create a truly unique visual experience without being limited by pre-set templates.
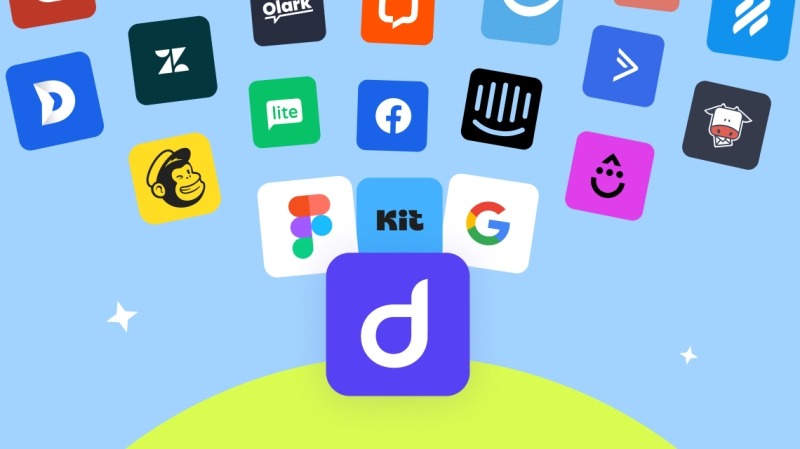
Droip Apps for Seamless Integrations
Droip has a convenient approach when it comes to connecting integrations.
You can directly install and connect third-party integrations without leaving the builder and automate workflows by integrating essential tools like analytics, email marketing, and customer support.
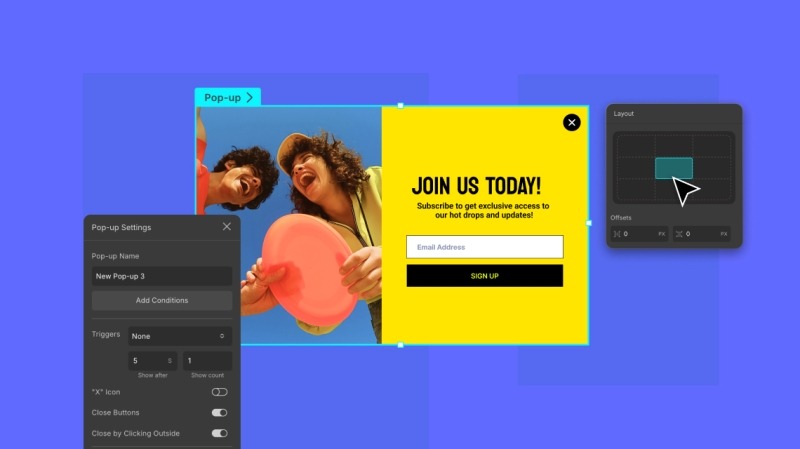
Native Pop-up Builder
The built-in popup builder also checks all the right boxes, giving you full control over both design and behavior.
Design your pop-ups visually, set visibility conditions, and choose custom triggers, whether it’s a click, scroll, or exit intent. You can position them exactly where you want on the screen.
But that’s not all. You can also customize the appearance with smooth transitions, whether it’s a subtle notification or a full-screen takeover.
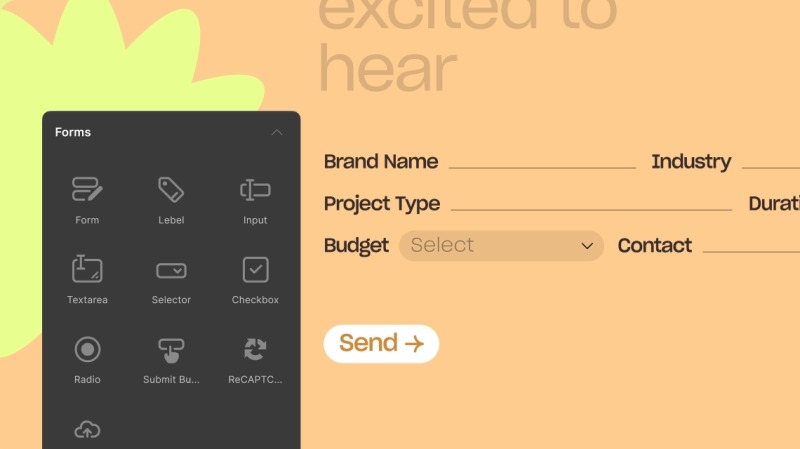
Form Builder with Built-in Form Data Manager
Creating forms elsewhere can be a hassle, requiring multiple tools to manage both form design and data collection.
But with this no-code website builder, you can practically design any web form and then access and manage form data with the built-in Form Data Manager.
Whether you’re collecting leads, registrations, or feedback, Droip combines form creation and data management in one place.
Unlimited Breakpoints for Responsiveness
Many builders limit your ability to adjust responsiveness across devices, leaving you with only a few pre-set breakpoints.
Here, however, you can define unlimited breakpoints and fine-tune responsiveness for every screen size, ensuring your design adapts perfectly.
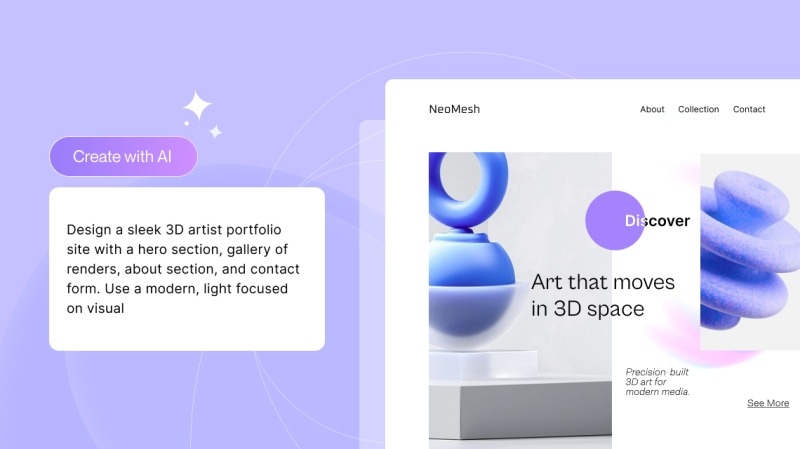
AI-Powered Website Creation
Droip also has AI features to assist and accelerate your entire workflow.
You can instantly generate page structures and layouts, all with a single prompt. It intelligently understands your content and automatically creates optimal layouts, which are neatly structured and easily accessible in the Layers Panel.
And if you need help crafting the perfect copy, it can do that too. It even generates meta titles and descriptions, saving you time while ensuring your site stays optimized for search engines.
Role Manager
Another essential feature for managing your website is the Role Manager.
With the Role Manager in Droip, you can control what users can access and edit within the Droip Editor.
Whether you’re working solo or collaborating with a team, Droip lets you customize who has access to what in a pretty straightforward way.
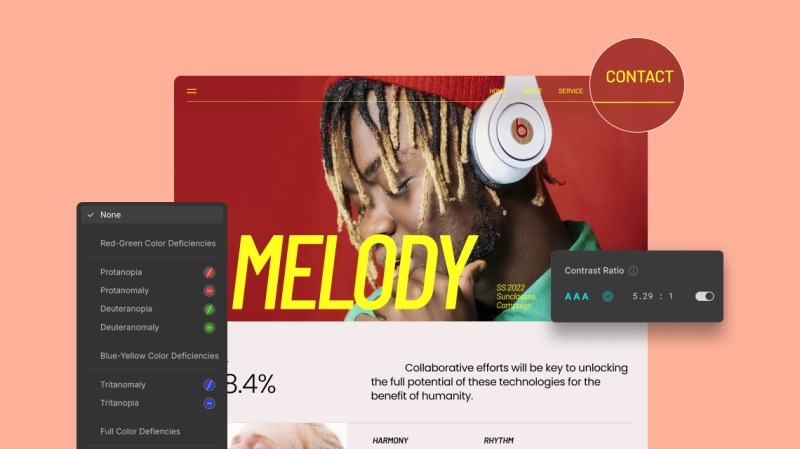
Accessibility Built-in
Accessibility is often left to external plugins in other platforms. But Droip bakes it right into the experience.
From increasing text size and reducing motion to enabling larger cursors and magnifying content, the builder offers a wide range of built-in tools to offer an inclusive website creation experience. It also includes support for various visual impairments, like color blindness.
It also has a built-in color contrast checker to ensure that your text is readable and your color choices meet accessibility standards.
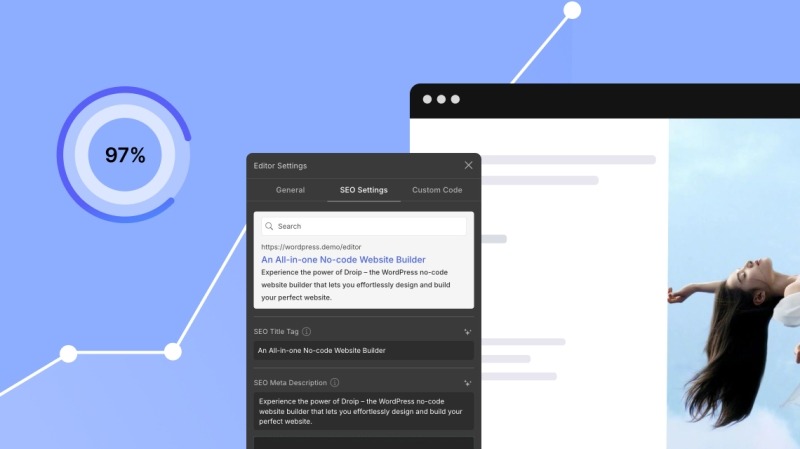
Dynamic and AI-Powered SEO
For SEO, you get the basics: meta titles, descriptions, and Open Graph tags, all easily editable for every page. Even better, you can generate SEO metadata automatically with AI, saving you time.
But when working with dynamic content, Droip takes SEO a step further.
You can set dynamic SEO, so you don’t have to write SEO data for every single dynamic detail page. Whether it’s a product catalog or course listings, dynamic SEO optimizes the individual detail pages automatically, saving you from manual updates.
No Performance Compromise
With so many powerful features built into the platform, you might wonder if performance takes a hit.
But no.
While other traditional WordPress page builders produce bloated code or excessive scripts, Droip delivers clean, minimal markup so even the most complex site loads fast and smooth.
Automatic Page Audit for Quality Control
Most platforms leave quality control up to you.
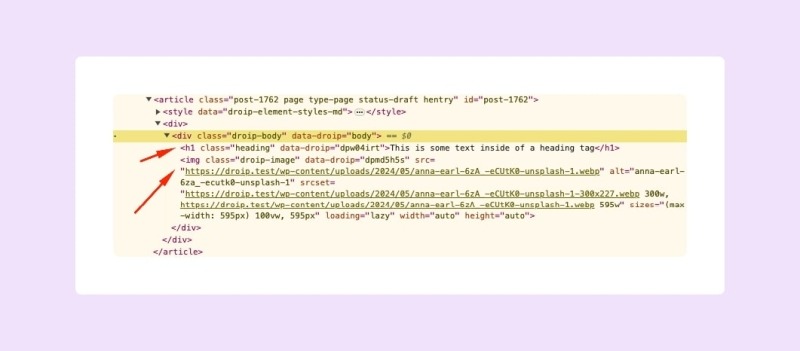
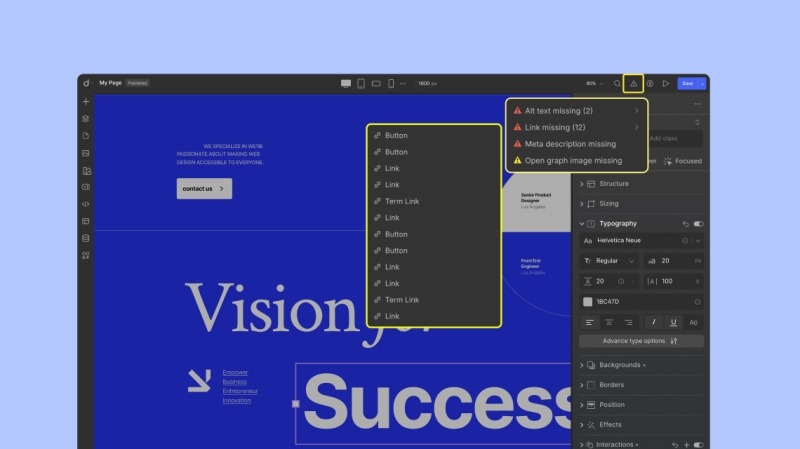
But Droip has a Page Audit feature that automatically catches issues before they become problems.
Whether it’s missing alt text, links, or class names, you’ll get a clear report so you can publish with confidence.
Final Verdict
With its packed feature set, slick UI, and native performance, it’s clear that Droip is a complete powerhouse solution at an unbeatable price.
It’s sleek, it’s powerful, and it’s exactly what WordPress has been waiting for.
Where other builders hit their limits, Droip puts you in the driver’s seat, giving you the freedom and tools to craft extraordinary websites.
So, if you’re still patching plugins together and wasting your money, it’s time to try Droip to feel the difference.