When Flash was taken from us all those years ago, it felt like losing a creative home — suddenly, there were no tools left for building truly interactive experiences on the web. In its place, the web flattened into a static world of HTML and CSS.
But those days are finally behind us. We’re picking up where we left off nearly two decades ago, and the web is alive again with rich, immersive experiences — thanks in large part to powerful tools like Three.js.
I’ve been working with images, video, and interactive projects for 15 years, using things like Processing, p5.js, OpenFrameworks, and TouchDesigner. Last year, I added Three.js to the mix as a creative tool, and I’ve been loving the learning process. That ongoing exploration leads to little experiments like the one I’m sharing in this tutorial.
Project Structure
The structure of our script is going to be simple: one function to preload assets, and another one to build the scene.
Since we’ll be working with 3D text, the first thing we need to do is load a font in .json format — the kind that works with Three.js.
To convert a .ttf font into that format, you can use the Facetype.js tool, which generates a .typeface.json file.
const Resources = {
	font: null
};

function preload() {

	const _font_loader = new FontLoader();
	_font_loader.load( "../static/font/Times New Roman_Regular.json", ( font ) => {

		Resources.font = font;
		init();

	} );

}

function init() {

}

window.onload = preload;
Scene setup & Environment
A classic Three.js scene — the only thing to keep in mind is that we’re working with Three Shader Language (TSL), which means our renderer needs to be a WebGPURenderer.
const scene = new THREE.Scene();
const camera = new THREE.PerspectiveCamera(75, window.innerWidth / window.innerHeight, 0.1, 1000);
const renderer = new THREE.WebGPURenderer({ antialias: true });

document.body.appendChild(renderer.domElement);

renderer.setSize(window.innerWidth, window.innerHeight);
camera.position.z = 5;

scene.add(camera);
Next, we’ll set up the scene environment to get some lighting going.
To keep things simple and avoid loading more assets, we’ll use the default RoomEnvironment that “comes” with Three.js. We’ll also add a DirectionalLight to the scene.
By default, the origin of the text sits at (0, 0), but we want it centered. To do that, we need to compute its BoundingBox and manually apply a translation to the geometry:
Now that we have the mesh and material ready, we can move on to the function that lets us blow everything up 💥
Three Shader Language
I really love TSL — it’s closed the gap between ideas and execution, in a context that’s not always the friendliest… shaders.
The effect we’re going to implement deforms the geometry’s vertices based on the pointer’s position, and uses spring physics to animate those deformations in a dynamic way.
But before we get to that, let’s grab a few attributes we’ll need to make everything work properly:
//  Original position of each vertex — we’ll use it as a reference
//  so unaffected vertices can "return" to their original spot
const initial_position = storage( text_geo.attributes.position, "vec3", count );

//  Normal of each vertex — we’ll use this to know which direction to "push" in
const normal_at = storage( text_geo.attributes.normal, "vec3", count );

//  Number of vertices in the geometry
const count = text_geo.attributes.position.count;
Next, we’ll create a storage buffer to hold the simulation data — and we’ll also write a function. But not a regular JavaScript function — this one’s a compute function, written in the context of TSL.
It runs on the GPU and we’ll use it to set up the initial values for our buffers, getting everything ready for the simulation.
// In this buffer we’ll store the modified positions of each vertex —
// in other words, their current state in the simulation.
const   position_storage_at = storage(new THREE.StorageBufferAttribute(count,3),"vec3",count);

const compute_init = Fn( ()=>{

	position_storage_at.element( instanceIndex ).assign( initial_position.element( instanceIndex ) );

} )().compute( count );

// Run the function on the GPU. This runs compute_init once per vertex.
renderer.computeAsync( compute_init );
Now we’re going to create another one of these functions — but unlike the previous one, this one will run inside the animation loop, since it’s responsible for updating the simulation on every frame.
This function runs on the GPU and needs to receive values from the outside — like the pointer position, for example.
To send that kind of data to the GPU, we use what’s called uniforms. They work like bridges between our “regular” code and the code that runs inside the GPU shader.
With this, we can calculate the distance between the pointer position and each vertex of the geometry.
Then we clamp that value so the deformation only affects vertices within a certain radius. To do that, we use the step function — it acts like a threshold, and lets us apply the effect only when the distance is below a defined value.
Finally, we use the vertex normal as a direction to push it outward.
const compute_update = Fn(() => {

    // Original position of the vertex — also its resting position
    const base_position = initial_position.element(instanceIndex);

    // The vertex normal tells us which direction to push
    const normal = normal_at.element(instanceIndex);

    // Current position of the vertex — we’ll update this every frame
    const current_position = position_storage_at.element(instanceIndex);

    // Calculate distance between the pointer and the base position of the vertex
    const distance = length(u_input_pos.sub(base_position));

    // Limit the effect's range: it only applies if distance is less than 0.5
    const pointer_influence = step(distance, 0.5).mul(1.0);

    // Compute the new displaced position along the normal.
    // Where pointer_influence is 0, there’ll be no deformation.
    const disorted_pos = base_position.add(normal.mul(pointer_influence));

    // Assign the new position to update the vertex
    current_position.assign(disorted_pos);

})().compute(count);
To make this work, we’re missing two key steps: we need to assign the buffer with the modified positions to the material, and we need to make sure the renderer runs the compute function on every frame inside the animation loop.
// Assign the buffer with the modified positions to the material
mesh.material.positionNode = position_storage_at.toAttribute();

// Animation loop
function animate() {
	// Run the compute function
	renderer.computeAsync(compute_update_0);

	// Render the scene
	renderer.renderAsync(scene, camera);
}
Right now the function doesn’t produce anything too exciting — the geometry moves around in a kinda clunky way. We’re about to bring in springs, and things will get much better.
// Spring — how much force we apply to reach the target value
velocity += (target_value - current_value) * spring;

// Friction controls the damping, so the movement doesn’t oscillate endlessly
velocity *= friction;

current_value += velocity;
But before that, we need to store one more value per vertex, the velocity, so let’s create another storage buffer.
const position_storage_at = storage(new THREE.StorageBufferAttribute(count, 3), "vec3", count);

// New buffer for velocity
const velocity_storage_at = storage(new THREE.StorageBufferAttribute(count, 3), "vec3", count);

const compute_init = Fn(() => {

    position_storage_at.element(instanceIndex).assign(initial_position.element(instanceIndex));

    // We initialize it too
    velocity_storage_at.element(instanceIndex).assign(vec3(0.0, 0.0, 0.0));

})().compute(count);
Now we’ve got everything we need — time to start fine-tuning.
We’re going to add two things. First, we’ll use the TSL function mx_noise_vec3 to generate some noise for each vertex. That way, we can tweak the direction a bit so things don’t feel so stiff.
We’re also going to rotate the vertices using another TSL function — surprise, it’s called rotate.
Here’s what our updated compute_update function looks like:
const compute_update = Fn(() => {

    const base_position = initial_position.element(instanceIndex);
    const current_position = position_storage_at.element(instanceIndex);
    const current_velocity = velocity_storage_at.element(instanceIndex);

    const normal = normal_at.element(instanceIndex);

    // NEW: Add noise so the direction in which the vertices "explode" isn’t too perfectly aligned with the normal
    const noise = mx_noise_vec3(current_position.mul(0.5).add(vec3(0.0, time, 0.0)), 1.0).mul(u_noise_amp);

    const distance = length(u_input_pos.sub(base_position));
    const pointer_influence = step(distance, 0.5).mul(1.5);

    const disorted_pos = base_position.add(noise.mul(normal.mul(pointer_influence)));

    // NEW: Rotate the vertices to give the animation a more chaotic feel
    disorted_pos.assign(rotate(disorted_pos, vec3(normal.mul(distance)).mul(pointer_influence)));

    disorted_pos.assign(mix(base_position, disorted_pos, u_input_pos_press));

    current_velocity.addAssign(disorted_pos.sub(current_position).mul(u_spring));
    current_position.addAssign(current_velocity);
    current_velocity.assign(current_velocity.mul(u_friction));

})().compute(count);
Now that the motion feels right, it’s time to tweak the material colors a bit and add some post-processing to the scene.
We’re going to work on the emissive color — meaning it won’t be affected by lights, and it’ll always look bright and explosive. Especially once we throw some bloom on top. (Yes, bloom everything.)
We’ll start from a base color (whichever you like), passed in as a uniform. To make sure each vertex gets a slightly different color, we’ll offset its hue a bit using values from the buffers — in this case, the velocity buffer.
The hue function takes a color and a value to shift its hue, kind of like how offsetHSL works in THREE.Color.
// Base emissive color
const emissive_color = color(new THREE.Color("0000ff"));

const vel_at = velocity_storage_at.toAttribute();
const hue_rotated = vel_at.mul(Math.PI*10.0);

// Multiply by the length of the velocity buffer — this means the more movement,
// the more the vertex color will shift
const emission_factor = length(vel_at).mul(10.0);

// Assign the color to the emissive node and boost it as much as you want
mesh.material.emissiveNode = hue(emissive_color, hue_rotated).mul(emission_factor).mul(5.0);
Finally! Lets change scene background color and add Fog:
scene.fog = new THREE.Fog(new THREE.Color("#41444c"),0.0,8.5);
scene.background = scene.fog.color;
Now, let’s spice up the scene with a bit of post-processing — one of those things that got way easier to implement thanks to TSL.
We’re going to include three effects: ambient occlusion, bloom, and noise. I always like adding some noise to what I do — it helps break up the flatness of the pixels a bit.
I won’t go too deep into this part — I grabbed the AO setup from the Three.js examples.
Rendering text in WebGL opens up a whole new world of unique visual effects and creative possibilities that are often
impossible to achieve with traditional HTML, CSS and JavaScript alone. By the end of this tutorial, we’ll have created
WebGL-rendered text elements that perfectly mimic the underlying HTML structure. Since we’ll be taking an HTML-first
approach, it will be responsive, SEO-friendly and accessible. We’ll be doing every step manually so you’ll gain a
solid understanding of the principles behind merging HTML and WebGL, and text-specific stuff like how to translate CSS
styles into the 3D world.
We’ll be creating the below demo:
We’ll start off with a standard styled HTML setup. Then we’ll recreate the text elements we have inside a 3D world.
From there, we’ll position, scale and make the text responsive with the 3D space. Next, we’ll replicate the “mask
reveal effect” in WebGL. And finally, we’ll apply some scroll-driven post processing effects to the scene.
Below are the core steps we’ll follow to achieve the final result:
Create the text as a HTML element and style it regularly using CSS
Create a 3D world and recreate the text element within it
Merge the 3D and 2D world, so that we can style the 3D text by using our viewport’s dimensions
Sync the key properties like position, size and font — from the HTML element to the WebGL text element
Hide the original HTML element
Be left with only the 3D text, fully styled and positioned in sync with the hidden HTML structure
Apply animations and post-processing to enhance our 3D scene
Necessities and Prerequisites
We’ll be using the Three.js library to create the 3D world, so you should already be familiar with its basics. For the
creation of text meshes, we’ll be using the troika-three-text
library, but you don’t have to be familiar with the library beforehand. If you’ve used HTML, CSS and JavaScript, know the basics of Three.JS,
you’re good to go.
Let’s get started.
1. Creating the Regular HTML and Making it Responsive
Before diving into the WebGL and Three.js implementation, we first need to create the HTML structure that we’ll later
mimic in the 3D world. I’ve set up a very simple page with some quick responsive content — you can find the setup content
in the demo repository under index.html
and styles.css
.
HTML
:
<div class="content">
<div class="container">
<section class="section__heading">
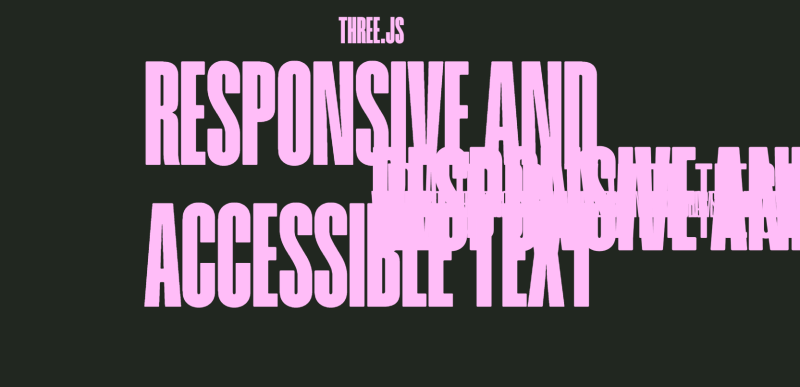
<h3 data-animation="webgl-text" class="text__2">THREE.JS</h3>
<h2 data-animation="webgl-text" class="text__1">
RESPONSIVE AND ACCESSIBLE TEXT
</h2>
</section>
<section class="section__main__content">
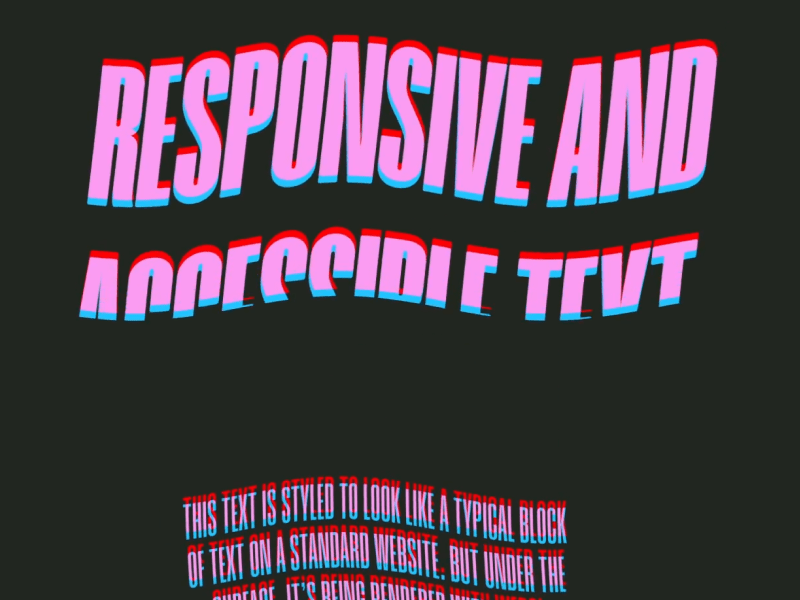
<p data-animation="webgl-text" class="text__2">
THIS TEXT IS STYLED TO LOOK LIKE A TYPICAL BLOCK OF TEXT ON A STANDARD
WEBSITE. BUT UNDER THE SURFACE, IT'S BEING RENDERED WITH WEBGL INSTEAD
OF TRADITIONAL HTML.
</p>
<p data-animation="webgl-text" class="text__2">
THIS OPENS THE DOOR TO CUSTOM SHADER EFFECTS AND INTERACTIONS THAT GO
BEYOND WHAT'S POSSIBLE WITH TRADITIONAL HTML.
</p>
<p data-animation="webgl-text" class="text__2">
WE KEEP THE UNDERYLING HTML STRUCTURE PRESENT IN THE DOM. RATHER THAN
CREATING MESHES DIRECTLY IN THREE.JS, THE SCENE IS BUILT BY READING FROM
THE EXISTING HTML CONTENT. THIS WAY, SCREEN READERS, SEARCH ENGINES, AND
OTHER TOOLS CAN STILL INTERPRET THE PAGE AS EXPECTED.
</p>
</section>
<section class="section__footer">
<p data-animation="webgl-text" class="text__3">
NOW GO CRAZY WITH THE SHADERS :)
</p>
</section>
</div>
</div>
The <canvas>
element is set to cover the entire screen, fixed in place behind the main content. We want a full screen canvas
covering the entire screen behind our main content at all times.
All text elements intended for WebGL rendering are marked with data-animation=”webgl-text” for clarity and easy
selection when we begin scripting.
The purpose of this setup is to function as the “placeholder” that we can mimic in our 3D implementation. So, it’s
important to position and style your text at this stage
to ensure it matches the final sizing and positioning that you want to achieve. All text formatting properties like
font-size, letter-spacing, line-height etc. are the properties you want to focus on, because we’ll later read these
computed styles directly from the DOM during the WebGL phase. Color is optional here, as we can handle text coloring
later with shaders inside WebGL.
That’s it for the HTML and CSS setup! It’s all we need for the foundation to move onto our JavaScript and WebGL
implementation.
2. Initial 3D World Setup
Let’s move onto the JavaScript and WebGL implementation. I’ll be using TypeScript, but you can easily follow along
with vanilla JavaScript if you prefer. I’m assuming you’re already familiar with the basics of Three.js, so I’ll focus
on explaining the high-level setup rather than covering every detail.
Below is the starter TypeScript and Three.JS base that I’ll be using for this demo.
// main.ts

import Commons from "./classes/Commons";
import * as THREE from "three";

/**
 * Main entry-point.
 * Creates Commons and Scenes
 * Starts the update loop
 * Eventually creates Postprocessing and Texts.
  */
class App {
  private commons!: Commons;

  scene!: THREE.Scene;

  constructor() {
    document.addEventListener("DOMContentLoaded", async () => {
      await document.fonts.ready; // Important to wait for fonts to load when animating any texts.

      this.commons = Commons.getInstance();
      this.commons.init();

      this.createScene();

      this.addEventListeners();

      this.update();
    });
  }

  private createScene() {
    this.scene = new THREE.Scene();
  }

  /**
   * The main loop handler of the App
   * The update function to be called on each frame of the browser.
   * Calls update on all other parts of the app
   */
  private update() {
    this.commons.update();

    this.commons.renderer.render(this.scene, this.commons.camera);

    window.requestAnimationFrame(this.update.bind(this));
  }

  private addEventListeners() {
    window.addEventListener("resize", this.onResize.bind(this));
  }

  private onResize() {
    this.commons.onResize();
  }
}

export default new App();
// Commons.ts

import { PerspectiveCamera, WebGLRenderer, Clock } from "three";

import Lenis from "lenis";

export interface Screen {
  width: number;
  height: number;
  aspect: number;
}

export interface Sizes {
  screen: Screen;
  pixelRatio: number
}

/**
 * Singleton class for Common stuff.
 * Camera
 * Renderer
 * Lenis
 * Time
 */
export default class Commons {
  private constructor() {}

  private static instance: Commons;

  lenis!: Lenis;
  camera!: PerspectiveCamera;
  renderer!: WebGLRenderer;

  private time: Clock = new Clock();
  elapsedTime!: number;

  sizes: Sizes = {
    screen: {
      width: window.innerWidth,
      height: window.innerHeight,
      aspect: window.innerWidth / window.innerHeight,
    },
    pixelRatio: this.getPixelRatio(),
  };

  private distanceFromCamera: number = 1000;

  /**
   * Function to be called to either create Commons Singleton instance, or to return existing one.
   * TODO AFTER: Call instances init() function.
   * @returns Commons Singleton Instance.
   */
  static getInstance() {
    if (this.instance) return this.instance;

    this.instance = new Commons();
    return this.instance;
  }

  /**
   * Initializes all-things Commons. To be called after instance is set.
   */
  init() {
    this.createLenis();
    this.createCamera();
    this.createRenderer();
  }

  /**
   * Creating Lenis instance.
   * Sets autoRaf to true so we don't have to manually update Lenis on every frame.
   * Resets possible saved scroll position.
   */
  private createLenis() {
    this.lenis = new Lenis({ autoRaf: true, duration: 2 });
  }

  private createCamera() {
    this.camera = new PerspectiveCamera(
      70,
      this.sizes.screen.aspect,
      200,
      2000
    );
    this.camera.position.z = this.distanceFromCamera;
    this.camera.updateProjectionMatrix();
  }

  /**
   * createRenderer(): Creates the common WebGLRenderer to be used.
   */
  private createRenderer() {
    this.renderer = new WebGLRenderer({
      alpha: true, // Sets scene background to transparent, so our body background defines the background color
    });

    this.renderer.setSize(this.sizes.screen.width, this.sizes.screen.height);

    this.renderer.setPixelRatio(this.sizes.pixelRatio);

	  // Creating canvas element and appending to body element.
    document.body.appendChild(this.renderer.domElement);
  }

  /**
   * Single source of truth to get pixelRatio.
   */
  getPixelRatio() {
    return Math.min(window.devicePixelRatio, 2);
  }

  /**
   * Resize handler function is called from the entry-point (main.ts)
   * Updates the Common screen dimensions.
   * Updates the renderer.
   * Updates the camera.
   */
  onResize() {
    this.sizes.screen = {
      width: window.innerWidth,
      height: window.innerHeight,
      aspect: window.innerWidth / window.innerHeight,
    };
    this.sizes.pixelRatio = this.getPixelRatio();

    this.renderer.setSize(this.sizes.screen.width, this.sizes.screen.height);
    this.renderer.setPixelRatio(this.sizes.pixelRatio);

    this.onResizeCamera();
  }

  /**
   * Handler function that is called from onResize handler.
   * Updates the perspective camera with the new adjusted screen dimensions
   */
  private onResizeCamera() {
    this.camera.aspect = this.sizes.screen.aspect;
    this.camera.updateProjectionMatrix();
  }

  /**
   * Update function to be called from entry-point (main.ts)
   */
  update() {
    this.elapsedTime = this.time.getElapsedTime();
  }
}
A Note About Smooth Scroll
When syncing HTML and WebGL worlds, you should use a custom scroll
. This is because the native scroll in browsers updates the scroll position at irregular intervals and does not thus
guarantee frame-perfect updates with our requestAnimationFrame loop and our WebGL world, causing a jittery and unsynchronized movement
.
By integrating a custom scroll (Lenis in this case), we ensure our scroll updates perfectly match the frame updates of
our WebGL world.
Right now we are seeing an empty 3D world, continuously being rendered.
We’re only missing one thing to get something visible in our 3D world: the creation of the text elements. So let’s
move onto creating our WebGLText class next.
3. Creating WebGLText Class and Texts Meshes
For the creation of the text meshes, we’ll be using troika-three-text
library.
npm i troika-three-text
We’ll now create a reusable WebGLText
class
. This will handle turning each HTML element into a 3D text mesh, using Troika and our Three.js scene.
Here’s the basic setup:
// WebGLText.ts

import Commons from "./Commons";
import * as THREE from "three";

// @ts-ignore
import { Text } from "troika-three-text";

interface Props {
  scene: THREE.Scene;
  element: HTMLElement;
}

export default class WebGLText {
  commons: Commons;

  scene: THREE.Scene;
  element: HTMLElement;

  computedStyle: CSSStyleDeclaration;
  font!: string; // Path to our .ttf font file.
  bounds!: DOMRect;
  color!: THREE.Color;
  material!: THREE.ShaderMaterial;
  mesh!: Text;

  // We assign the correct font bard on our element's font weight from here
  weightToFontMap: Record<string, string> = {
    "900": "/fonts/Humane-Black.ttf",
    "800": "/fonts/Humane-ExtraBold.ttf",
    "700": "/fonts/Humane-Bold.ttf",
    "600": "/fonts/Humane-SemiBold.ttf",
    "500": "/fonts/Humane-Medium.ttf",
    "400": "/fonts/Humane-Regular.ttf",
    "300": "/fonts/Humane-Light.ttf",
    "200": "/fonts/Humane-ExtraLight.ttf",
    "100": "/fonts/Humane-Thin.ttf",
  };

  private y: number = 0; // Scroll-adjusted bounds.top

  private isVisible: boolean = false;

  constructor({ scene, element }: Props) {
    this.commons = Commons.getInstance();

    this.scene = scene;
    this.element = element;

    this.computedStyle = window.getComputedStyle(this.element); // Saving initial computed style.
  }
}
We have access to the Text class
from Troika, which allows us to create text meshes elements and apply styling to it using familiar properties like
fontSize, letterSpacing, and font. I’ll cover everything you need to style your text responsively in this tutorial,
but I implore you to take a look at the full documentation and its possibilities here
.
Troika doesn’t ship with TypeScript definitions out of the box, so if you’re using TS, you can quickly get around this
by creating a type declaration file in the root of your project. It’s not pretty, but it gets the job done while
keeping TypeScript happy.
Let’s start by creating new methods called createFont(), createColor() and createMesh().
createFont()
: Selects the appropriate .ttf file based on the DOM element’s font-weight. If a match isn’t found, we fall back to
the regular weight. Adjust the mapping to match your own font files and multiple font families if needed.
createColor()
: Converts the computed CSS color into a THREE.Color instance:
// WebGLText.ts

private createColor() {
    this.color = new THREE.Color(this.computedStyle.color);
}
createMesh():
Instantiates the text mesh and sets some basic properties. Copies the text’s inner text and sets it onto the mesh.
Adds the mesh to our Three.JS scene. We anchor the text from the left-center to match typical HTML layout
expectations.
// WebGLText.ts
private createMesh() {
  this.mesh = new Text();

  this.mesh.text = this.element.innerText; // Copying HTML content over to the mesh
  this.mesh.font = this.font;

  // Anchor the text to the left-center (instead of center-center)
  this.mesh.anchorX = "0%";
  this.mesh.anchorY = "50%";

  this.mesh.color = this.color;

  this.scene.add(this.mesh);
}
⚠️ When copying text contents over to the Mesh, avoid using innerHTML or textContent and use innerText instead as it
gives the most layout-accurate and consistent results.
setStaticValues
(): Let’s also create a baby setStaticValues() method which will set the critical properties of our text mesh based on
the computedStyle.
We sets values like font size based on computed CSS. We’ll expand this more as we sync more styles down the line.
We want to call all these methods in the constructor like this:
Finally, let’s update our App class (main.ts), and hook this all up by scanning for DOM elements with a
data-animation=”webgl-text” attribute — creating a WebGLText instance for each one:
// main.ts

texts!: Array<WebGLText>;

// ...

private createWebGLTexts() {
  const texts = document.querySelectorAll('[data-animation="webgl-text"]');

  if (texts) {
    this.texts = Array.from(texts).map((el) => {
      const newEl = new WebGLText({
        element: el as HTMLElement,
        scene: this.scene,
      });

      return newEl;
    });
  }
}
Make sure to call this method in the constructor on initialization. This will populate our scene with styled text
meshes based on our DOM content.
That’s all we need to have our text meshes visible, it’s not the prettiest sight to behold, but at least we got
everything working:
Next Challenge: Screen vs. 3D Space Mismatch
Even though we copy the font size directly from the DOM, the scale looks different in 3D. That’s because WebGL units don’t map 1:1 with screen pixels
, and they operate in different coordinate systems. This mismatch will become even more obvious if we start
positioning and animating elements.
To get true visual parity between our DOM elements and WebGL text, we need to bridge the gap between screen space and
3D space. Let’s tackle that next so our text sizes and positions actually match with what we see in the browser.
4. Syncing Dimensions
The major problem when syncing HTML and WebGL dimensions is that things between them aren’t exactly pixel-perfect.
This is because the DOM and WebGL don’t “speak the same units” by default.
Web browsers work in screen pixels.
WebGL uses arbitrary units
Our goal is simple:
💡 Make one unit in the WebGL scene equal one pixel on the screen.
To achieve this, we’ll adjust the camera’s field of view (FOV) so that visible area through the camera exactly matches
the dimensions of the browser window in pixels.
So, we’ll create a syncDimensions()
function under our Commons class, which calculates our camera’s field of view such that 1 unit in the WebGL scene
corresponds to 1 pixel on the screen — at a given distance from the camera.
 // Commons.ts
/**
  * Helper function that is called upon creation and resize
  * Updates the camera's fov according to the new dimensions such that the window's pixels match with that of WebGL scene
  */
private syncDimensions() {
  this.camera.fov =
    2 *
    Math.atan(this.sizes.screen.height / 2 / this.distanceFromCamera) *
    (180 / Math.PI);
}
This function will be called once when we create the camera, and every time that the screen is resized.
Let’s break down what’s actually going on here using the image below:
We know:
The height of the screen
The distance from camera (Z)
The FOV of the camera is the vertical angle (fov y in the image)
So our main goal is to set how wide (vertical angle) we see according to our screen height.
Because the Z (distance from camera) and half of the screen height forms a right triangle
(distance + height), we can solve for the angle using some basic trigonometry, and compute the FOV using the inverse
tangent ( atan
) of this triangle.
Step-by-step Breakdown of the Formula
this.sizes.screen.height / 2
→ This gives us half the screen’s pixel height — the opposite side of our triangle.
this.distanceFromCamera
→ This is the adjacent side of the triangle — the distance from the camera to the 3D scene.
Math.atan(opposite / adjacent)
→ Calculates half of the vertical FOV (in radians).
*2
→ Since atan only gives half of the angle, we multiply it by 2 to get the full FOV.
* (180 / Math.PI)
→ Converts the angle from radians to degrees (Three.js expects degrees for PerspectiveCamera’s fov)
That’s all we need to sync our dimensions, and this setup ensures that 1 unit in WebGL = 1 pixel on screen.
Let’s move back to the text implementation.
5. Setting Text Properties and Positioning
Now that we’ve synced the WebGL scene to our screen’s pixel dimensions, we can start mapping HTML styles to our 3D
text.
If everything’s wired up correctly, you should see that the font size of the WebGL-rendered text matches the size of
the underlying HTML, although the positioning is still off.
Let’s sync more styling properties and positioning.
Before we can position the 3D text, we need to get the DOM element’s position and size. We’ll create a new method in
the WebGLText class called createBounds() ,
and use the browser’s built-in getBoundingClientRect() method:
Next, we’ll pull important typographic properties from the DOM (computed style) and pass them to the 3D mesh, so that
it behaves like our native HTML text. (Again, you can see the full documentation and possible properties of troika here
). Below I’ve included the most important ones.
  // WebGLText.ts

private setStaticValues() {
  const { fontSize, letterSpacing, lineHeight, whiteSpace, textAlign } =
    this.computedStyle;

  const fontSizeNum = window.parseFloat(fontSize);

  this.mesh.fontSize = fontSizeNum;

  this.mesh.textAlign = textAlign;

  // Troika defines letter spacing in em's, so we convert to them
  this.mesh.letterSpacing = parseFloat(letterSpacing) / fontSizeNum;

  // Same with line height
  this.mesh.lineHeight = parseFloat(lineHeight) / fontSizeNum;

  // Important to define maxWidth for the mesh, so that our text doesn't overflow
  this.mesh.maxWidth = this.bounds.width;

  // Match whiteSpace behavior (e.g., 'pre', 'nowrap')
  this.mesh.whiteSpace = whiteSpace;
}
Troika accepts some of the properties in local em units, so we have to convert pixels into em’s by dividing the pixel
values by the font size.
Also, it’s important to set a maximum width (in pixels) to constrain the mesh’s layout — this prevents text from
overflowing and ensures proper text wrapping.
And finally, let’s create an update()
function to be called on each frame that consistently positions our mesh according to the underlying DOM position.
And now, the texts will perfectly follow DOM counterparts
, even as the user scrolls.
Let’s finalize our base text class implementation before diving into effects:
Resizing
We need to ensure that our WebGL text updates correctly on window resize events. This means recreating the computedStyle, bounds, and static values
whenever the window size changes.
Once everything is working responsively and perfectly synced with the DOM, we can finally hide the original HTML text by setting it transparent
— but we’ll keep it in place so it’s still selectable and accessible to the user.
// WebGLText.ts

this.createFont();
this.createColor();
this.createBounds();
this.createMesh();
this.setStaticValues();

this.element.style.color = "transparent"; // Hide DOM element
We should now have our perfectly responsive text meshes, and the user only sees the rendered WebGL text, while the DOM
element remains fully intact for accessibility.
Let’s add some effects!
6. Adding a Custom shader and Replicating Mask Reveal Animations
Troika also lets us use custom shader materials for meshes, giving us the flexibility to create complex effects beyond
just setting colors.
The vertex shader passes the texture coordinates (uv) to the fragment shader for the text rendering.
Shader File Imports using Vite
To handle shader files more easily, we can use the vite-plugin-glsl
plugin together with Vite to directly import shader files like .frag and .vert in code:
Let’s now create our custom ShaderMaterial and apply it to our mesh:
// WebGLText.ts

// Importing shaders
import fragmentShader from "../../shaders/text/text.frag";
import vertexShader from "../../shaders/text/text.vert";

//...

this.createFont();
this.createColor();
this.createBounds();
this.createMaterial(); // Creating material
this.createMesh();
this.setStaticValues();

//...

private createMaterial() {
   this.material = new THREE.ShaderMaterial({
     fragmentShader,
     vertexShader
       uniforms: {
       uColor: new THREE.Uniform(this.color), // Passing our color to the shader
     },
   });
 }
In the createMaterial()
method, we define the ShaderMaterial
using the imported shaders and pass in the uColor uniform, which allows us to dynamically control the color of the
text based on our DOM-element.
And now, instead of setting the color directly on the default mesh material, we apply our new custom material:
  // WebGLText.ts

private createMesh() {
  this.mesh = new Text();

  this.mesh.text = this.element.innerText; // Always use innerText (not innerHTML or textContent).
  this.mesh.font = this.font;

  this.mesh.anchorX = "0%";
  this.mesh.anchorY = "50%";

  this.mesh.material = this.material; //Using custom material instead of color
}
At this point, we are using our custom shader material, but so far, nothing in our output has changed. Let’s now setup
show and hide animations using our custom shader, and replicate the mask reveal effect.
Setting up Reveal Animations
We’ll create an animation that uses a progress uniform (uProgress) to control the visibility and reveal progress of
the text. The animation will be controlled using the motion library.
First, we must install motion
and import its animate
and inView
functions to our WebGLText class.
npm i motion
// WebGLText.ts

import { inView, animate } from "motion";
Now, let’s configure our class so that when the text steps into view, the show() function is called
, and when it steps away, the hide() function is called
. These methods also control the current visibility variable this.isVisible
. These functions will control the uProgress variable, and animate it between 0 and 1.
For this, we also must setup an addEventListeners() function:
 // WebGLText.ts

/**
  * Inits visibility tracking using motion's inView function.
  * Show is called when the element steps into view, and hide is called when the element steps out of view
  */
private addEventListeners() {
  inView(this.element, () => {
    this.show();

    return () => this.hide();
  });
}

show() {
  this.isVisible = true;

  animate(
    this.material.uniforms.uProgress,
    { value: 1 },
    { duration: 1.8, ease: [0.25, 1, 0.5, 1] }
  );
}

hide() {
  animate(
    this.material.uniforms.uProgress,
    { value: 0 },
    { duration: 1.8, onComplete: () => (this.isVisible = false) }
  );
}
Just make sure to call addEventListeners() in your constructor after setting up the class.
Updating the Shader Material for Animation
We’ll also add two additional uniform variables in our material for the animations:
uProgress
: Controls the reveal progress (from 0 to 1).
uHeight
: Used by the vertex shader to calculate vertical position offset.
Updated createMaterial()
method:
 // WebGLText.ts

private createMaterial() {
  this.material = new THREE.ShaderMaterial({
    fragmentShader,
    vertexShader,
    uniforms: {
      uProgress: new THREE.Uniform(0),
      uHeight: new THREE.Uniform(this.bounds.height),
      uColor: new THREE.Uniform(this.color),
    },
  });
}
Since the uHeight is dependent on bounds, we also want to update the uniform variable upon resizing:
We now have the text class instance automatically calling show() and hide(), and animating the uProgress according to
the visibility of our underlying DOM-element.
For performance, you might want to update the update() method to only calculate a new position when the mesh is
visible:
Creating a mask reveal effect with custom shaders in WebGL is surprisingly simple when we break it down into two
separate movements: one happening in the fragment shader and the other in the vertex shader. You might’ve seen this
effect happen in WebGL on the page of Zajno
, for example.
Instead of overcomplicating the concept with complex masks or thinking about “lifting it up” behind a window (as we do
in traditional HTML), we can think of it as two distinct actions that work together.
Fragment Shader
: We clip the text vertically, revealing it gradually from top to bottom.
Vertex Shader
: We translate the text’s position from the bottom to the top by its height.
Together these two movements create the illusion of the text lifting itself up from behind a mask.
Let’s update our fragment shader code:
//text.frag

uniform float uProgress; // Our progress value between 0 and 1

uniform vec3 uColor;
varying vec2 vUv;

void main() {
  // Calculate the reveal threshold (bottom to top reveal)
  float reveal = 1.0 - vUv.y;

  // Discard fragments above the reveal threshold based on progress
  if (reveal > uProgress) discard;

  // Apply the color to the visible parts of the text
  gl_FragColor = vec4(uColor, 1.0);
}
When uProgress is 0, the mesh is fully clipped out, and nothing is visible
When uProgress increases towards 1, the mesh reveals itself from top to bottom.
For the vertex shader, we can simply pass the new uniform called uHeight, which stands for the height of our
DOM-element (this.bounds.height), and translate the output vertically according to it and uProgress.
//text.vert

uniform float uProgress;
uniform float uHeight; // Total height of the mesh passed in from JS

varying vec2 vUv;

void main() {
  vUv = uv;

  vec3 transformedPosition = position;

  // Push the mesh upward as it reveals
  transformedPosition.y -= uHeight * (1.0 - uProgress);

  gl_Position = projectionMatrix * modelViewMatrix * vec4(transformedPosition, 1.0);
}
uHeight
: Total height of the DOM-element (and mesh), passed in from JS.
When uProgress
is 0
, the mesh is fully pushed down.
As uProgress
reaches 1
, it resolves to its natural position.
Now, we should have a beautifully on-scroll animating scene, where the texts reveal themselves as in regular HTML when
they scroll into view.
To spice things up, let’s add some scroll-velocity based post processing effects to our scene as the final step!
7. Adding Post-processing
Now that we’ve built our animated WebGL text with custom shaders and scroll-triggered reveals, we can push the visuals
further with post-processing
.
Post-processing allows us to apply full-screen visual effects after the scene has been rendered. This is done by
passing the final image through a series of custom shader passes.
So, in this final section, we’ll:
Set up a PostProcessing class using Three.js’s EffectComposer
Add a custom RGB shift and wave distortion effect
Drive the distortion strength dynamically using the scroll velocity from our Lenis custom scroll instance
Creating a PostProcessing class with EffectComposer
Let’s create a PostProcessing class that will be intialized from our entry-point, and which will handle everything
regarding postprocessing using Three.JS’s EffectComposer. Read more about the EffectComposer class here from Three.js’s documentation
. We’ll also create new fragment and vertex shaders for the postprocessing class to use.
// PostProcessing.ts

import {
  EffectComposer,
  RenderPass,
  ShaderPass,
} from "three/examples/jsm/Addons.js";
import Commons from "./Commons";
import * as THREE from "three";

// Importing postprocessing shaders
import fragmentShader from "../../shaders/postprocessing/postprocessing.frag";
import vertexShader from "../../shaders/postprocessing/postprocessing.vert";

interface Props {
  scene: THREE.Scene;
}

export default class PostProcessing {
  // Scene and utility references
  private commons: Commons;
  private scene: THREE.Scene;

  private composer!: EffectComposer;

  private renderPass!: RenderPass;
  private shiftPass!: ShaderPass;

  constructor({ scene }: Props) {
    this.commons = Commons.getInstance();

    this.scene = scene;

    this.createComposer();
    this.createPasses();
  }

  private createComposer() {
    this.composer = new EffectComposer(this.commons.renderer);
    this.composer.setPixelRatio(this.commons.sizes.pixelRatio);
    this.composer.setSize(
      this.commons.sizes.screen.width,
      this.commons.sizes.screen.height
    );
  }

  private createPasses() {
    // Creating Render Pass (final output) first.
    this.renderPass = new RenderPass(this.scene, this.commons.camera);
    this.composer.addPass(this.renderPass);

    // Creating Post-processing shader for wave and RGB-shift effect.
    const shiftShader = {
      uniforms: {
        tDiffuse: { value: null },      // Default input from previous pass
        uVelocity: { value: 0 },        // Scroll velocity input
        uTime: { value: 0 },            // Elapsed time for animated distortion
      },
      vertexShader,
      fragmentShader,
    };

    this.shiftPass = new ShaderPass(shiftShader);
    this.composer.addPass(this.shiftPass);
  }

  /**
   * Resize handler for EffectComposer, called from entry-point.
   */
  onResize() {
    this.composer.setPixelRatio(this.commons.sizes.pixelRatio);
    this.composer.setSize(
      this.commons.sizes.screen.width,
      this.commons.sizes.screen.height
    );
  }

  update() {
    this.shiftPass.uniforms.uTime.value = this.commons.elapsedTime;

    this.composer.render();
  }
}
Since we don’t have our postprocessing shaders created yet, make sure you create placeholder postprocessing.frag and
postprocessing.vert shaders so the imports don’t fail.
Constructor:
Initializes the class by storing the provided scene, grabbing the shared Commons instance, and then calling createComposer()
and createPasses()
.
createComposer():
Sets up the EffectComposer with the correct pixel ratio and canvas size:
EffectComposer wraps the WebGL renderer and allows chaining of multiple render passes.
Sized according to current viewport dimensions and pixel ratio
createPasses():
This method sets up all rendering passes applied to the scene.
RenderPass
: The first pass that simply renders the scene with the main camera as regular.
ShaderPass (shiftPass)
: A custom full-screen shader pass that we’ll create and which will create the RGB shift and wavy distortion
effects.
update():
Method called on every frame. Updates the uTime uniform so we can animate effects over time, and renders the final
post-processed image using composer.render()
Initializing Post-processing
To wire the post-processing system into our existing app, we update our main.ts:
  //main.ts
private postProcessing!: PostProcessing;

//....

constructor() {
  document.addEventListener("DOMContentLoaded", async () => {
    await document.fonts.ready;

    this.commons = Commons.getInstance();
    this.commons.init();

    this.createScene();
    this.createWebGLTexts();
    this.createPostProcessing(); // Creating post-processing
    this.addEventListeners();

    this.update();
  });
}

// ...

private createPostProcessing() {
  this.postProcessing = new PostProcessing({ scene: this.scene });
}

// ...

private update() {
  this.commons.update();

  if (this.texts) {
    this.texts.forEach((el) => el.update());
  }

  // Don't need line below as we're rendering everything using EffectComposer.
  // this.commons.renderer.render(this.scene, this.commons.camera);

  this.postProcessing.update(); // Post-processing class handles rendering of output from now on


  window.requestAnimationFrame(this.update.bind(this));
}


private onResize() {
  this.commons.onResize();

  if (this.texts) {
    this.texts.forEach((el) => el.onResize());
  }

  this.postProcessing.onResize(); // Resize post-processing
}
So in the new update() function, instead of rendering directly from there, we now hand off rendering responsibility to
the PostProcessing class.
Creating Post-processing Shader and Wiring Scroll Velocity
We want to modify the PostProcessing class further, so that we update the postprocessing fragment shader with the
current scroll velocity from Lenis.
For this, I’m adding a new property lerpedVelocity and lerpFactor, which control the smoothed out velocity. The raw
velocity values from lenis can be spiky and sudden, especially with fast scrolling or scroll jumps. If we pass that
raw value directly into a shader, it can cause a really jittery output.
private lerpedVelocity = 0; // Smoothed scroll velocity for post-processing.
private lerpFactor = 0.05; // Controls how quickly lerpedVelocity follows the real velocity

// ...

update() {
    this.shiftPass.uniforms.uTime.value = this.commons.elapsedTime;

  // Reading current velocity form lenis instance.
  const targetVelocity = this.commons.lenis.velocity;

  // We use the lerped velocity as the actual velocity for the shader, just for a smoother experience.
  this.lerpedVelocity +=
    (targetVelocity - this.lerpedVelocity) * this.lerpFactor;

  this.shiftPass.uniforms.uVelocity.value = this.lerpedVelocity;

  this.composer.render();
}
Post-processing Shaders
For the vertex shader, we can keep all things default, we pass the texture coordinates to the fragment shader.
The red channel is offset slightly based on the velocity, creating the RGB shift effect.
// Applying the RGB shift to the wave-distorted coordinates
float r = texture2D(tDiffuse, vec2(waveUv.x, waveUv.y + uVelocity * 0.0005)).r;
vec2 gb = texture2D(tDiffuse, waveUv).gb;

gl_FragColor = vec4(r, gb, r);
This will create a subtle color separation in the final image that shifts according to our scroll velocity.
Finally, we combine red, green, blue, and alpha into the output color.
8. Final Result
And there you have it! We’ve created a responsive text scene, with scroll-triggered mask reveal animations and
wavy/rgb shifted post-processing.
This setup provides a solid, modular foundation for building more advanced WebGL text effects. If you’re curious to explore further, consider adding particles, fluid simulations, audio reactivity, or more complex materials and shaders. If you’re interested in breakdowns of any of these, feel free to reach out on X.