برچسب: WebGL

  • How to Animate WebGL Shaders with GSAP: Ripples, Reveals, and Dynamic Blur Effects

    How to Animate WebGL Shaders with GSAP: Ripples, Reveals, and Dynamic Blur Effects


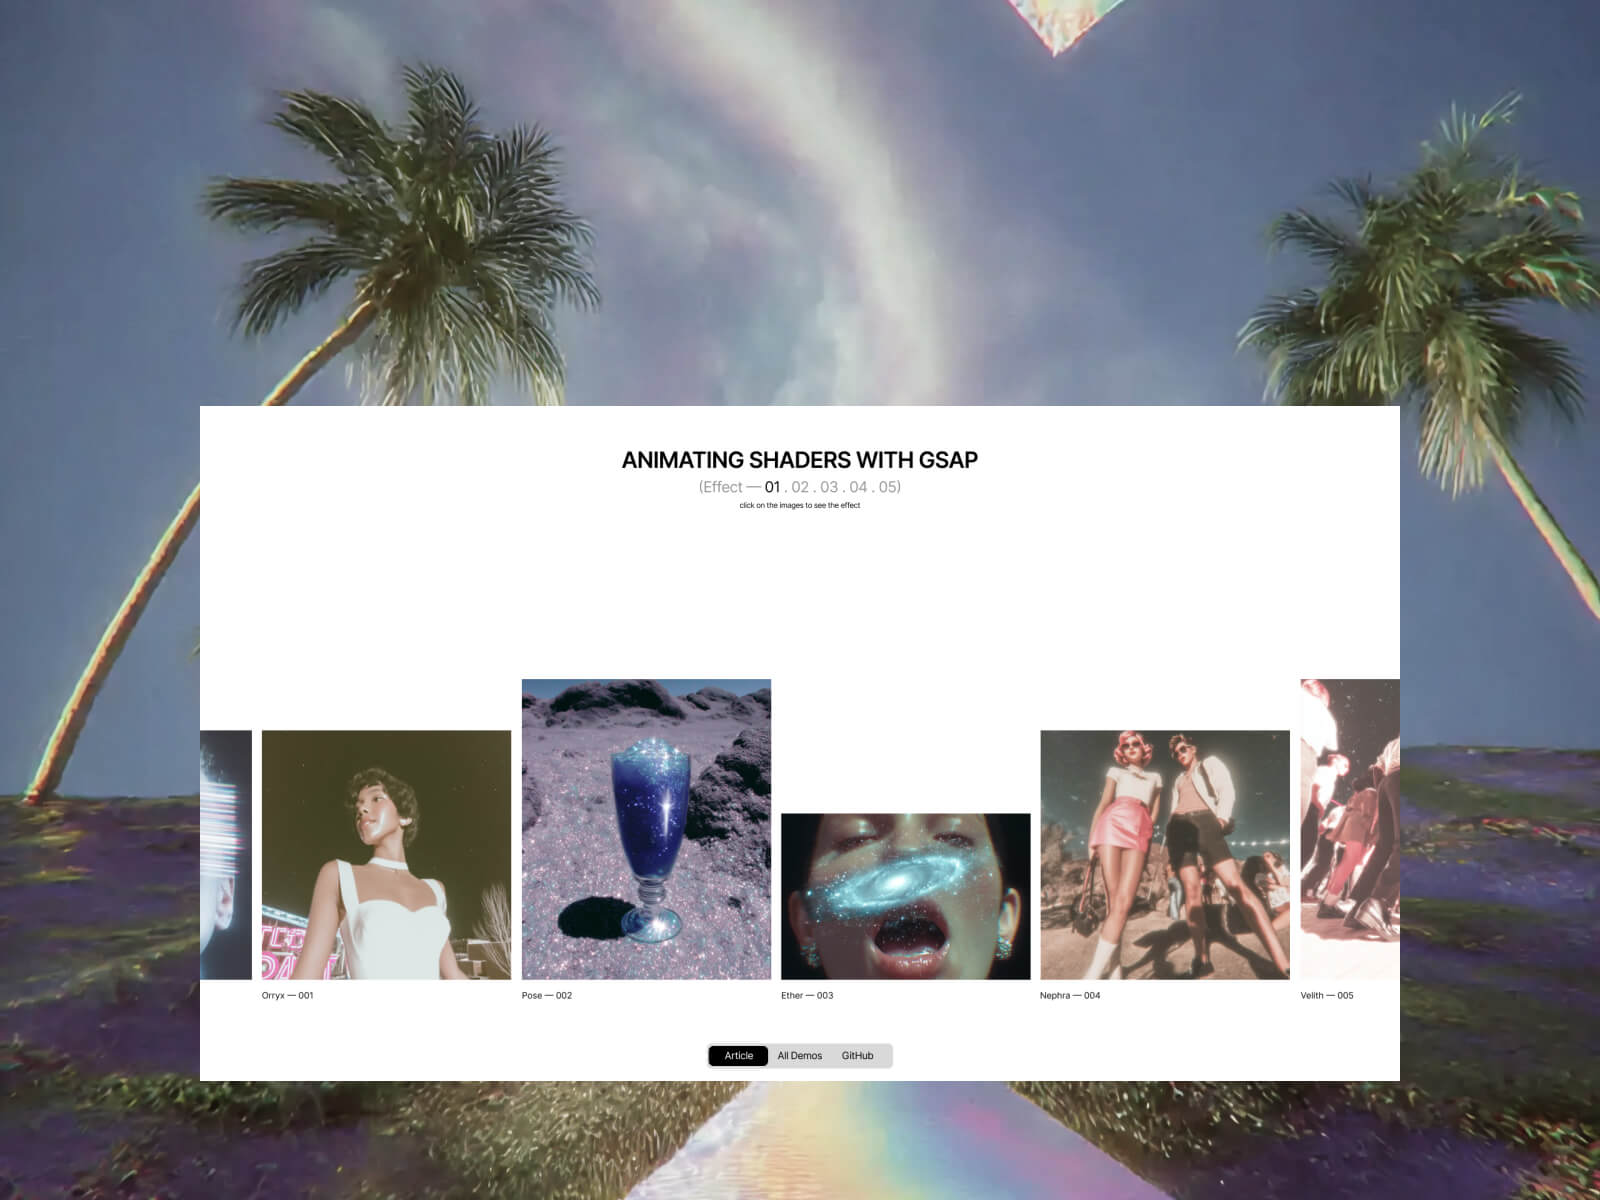
    In this tutorial, we’ll explore how to bring motion and interactivity to your WebGL projects by combining GSAP with custom shaders. Working with the Dev team at Adoratorio Studio, I’ll guide you through four GPU-powered effects, from ripples that react to clicks to dynamic blurs that respond to scroll and drag.

    We’ll start by setting up a simple WebGL scene and syncing it with our HTML layout. From there, we’ll move step by step through more advanced interactions, animating shader uniforms, blending textures, and revealing images through masks, until we turn everything into a scrollable, animated carousel.

    By the end, you’ll understand how to connect GSAP timelines with shader parameters to create fluid, expressive visuals that react in real time and form the foundation for your own immersive web experiences.

    Creating the HTML structure

    As a first step, we will set up the page using HTML.

    We will create a container without specifying its dimensions, allowing it to extend beyond the page width. Then, we will set the main container’s overflow property to hidden, as the page will be later made interactive through the GSAP Draggable and ScrollTrigger functionalities.

    <main>
      <section class="content">
        <div class="content__carousel">
          <div class="content__carousel-inner-static">
            <div class="content__carousel-image">
              <img src="/images/01.webp" alt="" role="presentation">
              <span>Lorem — 001</span>
            </div>
            <div class="content__carousel-image">
              <img src="/images/04.webp" alt="" role="presentation">
              <span>Ipsum — 002</span>
            </div>
            <div class="content__carousel-image">
              <img src="/images/02.webp" alt="" role="presentation">
              <span>Dolor — 003</span>
            </div>
            ...
          </div>
        </div>
      </section>
    </main>

    We’ll style all this and then move on to the next step.

    Sync between HTML and Canvas

    We can now begin integrating Three.js into our project by creating a Stage class responsible for managing all 3D engine logic. Initially, this class will set up a renderer, a scene, and a camera.

    We will pass an HTML node as the first parameter, which will act as the container for our canvas.
    Next, we will update the CSS and the main script to create a full-screen canvas that resizes responsively and renders on every GSAP frame.

    export default class Stage {
      constructor(container) {
        this.container = container;
    
        this.DOMElements = [...this.container.querySelectorAll('img')];
    
        this.renderer = new WebGLRenderer({
          powerPreference: 'high-performance',
          antialias: true,
          alpha: true,
        });
        this.renderer.setPixelRatio(Math.min(1.5, window.devicePixelRatio));
        this.renderer.setSize(window.innerWidth, window.innerHeight);
        this.renderer.domElement.classList.add('content__canvas');
    
        this.container.appendChild(this.renderer.domElement);
    
        this.scene = new Scene();
    
        const { innerWidth: width, innerHeight: height } = window;
        this.camera = new OrthographicCamera(-width / 2, width / 2, height / 2, -height / 2, -1000, 1000);
        this.camera.position.z = 10;
      }
    
      resize() {
        // Update camera props to fit the canvas size
        const { innerWidth: screenWidth, innerHeight: screenHeight } = window;
    
        this.camera.left = -screenWidth / 2;
        this.camera.right = screenWidth / 2;
        this.camera.top = screenHeight / 2;
        this.camera.bottom = -screenHeight / 2;
        this.camera.updateProjectionMatrix();
    
        // Update also planes sizes
        this.DOMElements.forEach((image, index) => {
          const { width: imageWidth, height: imageHeight } = image.getBoundingClientRect();
          this.scene.children[index].scale.set(imageWidth, imageHeight, 1);
        });
    
        // Update the render using the window sizes
        this.renderer.setSize(screenWidth, screenHeight);
      }
    
      render() {
        this.renderer.render(this.scene, this.camera);
      }
    }

    Back in our main.js file, we’ll first handle the stage’s resize event. After that, we’ll synchronize the renderer’s requestAnimationFrame (RAF) with GSAP by using gsap.ticker.add, passing the stage’s render function as the callback.

    // Update resize with the stage resize
    function resize() {
      ...
      stage.resize();
    }
    
    // Add render cycle to gsap ticker
    gsap.ticker.add(stage.render.bind(stage));
    
    <style>
    .content__canvas {
      position: absolute;
      top: 0;
      left: 0;
      width: 100vw;
      height: 100svh;
    
      z-index: 2;
      pointer-events: none;
    }
    </style>

    It’s now time to load all the images included in the HTML. For each image, we will create a plane and add it to the scene. To achieve this, we’ll update the class by adding two new methods:

    setUpPlanes() {
      this.DOMElements.forEach((image) => {
        this.scene.add(this.generatePlane(image));
      });
    }
    
    generatePlane(image, ) {
      const loader = new TextureLoader();
      const texture = loader.load(image.src);
    
      texture.colorSpace = SRGBColorSpace;
      const plane = new Mesh(
        new PlaneGeometry(1, 1),
        new MeshStandardMaterial(),
      );
    
      return plane;
    }

    We can then call setUpPlanes() within the constructor of our Stage class.
    The result should resemble the following, depending on the camera’s z-position or the planes’ placement—both of which can be adjusted to fit our specific needs.

    The next step is to position the planes precisely to correspond with the location of their associated images and update their positions on each frame. To achieve this, we will implement a utility function that converts screen space (CSS pixels) into world space, leveraging the Orthographic Camera, which is already aligned with the screen.

    const getWorldPositionFromDOM = (element, camera) => {
      const rect = element.getBoundingClientRect();
    
      const xNDC = (rect.left + rect.width / 2) / window.innerWidth * 2 - 1;
      const yNDC = -((rect.top + rect.height / 2) / window.innerHeight * 2 - 1);
    
      const xWorld = xNDC * (camera.right - camera.left) / 2;
      const yWorld = yNDC * (camera.top - camera.bottom) / 2;
    
      return new Vector3(xWorld, yWorld, 0);
    };
    render() {
      this.renderer.render(this.scene, this.camera);
    
      // For each plane and each image update the position of the plane to match the DOM element position on page
      this.DOMElements.forEach((image, index) => {
         this.scene.children[index].position.copy(getWorldPositionFromDOM(image, this.camera, this.renderer));
      });
    }

    By hiding the original DOM carousel, we can now display only the images as planes within the canvas. Create a simple class extending ShaderMaterial and use it in place of MeshStandardMaterial for the planes.

    const plane = new Mesh(
      new PlaneGeometry(1, 1),
      new PlanesMaterial(),
    );
    ...
    
    import { ShaderMaterial } from 'three';
    import baseVertex from './base.vert?raw';
    import baseFragment from './base.frag?raw';
    
    export default class PlanesMaterial extends ShaderMaterial {
      constructor() {
        super({
          vertexShader: baseVertex,
          fragmentShader: baseFragment,
        });
      }
    }
    
    // base.vert
    varying vec2 vUv;
    
    void main() {
      gl_Position = projectionMatrix * modelViewMatrix * vec4(position, 1.0);
      vUv = uv;
    }
    
    // base.frag
    varying vec2 vUv;
    
    void main() {
      gl_FragColor = vec4(vUv.x, vUv.y, 0.0, 1.0);
    }

    We can then replace the shader output with texture sampling based on the UV coordinates, passing the texture to the material and shaders as a uniform.

    ...
    const plane = new Mesh(
      new PlaneGeometry(1, 1),
      new PlanesMaterial(texture),
    );
    ...
    
    export default class PlanesMaterial extends ShaderMaterial {
      constructor(texture) {
        super({
          vertexShader: baseVertex,
          fragmentShader: baseFragment,
          uniforms: {
            uTexture: { value: texture },
          },
        });
      }
    }
    
    // base.frag
    varying vec2 vUv;
    
    uniform sampler2D uTexture;
    
    void main() {
      vec4 diffuse = texture2D(uTexture, vUv);
      gl_FragColor = diffuse;
    }

    Click on the images for a ripple and coloring effect

    This steps breaks down the creation of an interactive grayscale transition effect, emphasizing the relationship between JavaScript (using GSAP) and GLSL shaders.

    Step 1: Instant Color/Grayscale Toggle

    Let’s start with the simplest version: clicking the image makes it instantly switch between color and grayscale.

    The JavaScript (GSAP)

    At this stage, GSAP’s role is to act as a simple “on/off” switch so let’s create a GSAP Observer to monitor the mouse click interaction:

    this.observer = Observer.create({
      target: document.querySelector('.content__carousel'),
      type: 'touch,pointer',
      onClick: e => this.onClick(e),
    });

    And here come the following steps:

    • Click Detection: We use an Observer to detect a click on our plane.
    • State Management: A boolean flag, isBw (is Black and White), is toggled on each click.
    • Shader Update: We use gsap.set() to instantly change a uniform in our shader. We’ll call it uGrayscaleProgress.
      • If isBw is trueuGrayscaleProgress becomes 1.0.
      • If isBw is falseuGrayscaleProgress becomes 0.0.
    onClick(e) {
      if (intersection) {
        const { material, userData } = intersection.object;
    
        userData.isBw = !userData.isBw;
    
        gsap.set(material.uniforms.uGrayscaleProgress, {
          value: userData.isBw ? 1.0 : 0.0
        });
      }
    }

    The Shader (GLSL)

    The fragment shader is very simple. It receives uGrayscaleProgress and uses it as a switch.

    uniform sampler2D uTexture;
    uniform float uGrayscaleProgress; // Our "switch" (0.0 or 1.0)
    varying vec2 vUv;
    
    vec3 toGrayscale(vec3 color) {
      float gray = dot(color, vec3(0.299, 0.587, 0.114));
      return vec3(gray);
    }
    
    void main() {
      vec3 originalColor = texture2D(uTexture, vUv).rgb;
      vec3 grayscaleColor = toGrayscale(originalColor);
      
       vec3 finalColor = mix(originalColor, grayscaleColor, uGrayscaleProgress);
       gl_FragColor = vec4(finalColor, 1.0);
    }

    Step 2: Animated Circular Reveal

    An instant switch is boring. Let’s make the transition a smooth, circular reveal that expands from the center.

    The JavaScript (GSAP)

    GSAP’s role now changes from a switch to an animator.
    Instead of gsap.set(), we use gsap.to() to animate uGrayscaleProgress from 0 to 1 (or 1 to 0) over a set duration. This sends a continuous stream of values (0.0, 0.01, 0.02, …) to the shader.

    gsap.to(material.uniforms.uGrayscaleProgress, {
      value: userData.isBw ? 1 : 0,
      duration: 1.5,
      ease: 'power2.inOut'
    });

    The Shader (GLSL)

    The shader now uses the animated uGrayscaleProgress to define the radius of a circle.

    void main() {
      float dist = distance(vUv, vec2(0.5));
      
      // 2. Create a circular mask.
      float mask = smoothstep(uGrayscaleProgress - 0.1, uGrayscaleProgress, dist);
    
      // 3. Mix the colors based on the mask's value for each pixel.
      vec3 finalColor = mix(originalColor, grayscaleColor, mask);
      gl_FragColor = vec4(finalColor, 1.0);
    }

    How smoothstep works here: Pixels where dist is less than uGrayscaleProgress – 0.1 get a mask value of 0. Pixels where dist is greater than uGrayscaleProgress get a value of 1. In between, it’s a smooth transition, creating the soft edge.

    Step 3: Originating from the Mouse Click

    The effect is much more engaging if it starts from the exact point of the click.

    The JavaScript (GSAP)

    We need to tell the shader where the click happened.

    • Raycasting: We use a Raycaster to find the precise (u, v) texture coordinate of the click on the mesh.
    • uMouse Uniform: We add a uniform vec2 uMouse to our material.
    • GSAP Timeline: Before the animation starts, we use .set() on our GSAP timeline to update the uMouse uniform with the intersection.uv coordinates.
    if (intersection) {
      const { material, userData } = intersection.object;
    
      material.uniforms.uMouse.value = intersection.uv;
    
      gsap.to(material.uniforms.uGrayscaleProgress, {
          value: userData.isBw ? 1 : 0
      });
    }

    The Shader (GLSL)

    We simply replace the hardcoded center with our new uMouse uniform.

    ...
    uniform vec2 uMouse; // The (u,v) coordinates from the click
    ...
    
    void main() {
    ...
    
    // 1. Calculate distance from the MOUSE CLICK, not the center.
    float dist = distance(vUv, uMouse);
    }

    Important Detail: To ensure the circular reveal always covers the entire plane, even when clicking in a corner, we calculate the maximum possible distance from the click point to any of the four corners (getMaxDistFromCorners) and normalize our dist value with it: dist / maxDist.

    This guarantees the animation completes fully.

    Step 4: Adding the Final Ripple Effect

    The last step is to add the 3D ripple effect that deforms the plane. This requires modifying the vertex shader.

    The JavaScript (GSAP)

    We need one more animated uniform to control the ripple’s lifecycle.

    1. uRippleProgress Uniform: We add a uniform float uRippleProgress.
    2. GSAP Keyframes: In the same timeline, we animate uRippleProgress from 0 to 1 and back to 0. This makes the wave rise up and then settle back down.
    gsap.timeline({ defaults: { duration: 1.5, ease: 'power3.inOut' } })
      .set(material.uniforms.uMouse, { value: intersection.uv }, 0)
      .to(material.uniforms.uGrayscaleProgress, { value: 1 }, 0)
      .to(material.uniforms.uRippleProgress, {
          keyframes: { value: [0, 1, 0] } // Rise and fall
      }, 0)

    The Shaders (GLSL)

    High-Poly Geometry: To see a smooth deformation, the PlaneGeometry in Three.js must be created with many segments (e.g., new PlaneGeometry(1, 1, 50, 50)). This gives the vertex shader more points to manipulate.

    generatePlane(image, ) {
      ...
      const plane = new Mesh(
        new PlaneGeometry(1, 1, 50, 50),
        new PlanesMaterial(texture),
      );
    
      return plane;
    }

    Vertex Shader: This shader now calculates the wave and moves the vertices.

    uniform float uRippleProgress;
    uniform vec2 uMouse;
    varying float vRipple; // Pass the ripple intensity to the fragment shader
    
    void main() {
      vec3 pos = position;
      float dist = distance(uv, uMouse);
    
      float ripple = sin(-PI * 10.0 * (dist - uTime * 0.1));
      ripple *= uRippleProgress;
    
      pos.y += ripple * 0.1;
    
      vRipple = ripple;
      gl_Position = projectionMatrix * modelViewMatrix * vec4(pos, 1.0);
    }

    Fragment Shader: We can use the ripple intensity to add a final touch, like making the wave crests brighter.

    varying float vRipple; // Received from vertex shader
    
    void main() {
      // ... (all the color and mask logic from before)
      vec3 color = mix(color1, color2, mask);
    
      // Add a highlight based on the wave's height
      color += vRipple * 2.0;
    
      gl_FragColor = vec4(color, diffuse.a);
    }

    By layering these techniques, we create a rich, interactive effect where JavaScript and GSAP act as the puppet master, telling the shaders what to do, while the shaders handle the heavy lifting of drawing it beautifully and efficiently on the GPU.

    Step 5: Reverse effect on previous tile

    As a final step, we set up a reverse animation of the current tile when a new tile is clicked. Let’s start by creating the reset animation that reverses the animation of the uniforms:

    resetMaterial(object) {
      // Reset all shader uniforms to default values
      gsap.timeline({
        defaults: { duration: 1, ease: 'power2.out' },
    
        onUpdate() {
          object.material.uniforms.uTime.value += 0.1;
        },
        onComplete() {       
          object.userData.isBw = false;
        }
      })
      .set(object.material.uniforms.uMouse, { value: { x: 0.5, y: 0.5} }, 0)
      .set(object.material.uniforms.uDirection, { value: 1.0 }, 0)
      .fromTo(object.material.uniforms.uGrayscaleProgress, { value: 1 }, { value: 0 }, 0)
      .to(object.material.uniforms.uRippleProgress, { keyframes: { value: [0, 1, 0] } }, 0);
    }

    Now, at each click, we need to set the current tile so that it’s saved in the constructor, allowing us to pass the current material to the reset animation. Let’s modify the onClick function like this and analyze it step by step:

    if (this.activeObject && intersection.object !== this.activeObject && this.activeObject.userData.isBw) {
      this.resetMaterial(this.activeObject)
      
      // Stops timeline if active
      if (this.activeObject.userData.tl?.isActive()) this.activeObject.userData.tl.kill();
      
      // Cleans timeline
      this.activeObject.userData.tl = null;
    }
    
    // Setup active object
    this.activeObject = intersection.object;
    • If this.activeObject exists (initially set to null in the constructor), we proceed to reset it to its initial black and white state
    • If there’s a current animation on the active tile, we use GSAP’s kill method to avoid conflicts and overlapping animations
    • We reset userData.tl to null (it will be assigned a new timeline value if the tile is clicked again)
    • We then set the value of this.activeObject to the object selected via the Raycaster

    In this way, we’ll have a double ripple animation: one on the clicked tile, which will be colored, and one on the previously active tile, which will be reset to its original black and white state.

    Texture reveal mask effect

    In this tutorial, we will create an interactive effect that blends two images on a plane when the user hovers or touches it.

    Step 1: Setting Up the Planes

    Unlike the previous examples, in this case we need different uniforms for the planes, as we are going to create a mix between a visible front texture and another texture that will be revealed through a mask that “cuts through” the first texture.

    Let’s start by modifying the index.html file, adding a data attribute to all images where we’ll specify the underlying texture:

    <img src="/images/front-texture.webp" alt="" role="presentation" data-back="/images/back-texture.webp">

    Then, inside our Stage.js, we’ll modify the generatePlane method, which is used to create the planes in WebGL. We’ll start by retrieving the second texture to load via the data attribute, and we’ll pass the plane material the parameters with both textures and the aspect ratio of the images:

    generatePlane(image) {
      const loader = new TextureLoader();
      const texture = loader.load(image.src);
      const textureBack = loader.load(image.dataset.back);
    
      texture.colorSpace = SRGBColorSpace;
      textureBack.colorSpace = SRGBColorSpace;
    
      const { width, height } = image.getBoundingClientRect();
    
      const plane = new Mesh(
        new PlaneGeometry(1, 1),
        new PlanesMaterial(texture, textureBack, height / width),
      );
    
      return plane;
    }
    

    Step 2: Material Setup

    import { ShaderMaterial, Vector2 } from 'three';
    import baseVertex from './base.vert?raw';
    import baseFragment from './base.frag?raw';
    
    export default class PlanesMaterial extends ShaderMaterial {
      constructor(texture, textureBack, imageRatio) {
        super({
          vertexShader: baseVertex,
          fragmentShader: baseFragment,
          uniforms: {
            uTexture: { value: texture },
            uTextureBack: { value: textureBack },
            uMixFactor: { value: 0.0 },
            uAspect: { value: imageRatio },
            uMouse: { value: new Vector2(0.5, 0.5) },
          },
        });
      }
    }
    

    Let’s quickly analyze the uniforms passed to the material:

    • uTexture and uTextureBack are the two textures shown on the front and through the mask
    • uMixFactor represents the blending value between the two textures inside the mask
    • uAspect is the aspect ratio of the images used to calculate a circular mask
    • uMouse represents the mouse coordinates, updated to move the mask within the plane

    Step 3: The Javascript (GSAP)

    this.observer = Observer.create({
      target: document.querySelector('.content__carousel'),
      type: 'touch,pointer',
      onMove: e => this.onMove(e),
      onHoverEnd: () => this.hoverOut(),
    });

    Quickly, let’s create a GSAP Observer to monitor the mouse movement, passing two functions:

    • onMove checks, using the Raycaster, whether a plane is being hit in order to manage the opening of the reveal mask
    • onHoverEnd is triggered when the cursor leaves the target area, so we’ll use this method to reset the reveal mask’s expansion uniform value back to 0.0

    Let’s go into more detail on the onMove function to explain how it works:

    onMove(e) {
      const normCoords = {
        x: (e.x / window.innerWidth) * 2 - 1,
        y: -(e.y / window.innerHeight) * 2 + 1,
      };
    
      this.raycaster.setFromCamera(normCoords, this.camera);
    
      const [intersection] = this.raycaster.intersectObjects(this.scene.children);
    
      if (intersection) {
        this.intersected = intersection.object;
        const { material } = intersection.object;
    
        gsap.timeline()
          .set(material.uniforms.uMouse, { value: intersection.uv }, 0)
          .to(material.uniforms.uMixFactor, { value: 1.0, duration: 3, ease: 'power3.out' }, 0);
      } else {
        this.hoverOut();
      }
    }

    In the onMove method, the first step is to normalize the mouse coordinates from -1 to 1 to allow the Raycaster to work with the correct coordinates.

    On each frame, the Raycaster is then updated to check if any object in the scene is intersected. If there is an intersection, the code saves the hit object in a variable.

    When an intersection occurs, we proceed to work on the animation of the shader uniforms.

    Specifically, we use GSAP’s set method to update the mouse position in uMouse, and then animate the uMixFactor variable from 0.0 to 1.0 to open the reveal mask and show the underlying texture.

    If the Raycaster doesn’t find any object under the pointer, the hoverOut method is called.

    hoverOut() {
        if (!this.intersected) return;
    
        // Stop any running tweens on the uMixFactor uniform
        gsap.killTweensOf(this.intersected.material.uniforms.uMixFactor);
    
        // Animate uMixFactor back to 0 smoothly
        gsap.to(this.intersected.material.uniforms.uMixFactor, { value: 0.0, duration: 0.5, ease: 'power3.out });
    
        // Clear the intersected reference
        this.intersected = null;
      }

    This method handles closing the reveal mask once the cursor leaves the plane.

    First, we rely on the killAllTweensOf method to prevent conflicts or overlaps between the mask’s opening and closing animations by stopping all ongoing animations on the uMixFactor .

    Then, we animate the mask’s closing by setting the uMixFactor uniform back to 0.0 and reset the variable that was tracking the currently highlighted object.

    Step 4: The Shader (GLSL)

    uniform sampler2D uTexture;
    uniform sampler2D uTextureBack;
    uniform float uMixFactor;
    uniform vec2 uMouse;
    uniform float uAspect;
    
    varying vec2 vUv;
    
    void main() {
        vec2 correctedUv = vec2(vUv.x, (vUv.y - 0.5) * uAspect + 0.5);
        vec2 correctedMouse = vec2(uMouse.x, (uMouse.y - 0.5) * uAspect + 0.5);
        
        float distance = length(correctedUv - correctedMouse);
        float influence = 1.0 - smoothstep(0.0, 0.5, distance);
    
        float finalMix = uMixFactor * influence;
    
        vec4 textureFront = texture2D(uTexture, vUv);
        vec4 textureBack = texture2D(uTextureBack, vUv);
    
        vec4 finalColor = mix(textureFront, textureBack, finalMix);
    
        gl_FragColor = finalColor;
    }

    Inside the main() function, it starts by normalizing the UV coordinates and the mouse position relative to the image’s aspect ratio. This correction is applied because we are using non-square images, so the vertical coordinates must be adjusted to keep the mask’s proportions correct and ensure it remains circular. Therefore, the vUv.y and uMouse.y coordinates are modified so they are “scaled” vertically according to the aspect ratio.

    At this point, the distance is calculated between the current pixel (correctedUv) and the mouse position (correctedMouse). This distance is a numeric value that indicates how close or far the pixel is from the mouse center on the surface.

    We then move on to the actual creation of the mask. The uniform influence must vary from 1 at the cursor’s center to 0 as it moves away from the center. We use the smoothstep function to recreate this effect and obtain a soft, gradual transition between two values, so the effect naturally fades.

    The final value for the mix between the two textures, that is the finalMix uniform, is given by the product of the global factor uMixFactor (which is a static numeric value passed to the shader) and this local influence value. So the closer a pixel is to the mouse position, the more its color will be influenced by the second texture, uTextureBack.

    The last part is the actual blending: the two colors are mixed using the mix() function, which creates a linear interpolation between the two textures based on the value of finalMix. When finalMix is 0, only the front texture is visible.

    When it is 1, only the background texture is visible. Intermediate values create a gradual blend between the two textures.

    Click & Hold mask reveal effect

    This document breaks down the creation of an interactive effect that transitions an image from color to grayscale. The effect starts from the user’s click, expanding outwards with a ripple distortion.

    Step 1: The “Move” (Hover) Effect

    In this step, we’ll create an effect where an image transitions to another as the user hovers their mouse over it. The transition will originate from the pointer’s position and expand outwards.

    The JavaScript (GSAP Observer for onMove)

    GSAP’s Observer plugin is the perfect tool for tracking pointer movements without the boilerplate of traditional event listeners.

    • Setup Observer: We create an Observer instance that targets our main container and listens for touch and pointer events. We only need the onMove and onHoverEnd callbacks.
    • onMove(e) Logic:
      When the pointer moves, we use a Raycaster to determine if it’s over one of our interactive images.
      • If an object is intersected, we store it in this.intersected.
      • We then use a GSAP Timeline to animate the shader’s uniforms.
      • uMouse: We instantly set this vec2 uniform to the pointer’s UV coordinate on the image. This tells the shader where the effect should originate.
      • uMixFactor: We animate this float uniform from 0 to 1. This uniform will control the blend between the two textures in the shader.
    • onHoverEnd() Logic:
      • When the pointer leaves the object, Observer calls this function.
      • We kill any ongoing animations on uMixFactor to prevent conflicts.
      • We animate uMixFactor back to 0, reversing the effect.

    Code Example: the “Move” effect

    This code shows how Observer is configured to handle the hover interaction.

    import { gsap } from 'gsap';
    import { Observer } from 'gsap/Observer';
    import { Raycaster } from 'three';
    
    gsap.registerPlugin(Observer);
    
    export default class Effect {
      constructor(scene, camera) {
        this.scene = scene;
        this.camera = camera;
        this.intersected = null;
        this.raycaster = new Raycaster();
    
    	// 1. Create the Observer
    	this.observer = Observer.create({
          target: document.querySelector('.content__carousel'),
          type: 'touch,pointer',
          onMove: e => this.onMove(e),
          onHoverEnd: () => this.hoverOut(), // Called when the pointer leaves the target
        });
      }
    
      hoverOut() {
        if (!this.intersected) return;
    
    	// 3. Animate the effect out
        gsap.killTweensOf(this.intersected.material.uniforms.uMixFactor);
        gsap.to(this.intersected.material.uniforms.uMixFactor, {
          value: 0.0,
          duration: 0.5,
          ease: 'power3.out'
        });
    
        this.intersected = null;
      }
    
      onMove(e) {
    	// ... (Raycaster logic to find intersection)
    	const [intersection] = this.raycaster.intersectObjects(this.scene.children);
    
        if (intersection) {
          this.intersected = intersection.object;
          const { material } = intersection.object;
    
    	  // 2. Animate the uniforms on hover
          gsap.timeline()
            .set(material.uniforms.uMouse, { value: intersection.uv }, 0) // Set origin point
            .to(material.uniforms.uMixFactor, { // Animate the blendvalue: 1.0,
              duration: 3,
              ease: 'power3.out'
            }, 0);
        } else {
          this.hoverOut(); // Reset if not hovering over anything
        }
      }
    }

    The Shader (GLSL)

    The fragment shader receives the uniforms animated by GSAP and uses them to draw the effect.

    • uMouse: Used to calculate the distance of each pixel from the pointer.
    • uMixFactor: Used as the interpolation value in a mix() function. As it animates from 0 to 1, the shader smoothly blends from textureFront to textureBack.
    • smoothstep(): We use this function to create a circular mask that expands from the uMouse position. The radius of this circle is controlled by uMixFactor.
    uniform sampler2D uTexture; // Front image
    uniform sampler2D uTextureBack; // Back image
    uniform float uMixFactor; // Animated by GSAP (0 to 1)
    uniform vec2 uMouse; // Set by GSAP on move
    
    // ...
    
    void main() {
      // ... (code to correct for aspect ratio)
    
      // 1. Calculate distance of the current pixel from the mouse
      float distance = length(correctedUv - correctedMouse);
    
      // 2. Create a circular mask that expands as uMixFactor increases
      float influence = 1.0 - smoothstep(0.0, 0.5, distance);
      float finalMix = uMixFactor * influence;
    
      // 3. Read colors from both textures
      vec4 textureFront = texture2D(uTexture, vUv);
      vec4 textureBack = texture2D(uTextureBack, vUv);
    
      // 4. Mix the two textures based on the animated value
      vec4 finalColor = mix(textureFront, textureBack, finalMix);
    	
      gl_FragColor = finalColor;
    }

    Step 2: The “Click & Hold” Effect

    Now, let’s build a more engaging interaction. The effect will start when the user presses down, “charge up” while they hold, and either complete or reverse when they release.

    The JavaScript (GSAP)

    Observer makes this complex interaction straightforward by providing clear callbacks for each state.

    • Setup Observer: This time, we configure Observer to use onPressonMove, and onRelease.
    • onPress(e):
      • When the user presses down, we find the intersected object and store it in this.active.
      • We then call onActiveEnter(), which starts a GSAP timeline for the “charging” animation.
    • onActiveEnter():
      • This function defines the multi-stage animation. We use await with a GSAP tween to create a sequence.
      • First, it animates uGrayscaleProgress to a midpoint (e.g., 0.35) and holds it. This is the “hold” part of the interaction.
      • If the user continues to hold, a second tween completes the animation, transitioning uGrayscaleProgress to 1.0.
      • An onComplete callback then resets the state, preparing for the next interaction.
    • onRelease():
      • If the user releases the pointer before the animation completes, this function is called.
      • It calls onActiveLeve(), which kills the “charging” animation and animates uGrayscaleProgress back to 0, effectively reversing the effect.
    • onMove(e):
      • This is still used to continuously update the uMouse uniform, so the shader’s noise effect tracks the pointer even during the hold.
      • Crucially, if the pointer moves off the object, we call onRelease() to cancel the interaction.

    Code Example: Click & Hold

    This code demonstrates the press, hold, and release logic managed by Observer.

    import { gsap } from 'gsap';
    import { Observer } from 'gsap/Observer';
    
    // ...
    
    export default class Effect {
      constructor(scene, camera) {
    	// ...
    		
        this.active = null; // Currently active (pressed) object
    	this.raycaster = new Raycaster();
    	
    	// 1. Create the Observer for press, move, and release
    	this.observer = Observer.create({
    	  target: document.querySelector('.content__carousel'),
    	  type: 'touch,pointer',
          onPress: e => this.onPress(e),
          onMove: e => this.onMove(e),
    	  onRelease: () => this.onRelease(),
    	});
    	
    	// Continuously update uTime for the procedural effect
    	gsap.ticker.add(() => {
    	  if (this.active) {
    	    this.active.material.uniforms.uTime.value += 0.1;
    	  }
    	});
      }
    
      // 3. The "charging" animation
      async onActiveEnter() {
        gsap.killTweensOf(this.active.material.uniforms.uGrayscaleProgress);
    
        // First part of the animation (the "hold" phase)
    	await gsap.to(this.active.material.uniforms.uGrayscaleProgress, {
          value: 0.35,
          duration: 0.5,
        });
    
    	// Second part, completes after the hold
        gsap.to(this.active.material.uniforms.uGrayscaleProgress, {
          value: 1,
          duration: 0.5,
          delay: 0.12,
          ease: 'power2.in',
          onComplete: () => {/* ... reset state ... */ },
        });
      }
    
      // 4. Reverses the animation on early release
      onActiveLeve(mesh) {
        gsap.killTweensOf(mesh.material.uniforms.uGrayscaleProgress);
        gsap.to(mesh.material.uniforms.uGrayscaleProgress, {
          value: 0,
          onUpdate: () => {
            mesh.material.uniforms.uTime.value += 0.1;
          },
        });
      }
    
      // ... (getIntersection logic) ...
    	
      // 2. Handle the initial press
      onPress(e) {
        const intersection = this.getIntersection(e);
    
        if (intersection) {
          this.active = intersection.object;
          this.onActiveEnter(this.active); // Start the animation
        }
      }
    
      onRelease() {
        if (this.active) {
          const prevActive = this.active;
          this.active = null;
          this.onActiveLeve(prevActive); // Reverse the animation
        }
      }
    
      onMove(e) {
    	// ... (getIntersection logic) ...
    		
    	if (intersection) {
    	  // 5. Keep uMouse updated while holding
    	  const { material } = intersection.object;
          gsap.set(material.uniforms.uMouse, { value: intersection.uv });
        } else {
          this.onRelease(); // Cancel if pointer leaves
        }
      }
    }

    The Shader (GLSL)

    The fragment shader for this effect is more complex. It uses the animated uniforms to create a distorted, noisy reveal.

    • uGrayscaleProgress: This is the main driver, animated by GSAP. It controls both the radius of the circular mask and the strength of a “liquid” distortion effect.
    • uTime: This is continuously updated by gsap.ticker as long as the user is pressing. It’s used to add movement to the noise, making the effect feel alive and dynamic.
    • noise() function: A standard GLSL noise function generates procedural, organic patterns. We use this to distort both the shape of the circular mask and the image texture coordinates (UVs).
    // ... (uniforms and helper functions)
    
    void main() {
      // 1. Generate a noise value that changes over time
      float noisy = (noise(vUv * 25.0 + uTime * 0.5) - 0.5) * 0.05;
    
      // 2. Create a distortion that pulses using the main progress animation
      float distortionStrength = sin(uGrayscaleProgress * PI) * 0.5;
      vec2 distortedUv = vUv + vec2(noisy) * distortionStrength;
    
      // 3. Read the texture using the distorted coordinates for a liquid effect
      vec4 diffuse = texture2D(uTexture, distortedUv);
      // ... (grayscale logic)
    	
      // 4. Calculate distance from the mouse, but add noise to it
      float dist = distance(vUv, uMouse);
      float distortedDist = dist + noisy;
    
      // 5. Create the circular mask using the distorted distance and progress
      float maxDist = getMaxDistFromCorners(uMouse);
      float mask = smoothstep(uGrayscaleProgress - 0.1, uGrayscaleProgress, distortedDist / maxDist);
    
      // 6. Mix between the original and grayscale colors
      vec3 color = mix(color1, color2, mask);
    
      gl_FragColor = vec4(color, diffuse.a);
    }

    This shader combines noise-based distortion, smooth circular masking, and real-time uniform updates to create a liquid, organic transition that radiates from the click position. As GSAP animates the shader’s progress and time values, the effect feels alive and tactile — a perfect example of how animation logic in JavaScript can drive complex visual behavior directly on the GPU.

    Dynamic blur effect carousel

    Step 1: Create the carousel

    In this final demo, we will create an additional implementation, turning the image grid into a scrollable carousel that can be navigated both by dragging and scrolling.

    First we will implement the Draggable plugin by registering it and targeting the appropriate <div>
    with the desired configuration. Make sure to handle boundary constraints and update them accordingly when the window is resized.

    const carouselInnerRef = document.querySelector('.content__carousel-inner');
    const draggable = new Draggable(carouselInnerRef, {
      type: 'x',
      inertia: true,
      dragResistance: 0.5,
      edgeResistance: 0.5,
      throwResistance: 0.5,
      throwProps: true,
    });
    
    function resize() {
      const innerWidth = carouselInnerRef.scrollWidth;
      const viewportWidth = window.innerWidth;
      maxScroll = Math.abs(Math.min(0, viewportWidth - innerWidth));
    
      draggable.applyBounds({ minX: -maxScroll, maxX: 0 });
    }
    
    window.addEventListener('resize', debounce(resize));

    We ill also link GSAP Draggable to the scroll functionality using the GSAP ScrollTrigger plugin, allowing us to synchronize both scroll and drag behavior within the same container. Let’s explore this in more detail:

    let maxScroll = Math.abs(Math.min(0, window.innerWidth - carouselInnerRef.scrollWidth));
    
    const scrollTriggerInstance = ScrollTrigger.create({
      trigger: carouselWrapper,
      start: 'top top',
      end: `+=${2.5 * maxScroll}`,
      pin: true,
      scrub: 0.05,
      anticipatePin: 1,
      invalidateOnRefresh: true,
    });
    
    ...
    
    resize() {
      ...
      scrollTriggerInstance.refresh();
    }

    Now that ScrollTrigger is configured on the same container, we can focus on synchronizing the scroll position between both plugins, starting from the ScrollTrigger instance:

    onUpdate(e) {
      const x = -maxScroll * e.progress;
    
      gsap.set(carouselInnerRef, { x });
      draggable.x = x;
      draggable.update();
    }

    We then move on to the Draggable instance, which will be updated within both its onDrag and onThrowUpdate callbacks using the scrollPos variable. This variable will serve as the final scroll position for both the window and the ScrollTrigger instance.

    onDragStart() {},
    onDrag() {
      const progress = gsap.utils.normalize(draggable.maxX, draggable.minX, draggable.x);
      scrollPos = scrollTriggerInstance.start + (scrollTriggerInstance.end - scrollTriggerInstance.start) * progress;
      window.scrollTo({ top: scrollPos, behavior: 'instant' });
    
      scrollTriggerInstance.scroll(scrollPos);
    },
    onThrowUpdate() {
      const progress = gsap.utils.normalize(draggable.maxX, draggable.minX, draggable.x);
      scrollPos = scrollTriggerInstance.start + (scrollTriggerInstance.end - scrollTriggerInstance.start) * progress;
      window.scrollTo({ top: scrollPos, behavior: 'instant' });
    },
    onThrowComplete() {
      scrollTriggerInstance.scroll(scrollPos);
    }

    Step 2: Material setup

    export default class PlanesMaterial extends ShaderMaterial {
      constructor(texture) {
        super({
          vertexShader: baseVertex,
          fragmentShader: baseFragment,
          uniforms: {
            uTexture: { value: texture },
            uBlurAmount: { value: 0 },
          },
        });
      }
    }

    Let’s quickly analyze the uniforms passed to the material:

    • uTexture is the base texture rendered on the plane
    • uBlurAmount represents the blur strength based on the distance from the window center

    Step 3: The JavaScript (GSAP)

    constructor(scene, camera) {
      ...
      this.callback = this.scrollUpdateCallback;
      this.centerX = window.innerWidth / 2
      ...
    }

    In the constructor we set up two pieces we’ll use to drive the dynamic blur effect:

    • <strong>this.callback</strong> references the function used inside ScrollTrigger’s onUpdate to refresh the blur amount
    • this.centerX represents the window center on X axes and is updated on each window resize

    Let’s dive into the callback passed to ScrollTrigger:

    scrollUpdateCallback() {
      this.tiles.forEach(tile => {
        const worldPosition = tile.getWorldPosition(new Vector3());
        const vector = worldPosition.clone().project(this.camera);
    
        const screenX = (vector.x * 0.5 + 0.5) * window.innerWidth;
    
        const distance = Math.abs(screenX - this.centerX);
        const maxDistance = window.innerWidth / 2;
    
        const blurAmount = MathUtils.clamp(distance / maxDistance * 5, 0.0, 5.0);
    
        gsap.to(tile.material.uniforms.uBlurAmount, {
          value: Math.round(blurAmount / 2) * 2,
          duration: 1.5,
          ease: 'power3.out'
        });
      });
    }
    

    Let’s dive deeper into this:

    • Vector projects each plane’s 3D position into normalized device coordinates; .project(this.camera) converts to the -1..1 range, then it’s scaled to real screen pixel coordinates.
    • screenX are the 2D screen-space coordinates.
    • distance measures how far the plane is from the screen center.
    • maxDistance is the maximum possible distance from center to corner.
    • blurAmount computes blur strength based on distance from the center; it’s clamped between 0.0 and 5.0 to avoid extreme values that would harm visual quality or shader performance.
    • The <strong>uBlurAmount</strong> uniform is animated toward the computed blurAmount. Rounding to the nearest even number (Math.round(blurAmount / 2) * 2) helps avoid overly frequent tiny changes that could cause visually unstable blur.

    Step 4: The Shader (GLSL)

    uniform sampler2D uTexture;
    uniform float uBlurAmount;
    
    varying vec2 vUv;
    
    vec4 kawaseBlur(sampler2D tex, vec2 uv, float offset) {
      vec2 texelSize = vec2(1.0) / vec2(textureSize(tex, 0));
      
      vec4 color = vec4(0.0);
      
      color += texture2D(tex, uv + vec2(offset, offset) * texelSize);
      color += texture2D(tex, uv + vec2(-offset, offset) * texelSize);
      color += texture2D(tex, uv + vec2(offset, -offset) * texelSize);
      color += texture2D(tex, uv + vec2(-offset, -offset) * texelSize);
      
      return color * 0.25;
    }
    
    vec4 multiPassKawaseBlur(sampler2D tex, vec2 uv, float blurStrength) {
      vec4 baseTexture = texture2D(tex, uv);
      
      vec4 blur1 = kawaseBlur(tex, uv, 1.0 + blurStrength * 1.5);
      vec4 blur2 = kawaseBlur(tex, uv, 2.0 + blurStrength);
      vec4 blur3 = kawaseBlur(tex, uv, 3.0 + blurStrength * 2.5);
      
      float t1 = smoothstep(0.0, 3.0, blurStrength);
      float t2 = smoothstep(3.0, 7.0, blurStrength);
      
      vec4 blurredTexture = mix(blur1, blur2, t1);
      blurredTexture = mix(blurredTexture, blur3, t2);
      
      float mixFactor = smoothstep(0.0, 1.0, blurStrength);
      
      return mix(baseTexture, blurredTexture, mixFactor);
    }
    
    void main() {
      vec4 color = multiPassKawaseBlur(uTexture, vUv, uBlurAmount);
      gl_FragColor = color;
    }
    

    This GLSL fragment receives a texture (uTexture) and a dynamic value (uBlurAmount) indicating how much the plane should be blurred. Based on this value, the shader applies a multi-pass Kawase blur, an efficient technique that simulates a soft, pleasing blur while staying performant.

    Let’s examine the kawaseBlur function, which applies a light blur by sampling 4 points around the current pixel (uv), each offset positively or negatively.

    • texelSize computes the size of one pixel in UV coordinates so offsets refer to “pixel amounts” regardless of texture resolution.
    • Four samples are taken in a diagonal cross pattern around uv.
    • The four colors are averaged (multiplied by 0.25) to return a balanced result.

    This function is a light single pass. To achieve a stronger effect, we apply it multiple times.

    The multiPassKawaseBlur function does exactly that, progressively increasing blur and then blending the passes:

    vec4 blur1 = kawaseBlur(tex, uv, 1.0 + blurStrength * 1.5);
    vec4 blur2 = kawaseBlur(tex, uv, 2.0 + blurStrength);
    vec4 blur3 = kawaseBlur(tex, uv, 3.0 + blurStrength * 2.5);

    This produces a progressive, visually smooth result.

    Next, we blend the different blur levels using two separate smoothsteps:

    float t1 = smoothstep(0.0, 3.0, blurStrength);
    float t2 = smoothstep(3.0, 7.0, blurStrength);
      
    vec4 finalBlur = mix(blur1, blur2, t1);
    finalBlur = mix(finalBlur, blur3, t2);

    The first mix blends blur1 and blur2, while the second blends that result with blur3. The resulting finalBlur represents the Kawase-blurred texture, which we finally mix with the base texture passed via the uniform.

    Finally, we mix the blurred texture with the original texture based on blurStrength, using another smoothstep from 0 to 1:

    float mixFactor = smoothstep(0.0, 1.0, blurStrength);
    return mix(baseTexture, finalBlur, mixFactor);

    Final Words

    Bringing together GSAP’s animation power and the creative freedom of GLSL shaders opens up a whole new layer of interactivity for the web. By animating shader uniforms directly with GSAP, we’re able to blend smooth motion design principles with the raw flexibility of GPU rendering — crafting experiences that feel alive, fluid, and tactile.

    From simple grayscale transitions to ripple-based deformations and dynamic blur effects, every step in this tutorial demonstrates how motion and graphics can respond naturally to user input, creating interfaces that invite exploration rather than just observation.

    While these techniques push the boundaries of front-end development, they also highlight a growing trend: the convergence of design, code, and real-time rendering.

    So, take these examples, remix them, and make them your own — because the most exciting part of working with GSAP and shaders is that the canvas is quite literally infinite.

    Source link

  • Ponpon Mania: How WebGL and GSAP Bring a Comic Sheep’s Dream to Life

    Ponpon Mania: How WebGL and GSAP Bring a Comic Sheep’s Dream to Life


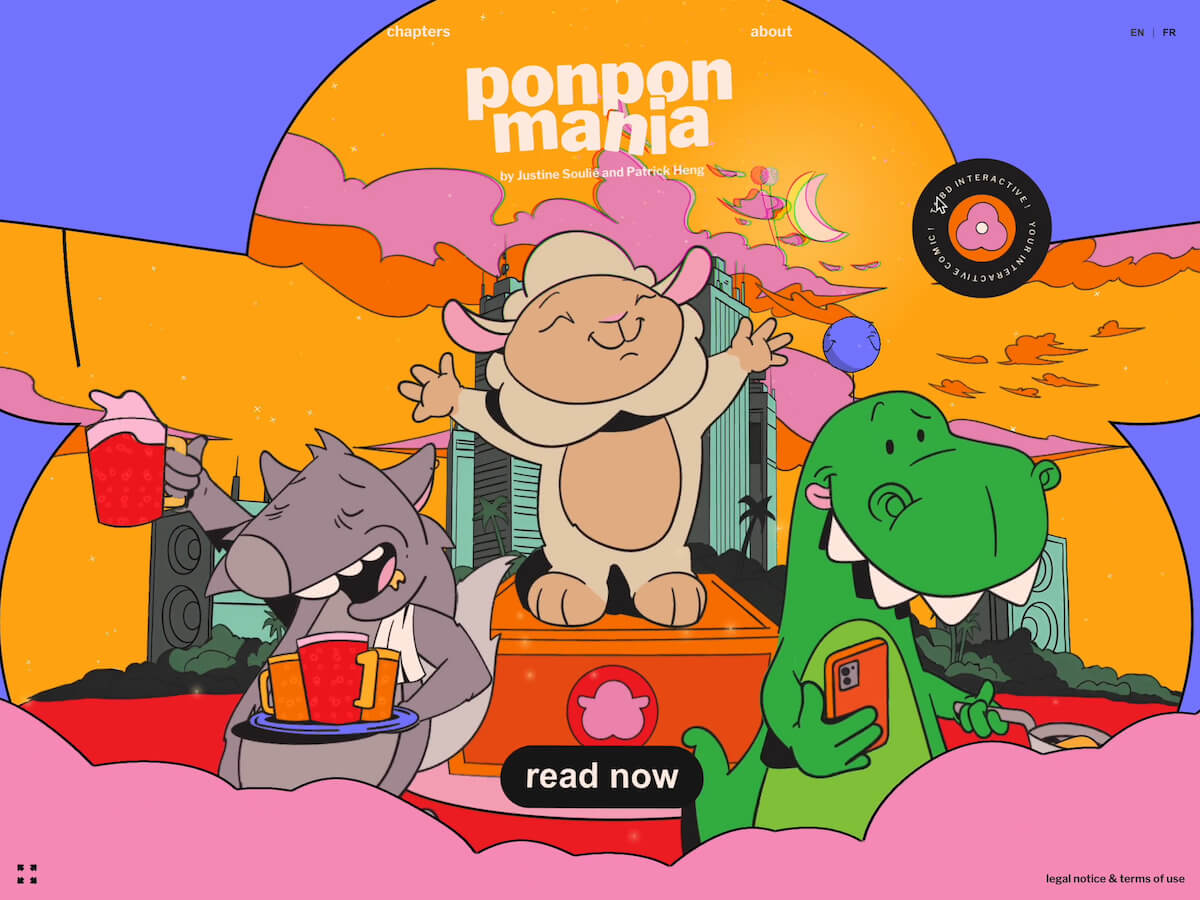
    Ponpon Mania is an animated comic featuring Ponpon, a megalomaniac sheep dreaming of becoming a DJ. We wanted to explore storytelling beyond traditional comics by combining playful interactions, smooth GSAP-powered motion, and dynamic visuals. The goal was to create a comic that feels alive, where readers engage directly with Ponpon’s world while following the narrative. The project evolved over several months, moving from early sketches to interactive prototypes.

    About us

    We are Justine Soulié (Art Director & Illustrator) and Patrick Heng (Creative Developer), a creative duo passionate about storytelling through visuals and interaction. Justine brings expertise in illustration, art direction, and design, while Patrick focuses on creative development and interactive experiences. Together, we explore ways to make stories more playful, immersive, and engaging.

    Art Direction

    Our visual direction emphasizes clean layouts, bold colors, and playful details. From the start, we wanted the comic to feel vibrant and approachable while using design to support the story. On the homepage, we aimed to create a simple, welcoming scene that immediately draws the user in, offering many interactive elements to explore and encouraging engagement from the very first moment.

    The comic is mostly black and white, providing a simple and striking visual base. Color appears selectively, especially when Ponpon dreams of being a DJ and is fully immersed in his imagined world, highlighting these key moments and guiding the reader’s attention. Scroll-triggered animations naturally direct focus, while hover effects and clickable elements invite exploration without interrupting the narrative flow.

    To reinforce Ponpon’s connection to music, we designed the navigation to resemble a music player. Readers move through chapters as if they were albums, with each panel functioning like a song. This structure reflects Ponpon’s DJ aspirations, making the reading experience intuitive, dynamic, and closely tied to the story.

    Technical Approach

    Our main goal was to reduce technical friction so we could dedicate our energy to refining the artistic direction, motion design, and animation of the website.

    We used WebGL because it gave us full creative freedom over rendering. Even though the comic has a mostly 2D look, we wanted the flexibility to add depth and apply shader-based effects.

    Starting from Justine’s illustrator files, every layer and visual element from each panel was exported as an individual image. These assets were then packed into optimized texture atlases using Free TexturePacker.

    Atlas example

    Once exported, the images were further compressed into GPU-friendly formats to reduce memory usage. Using the data generated by the packer, we reconstructed each scene in WebGL by generating planes at the correct size. Finally, everything was placed in a 3D scene where we applied the necessary shaders and animations to achieve the desired visual effects.

    Tech Stack & Tools

    Design

    • Adobe Photoshop & Illustrator – illustration and asset preparation
    • Figma – layout and interface design

    Development

    • ogl – WebGL framework for rendering
    • Nuxt.js – frontend framework for structure and routing
    • GSAP – animation library for smooth and precise motion
    • Matter.js – physics engine used on the About page
    • Free TexturePacker – for creating optimized texture atlases from exported assets
    • Tweakpane – GUI tool for real-time debugging and fine-tuning parameters

    Animating using GSAP

    GSAP makes it easy to animate both DOM elements and WebGL objects with a unified syntax. Its timeline system brought structure to complex sequences, while combining it with ScrollTrigger streamlined scroll-based animations. We also used SplitText to handle text animations.

    Home page

    For the homepage, we wanted the very first thing users see to feel playful and full of life. It introduces the three main characters, all animated, and sets the tone for the rest of the experience. Every element reacts subtly to the mouse: the Ponpon mask deforms slightly, balloons collide softly, and clouds drift away in gentle repulsion. These micro-interactions make the scene feel tangible and invite visitors to explore the world of Ponpon Mania with curiosity and delight. We used GSAP timeline to choreograph the intro animation, allowing us to trigger each element in sequence for a smooth and cohesive reveal.

    // Simple repulsion we used for the clouds in our render function
    const dx = baseX - mouse.x;
    const dy = baseY - mouse.y;
    const dist = Math.sqrt(dx * dx + dy * dy);
    
    // Repel the cloud if the mouse is near
    const radius = 2; // interaction radius
    const strength = 1.5; // repulsion force
    const repulsion = Math.max(0, 1 - dist / radius) * strength;
    
    // Apply the repulsion with smooth spring motion
    const targetX = basePosX + dx * repulsion;
    const targetY = basePosY - Math.abs(dy * repulsion) / 2;
    
    velocity.x += (targetX - position.x) * springStrength * deltaTime;
    velocity.y += (targetY - position.y) * springStrength * deltaTime;
    
    position.x += velocity.x;
    position.y += velocity.y;

    Chapter Selection

    For the chapter selection, we wanted something simple yet evocative of Ponpon musical universe. Each chapter is presented as an album cover, inviting users to browse through them as if flipping through a record collection. We try to have a smooth and intuitive navigation, users can drag, scroll, or click to explore and each chapter snaps into place for an easy and satisfying selection experience.

    Panel Animation

    For the panel animations, we wanted each panel to feel alive bringing Justine’s illustrations to life through motion. We spent a lot of time refining every detail so that each scene feels expressive and unique. Using GSAP timelines made it easy to structure and synchronize the different animations, keeping them flexible and reusable. Here’s an example of a GSAP timeline animating a panel, showing how sequences can be chained together smoothly.

    // Animate ponpons in sequence with GSAP timelines
    const timeline = gsap.timeline({ repeat: -1, repeatDelay: 0.7 });
    const uFlash = { value: 0 };
    const flashTimeline = gsap.timeline({ paused: true });
    
    function togglePonponGroup(index) {
      ponponsGroups.forEach((g, i) => (g.mesh.visible = i === index));
    }
    
    function triggerFlash() {
      const flashes = Math.floor(Math.random() * 2) + 1; // 1–2 flashes
      const duration = 0.4 / flashes;
    
      flashTimeline.clear();
    
      for (let i = 0; i < flashes; i++) {
        flashTimeline
          .set(uFlash, { value: 0.6 }, i * duration) // bright flash
          .to(uFlash, { value: 0, duration: duration * 0.9 }, i * duration + duration * 0.1); // fade out
      }
    
      flashTimeline.play();
    }
    
    ponponMeshes.forEach((ponpon, i) => {
      timeline.fromTo(
        ponpon.position,
        { y: ponpon.initialY - 0.2 },  // start slightly below
        {
          y: ponpon.initialY,          // bounce up
          duration: 1,
          ease: "elastic.out",
          onStart: () => {
            togglePonponGroup(i);      // show active group
            triggerFlash();            // trigger flash
          }
        },
        i * 1.6 // stagger delay between ponpons
      );
    });

    About Page

    On the About page, GSAP ScrollTrigger tracks the scroll progress of each section. These values drive the WebGL scenes, controlling rendering, transitions, and camera movement. This ensures the visuals stay perfectly synchronized with the user’s scrolling.

    const sectionUniform = { progress: { value: 0 } };
    
    // create a ScrollTrigger for one section
    const sectionTrigger = ScrollTrigger.create({
      trigger: ".about-section",
      start: "top bottom",
      end: "bottom top",
      onUpdate: (self) => {
        sectionUniform.progress.value = self.progress; // update uniform
      }
    });
    
    // update scene each frame using trigger values
    function updateScene() {
      const progress = sectionTrigger.progress;  
      const velocity = sectionTrigger.getVelocity(); 
    
      // drive camera movement with scroll progress
      camera.position.y = map(progress, 0.75, 1, -0.4, 3.4);
      camera.position.z =
        5 + map(progress, 0, 0.3, -4, 0) +
            map(progress, 0.75, 1, 0, 2) + velocity * 0.01;
    
      // subtle velocity feedback on ponpon and camera
      ponpon.position.y = ponpon.initialY + velocity * 0.01;
    }

    Thanks to the SplitText plugin, we can animate each section title line by line as it comes into view while scrolling.

    // Split the text into lines for staggered animation
    const split = new SplitText(titleDomElement, { type: "lines" });
    const lines = split.lines;
    
    // Create a timeline for the text animation
    const tl = gsap.timeline({ paused: true });
    
    tl.from(lines, {
      x: "100%",
      skewX: () => Math.random() * 50 - 25,
      rotation: 5,
      opacity: 0,
      duration: 1,
      stagger: 0.06,
      ease: "elastic.out(0.7, 0.7)"
    });
    
    // Trigger the timeline when scrolling the section into view
    ScrollTrigger.create({
      trigger: ".about-section",
      start: "top 60%",
      end: "bottom top",
      onEnter: () => tl.play(),
      onLeaveBack: () => tl.reverse()
    });

    Page transitions

    For the page transitions, we wanted them to add a sense of playfulness to the experience while keeping navigation snappy and fluid. Each transition was designed to fit the mood of the page so rather than using a single generic effect, we built variations that keep the journey fresh.

    Technically, the transitions blend two WebGL scenes together using a custom shader, where the previous and next pages are rendered and mixed in real time. The animation of the blend is driven by GSAP tweens, which lets us precisely control the timing and progress of the shader for smooth, responsive transitions.

    Designing Playful Experiences

    Ponpon Mania pushed us to think beyond traditional storytelling. It was a joy to work on the narrative and micro-interactions that add playfulness and energy to the comic.

    Looking ahead, we plan to create new chapters, expand Ponpon’s story, and introduce small games and interactive experiences within the universe we’ve built. We’re excited to keep exploring Ponpon’s world and share more surprises with readers along the way.

    Thank you for reading! We hope you enjoyed discovering the creative journey behind Ponpon Mania and the techniques we used to bring Ponpon’s world to life.

    If you want to follow Ponpon, check us out on TikTok or Instagram.

    You can also support us on Tipeee!

    Justine Soulié & Patrick Heng


    Source link

  • Building a Blended Material Shader in WebGL with Solid.js

    Building a Blended Material Shader in WebGL with Solid.js


    Blackbird was a fun, experimental site that I used as a way to get familiar with WebGL inside of Solid.js. It went through the story of how the SR-71 was built in super technical detail. The wireframe effect covered here helped visualize the technology beneath the surface of the SR-71 while keeping the polished metal exterior visible that matched the sites aesthetic.

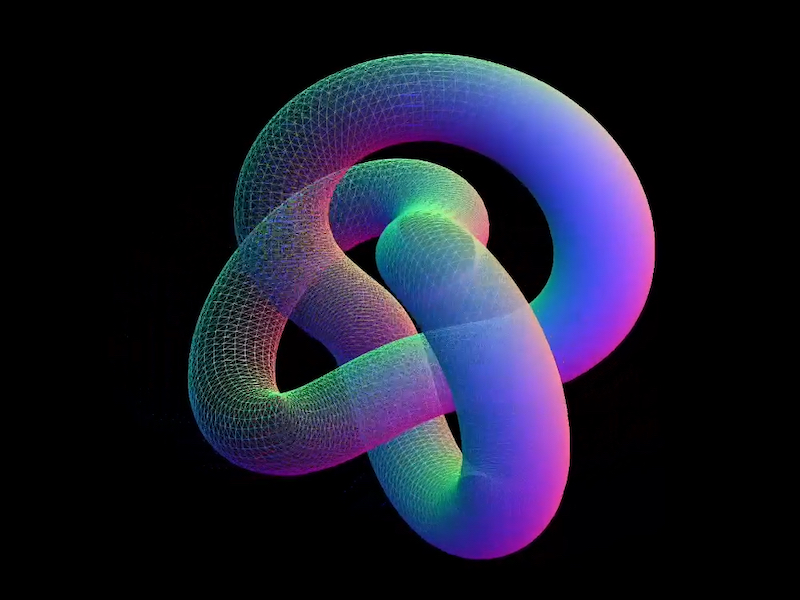
    Here is how the effect looks like on the Blackbird site:

    In this tutorial, we’ll rebuild that effect from scratch: rendering a model twice, once as a solid and once as a wireframe, then blending the two together in a shader for a smooth, animated transition. The end result is a flexible technique you can use for technical reveals, holograms, or any moment where you want to show both the structure and the surface of a 3D object.

    There are three things at work here: material properties, render targets, and a black-to-white shader gradient. Let’s get into it!

    But First, a Little About Solid.js

    Solid.js isn’t a framework name you hear often, I’ve switched my personal work to it for the ridiculously minimal developer experience and because JSX remains the greatest thing since sliced bread. You absolutely don’t need to use the Solid.js part of this demo, you could strip it out and use vanilla JS all the same. But who knows, you may enjoy it 🙂

    Intrigued? Check out Solid.js.

    Why I Switched

    TLDR: Full-stack JSX without all of the opinions of Next and Nuxt, plus it’s like 8kb gzipped, wild.

    The technical version: Written in JSX, but doesn’t use a virtual DOM, so a “reactive” (think useState()) doesn’t re-render an entire component, just one DOM node. Also runs isomorphically, so "use client" is a thing of the past.

    Setting Up Our Scene

    We don’t need anything wild for the effect: a Mesh, Camera, Renderer, and Scene will do. I use a base Stage class (for theatrical-ish naming) to control when things get initialized.

    A Global Object for Tracking Window Dimensions

    window.innerWidth and window.innerHeight trigger document reflow when you use them (more about document reflow here). So I keep them in one object, only updating it when necessary and reading from the object, instead of using window and causing reflow. Notice these are all set to 0 and not actual values by default. window gets evaluated as undefined when using SSR, so we want to wait to set this until our app is mounted, GL class is initialized, and window is defined to avoid everybody’s favorite error: Cannot read properties of undefined (reading ‘window’).

    // src/gl/viewport.js
    
    export const viewport = {
      width: 0,
      height: 0,
      devicePixelRatio: 1,
      aspectRatio: 0,
    };
    
    export const resizeViewport = () => {
      viewport.width = window.innerWidth;
      viewport.height = window.innerHeight;
    
      viewport.aspectRatio = viewport.width / viewport.height;
    
      viewport.devicePixelRatio = Math.min(window.devicePixelRatio, 2);
    };

    A Basic Three.js Scene, Renderer, and Camera

    Before we can render anything, we need a small framework to handle our scene setup, rendering loop, and resizing logic. Instead of scattering this across multiple files, we’ll wrap it in a Stage class that initializes the camera, renderer, and scene in one place. This makes it easier to keep our WebGL lifecycle organized, especially once we start adding more complex objects and effects.

    // src/gl/stage.js
    
    import { WebGLRenderer, Scene, PerspectiveCamera } from 'three';
    import { viewport, resizeViewport } from './viewport';
    
    class Stage {
      init(element) {
        resizeViewport() // Set the initial viewport dimensions, helps to avoid using window inside of viewport.js for SSR-friendliness
        
        this.camera = new PerspectiveCamera(45, viewport.aspectRatio, 0.1, 1000);
        this.camera.position.set(0, 0, 2); // back the camera up 2 units so it isn't on top of the meshes we make later, you won't see them otherwise.
    
        this.renderer = new WebGLRenderer();
        this.renderer.setSize(viewport.width, viewport.height);
        element.appendChild(this.renderer.domElement); // attach the renderer to the dom so our canvas shows up
    
        this.renderer.setPixelRatio(viewport.devicePixelRatio); // Renders higher pixel ratios for screens that require it.
    
        this.scene = new Scene();
      }
    
      render() {
        this.renderer.render(this.scene, this.camera);
        requestAnimationFrame(this.render.bind(this));
    // All of the scenes child classes with a render method will have it called automatically
        this.scene.children.forEach((child) => {
          if (child.render && typeof child.render === 'function') {
            child.render();
          }
        });
      }
    
      resize() {
        this.renderer.setSize(viewport.width, viewport.height);
        this.camera.aspect = viewport.aspectRatio;
        this.camera.updateProjectionMatrix();
    
    // All of the scenes child classes with a resize method will have it called automatically
        this.scene.children.forEach((child) => {
          if (child.resize && typeof child.resize === 'function') {
            child.resize();
          }
        });
      }
    }
    
    export default new Stage();

    And a Fancy Mesh to Go With It

    With our stage ready, we can give it something interesting to render. A torus knot is perfect for this: it has plenty of curves and detail to show off both the wireframe and solid passes. We’ll start with a simple MeshNormalMaterial in wireframe mode so we can clearly see its structure before moving on to the blended shader version.

    // src/gl/torus.js
    
    import { Mesh, MeshBasicMaterial, TorusKnotGeometry } from 'three';
    
    export default class Torus extends Mesh {
      constructor() {
        super();
    
        this.geometry = new TorusKnotGeometry(1, 0.285, 300, 26);
        this.material = new MeshNormalMaterial({
          color: 0xffff00,
          wireframe: true,
        });
    
        this.position.set(0, 0, -8); // Back up the mesh from the camera so its visible
      }
    }

    A quick note on lights

    For simplicity we’re using MeshNormalMaterial so we don’t have to mess with lights. The original effect on Blackbird had six lights, waaay too many. The GPU on my M1 Max was choked to 30fps trying to render the complex models and realtime six-point lighting. But reducing this to just 2 lights (which visually looked identical) ran at 120fps no problem. Three.js isn’t like Blender where you can plop in 14 lights and torture your beefy computer with the render for 12 hours while you sleep. The lights in WebGL have consequences 🫠

    Now, the Solid JSX Components to House It All

    // src/components/GlCanvas.tsx
    
    import { onMount, onCleanup } from 'solid-js';
    import Stage from '~/gl/stage';
    
    export default function GlCanvas() {
    // let is used instead of refs, these aren't reactive
      let el;
      let gl;
      let observer;
    
      onMount(() => {
        if(!el) return
        gl = Stage;
    
        gl.init(el);
        gl.render();
    
    
        observer = new ResizeObserver((entry) => gl.resize());
        observer.observe(el); // use ResizeObserver instead of the window resize event. 
        // It is debounced AND fires once when initialized, no need to call resize() onMount
      });
    
      onCleanup(() => {
        if (observer) {
          observer.disconnect();
        }
      });
    
    
      return (
        <div
          ref={el}
          style={{
            position: 'fixed',
            inset: 0,
            height: '100lvh',
            width: '100vw',
          }}
          
        />
      );
    }

    let is used to declare a ref, there is no formal useRef() function in Solid. Signals are the only reactive method. Read more on refs in Solid.

    Then slap that component into app.tsx:

    // src/app.tsx
    
    import { Router } from '@solidjs/router';
    import { FileRoutes } from '@solidjs/start/router';
    import { Suspense } from 'solid-js';
    import GlCanvas from './components/GlCanvas';
    
    export default function App() {
      return (
        <Router
          root={(props) => (
            <Suspense>
              {props.children}
              <GlCanvas />
            </Suspense>
          )}
        >
          <FileRoutes />
        </Router>
      );
    }

    Each 3D piece I use is tied to a specific element on the page (usually for timeline and scrolling), so I create an individual component to control each class. This helps me keep organized when I have 5 or 6 WebGL moments on one page.

    // src/components/WireframeDemo.tsx
    
    import { createEffect, createSignal, onMount } from 'solid-js'
    import Stage from '~/gl/stage';
    import Torus from '~/gl/torus';
    
    export default function WireframeDemo() {
      let el;
      const [element, setElement] = createSignal(null);
      const [actor, setActor] = createSignal(null);
    
      createEffect(() => {
        setElement(el);
        if (!element()) return;
    
        setActor(new Torus()); // Stage is initialized when the page initially mounts, 
        // so it's not available until the next tick. 
        // A signal forces this update to the next tick, 
        // after Stage is available.
    
        Stage.scene.add(actor());
      });
    
      return <div ref={el} />;
    }

    createEffect() instead of onMount(): this automatically tracks dependencies (element, and actor in this case) and fires the function when they change, no more useEffect() with dependency arrays 🙃. Read more on createEffect in Solid.

    Then a minimal route to put the component on:

    // src/routes/index.tsx
    
    import WireframeDemo from '~/components/WiframeDemo';
    
    export default function Home() {
      return (
        <main>
          <WireframeDemo />
        </main>
      );
    }
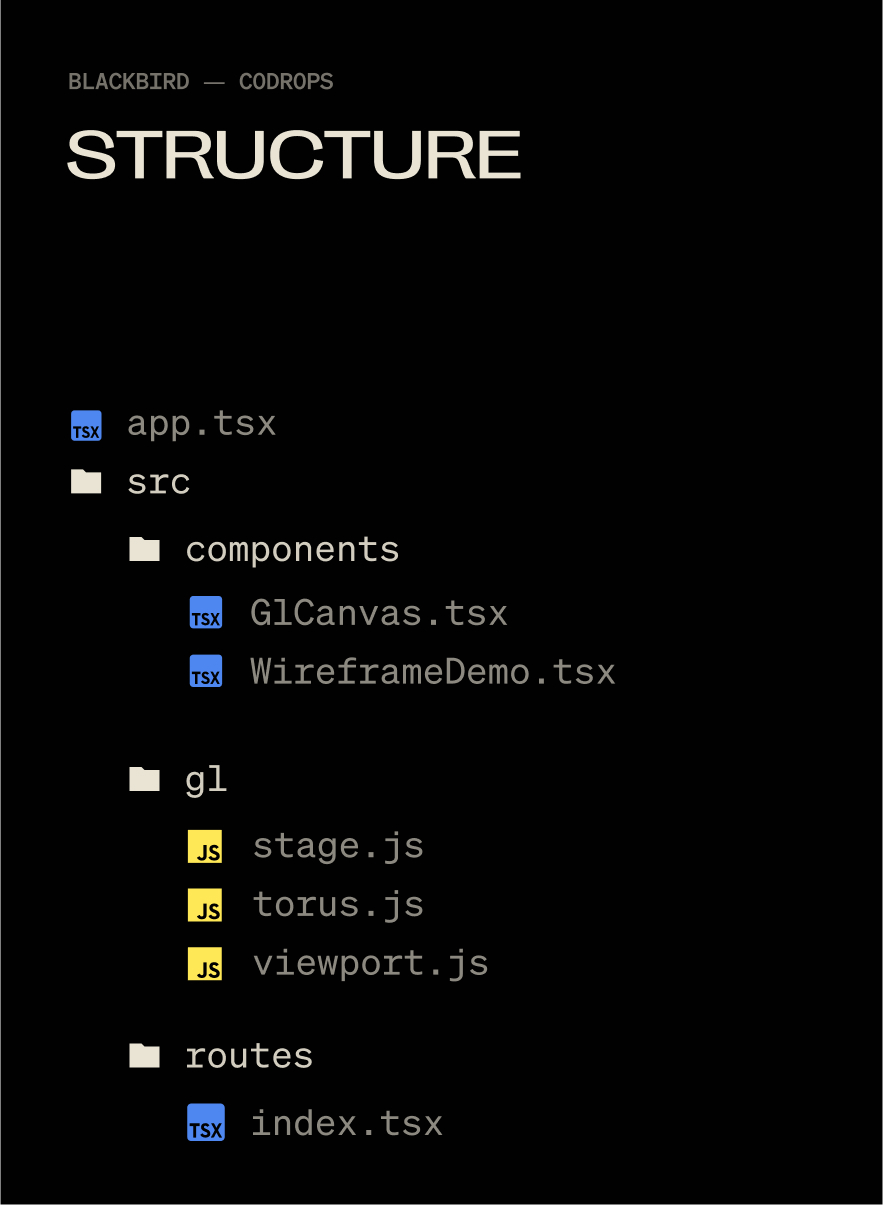
    Diagramming showing the folder structure of a code project

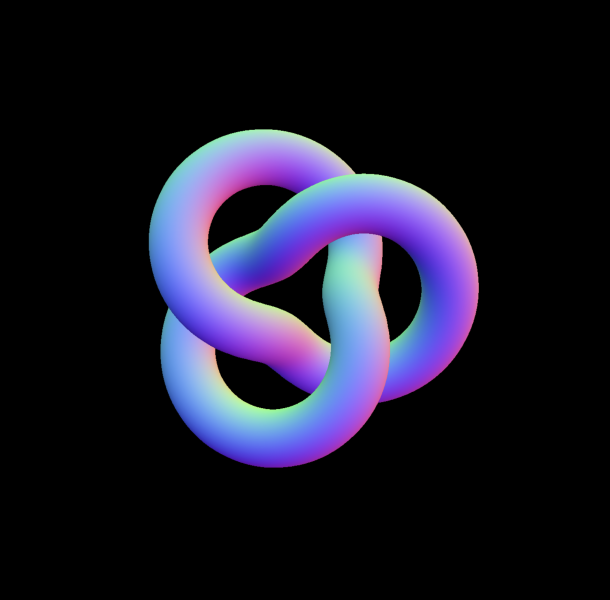
    Now you’ll see this:

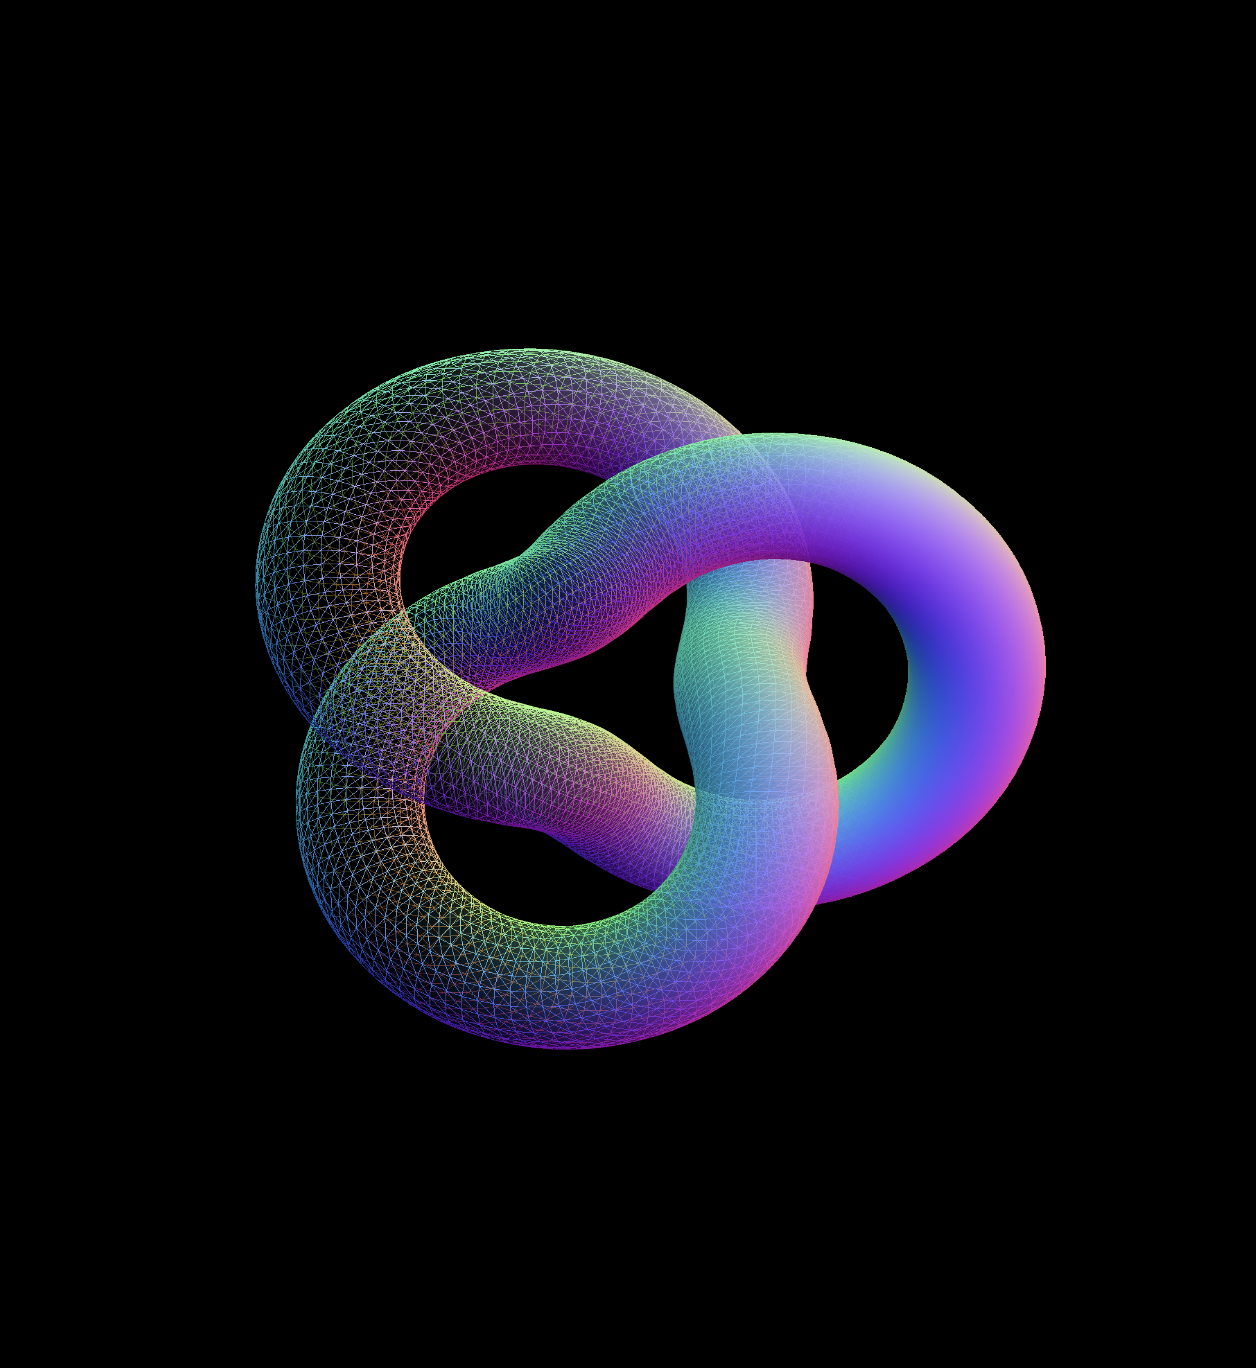
    Rainbow torus knot

    Switching a Material to Wireframe

    I loved wireframe styling for the Blackbird site! It fit the prototype feel of the story, fully textured models felt too clean, wireframes are a bit “dirtier” and unpolished. You can wireframe just about any material in Three.js with this:

    // /gl/torus.js
    
      this.material.wireframe = true
      this.material.needsUpdate = true;
    Rainbow torus knot changing from wireframe to solid colors

    But we want to do this dynamically on only part of our model, not on the entire thing.

    Enter render targets.

    The Fun Part: Render Targets

    Render Targets are a super deep topic but they boil down to this: Whatever you see on screen is a frame for your GPU to render, in WebGL you can export that frame and re-use it as a texture on another mesh, you are creating a “target” for your rendered output, a render target.

    Since we’re going to need two of these targets, we can make a single class and re-use it.

    // src/gl/render-target.js
    
    import { WebGLRenderTarget } from 'three';
    import { viewport } from '../viewport';
    import Torus from '../torus';
    import Stage from '../stage';
    
    export default class RenderTarget extends WebGLRenderTarget {
      constructor() {
        super();
    
        this.width = viewport.width * viewport.devicePixelRatio;
        this.height = viewport.height * viewport.devicePixelRatio;
      }
    
      resize() {
        const w = viewport.width * viewport.devicePixelRatio;
        const h = viewport.height * viewport.devicePixelRatio;
    
        this.setSize(w, h)
      }
    }

    This is just an output for a texture, nothing more.

    Now we can make the class that will consume these outputs. It’s a lot of classes, I know, but splitting up individual units like this helps me keep track of where stuff happens. 800 line spaghetti mega-classes are the stuff of nightmares when debugging WebGL.

    // src/gl/targeted-torus.js
    
    import {
      Mesh,
      MeshNormalMaterial,
      PerspectiveCamera,
      PlaneGeometry,
    } from 'three';
    import Torus from './torus';
    import { viewport } from './viewport';
    import RenderTarget from './render-target';
    import Stage from './stage';
    
    export default class TargetedTorus extends Mesh {
      targetSolid = new RenderTarget();
      targetWireframe = new RenderTarget();
    
      scene = new Torus(); // The shape we created earlier
      camera = new PerspectiveCamera(45, viewport.aspectRatio, 0.1, 1000);
      
      constructor() {
        super();
    
        this.geometry = new PlaneGeometry(1, 1);
        this.material = new MeshNormalMaterial();
      }
    
      resize() {
        this.targetSolid.resize();
        this.targetWireframe.resize();
    
        this.camera.aspect = viewport.aspectRatio;
        this.camera.updateProjectionMatrix();
      }
    }

    Now, switch our WireframeDemo.tsx component to use the TargetedTorus class, instead of Torus:

    // src/components/WireframeDemo.tsx 
    
    import { createEffect, createSignal, onMount } from 'solid-js';
    import Stage from '~/gl/stage';
    import TargetedTorus from '~/gl/targeted-torus';
    
    export default function WireframeDemo() {
      let el;
      const [element, setElement] = createSignal(null);
      const [actor, setActor] = createSignal(null);
    
      createEffect(() => {
        setElement(el);
        if (!element()) return;
    
        setActor(new TargetedTorus()); // << change me
    
        Stage.scene.add(actor());
      });
    
      return <div ref={el} data-gl="wireframe" />;
    }

    “Now all I see is a blue square Nathan, it feel like we’re going backwards, show me the cool shape again”.

    Shhhhh, It’s by design I swear!

    From MeshNormalMaterial to ShaderMaterial

    We can now take our Torus rendered output and smack it onto the blue plane as a texture using ShaderMaterial. MeshNormalMaterial doesn’t let us use a texture, and we’ll need shaders soon anyway. Inside of targeted-torus.js remove the MeshNormalMaterial and switch this in:

    // src/gl/targeted-torus.js
    
    this.material = new ShaderMaterial({
      vertexShader: `
        varying vec2 v_uv;
    
        void main() {
          gl_Position = projectionMatrix * modelViewMatrix * vec4(position, 1.0);
          v_uv = uv;
        }
      `,
      fragmentShader: `
        varying vec2 v_uv;
        varying vec3 v_position;
    
        void main() {
          gl_FragColor = vec4(0.67, 0.08, 0.86, 1.0);
        }
      `,
    });

    Now we have a much prettier purple plane with the help of two shaders:

    • Vertex shaders manipulate vertex locations of our material, we aren’t going to touch this one further
    • Fragment shaders assign the colors and properties to each pixel of our material. This shader tells every pixel to be purple

    Using the Render Target Texture

    To show our Torus instead of that purple color, we can feed the fragment shader an image texture via uniforms:

    // src/gl/targeted-torus.js
    
    this.material = new ShaderMaterial({
      vertexShader: `
        varying vec2 v_uv;
    
        void main() {
          gl_Position = projectionMatrix * modelViewMatrix * vec4(position, 1.0);
          v_uv = uv;
        }
      `,
      fragmentShader: `
        varying vec2 v_uv;
        varying vec3 v_position;
    
        // declare 2 uniforms
        uniform sampler2D u_texture_solid;
        uniform sampler2D u_texture_wireframe;
    
        void main() {
          // declare 2 images
          vec4 wireframe_texture = texture2D(u_texture_wireframe, v_uv);
          vec4 solid_texture = texture2D(u_texture_solid, v_uv);
    
          // set the color to that of the image
          gl_FragColor = solid_texture;
        }
      `,
      uniforms: {
        u_texture_solid: { value: this.targetSolid.texture },
        u_texture_wireframe: { value: this.targetWireframe.texture },
      },
    });

    And add a render method to our TargetedTorus class (this is called automatically by the Stage class):

    // src/gl/targeted-torus.js
    
    render() {
      this.material.uniforms.u_texture_solid.value = this.targetSolid.texture;
    
      Stage.renderer.render(this.scene, this.camera);
      Stage.renderer.setRenderTarget(this.targetSolid);
      Stage.renderer.clear();
      Stage.renderer.setRenderTarget(null);
    }

    THE TORUS IS BACK. We’ve passed our image texture into the shader and its outputting our original render.

    Mixing Wireframe and Solid Materials with Shaders

    Shaders were black magic to me before this project. It was my first time using them in production and I’m used to frontend where you think in boxes. Shaders are coordinates 0 to 1, which I find far harder to understand. But, I’d used Photoshop and After Effects with layers plenty of times. These applications do a lot of the same work shaders can: GPU computing. This made it far easier. Starting out by picturing or drawing what I wanted, thinking how I might do it in Photoshop, then asking myself how I could do it with shaders. Photoshop or AE into shaders is far less mentally taxing when you don’t have a deep foundation in shaders.

    Populating Both Render Targets

    At the moment, we are only saving data to the solidTarget render target via normals. We will update our render loop, so that our shader has them both this and wireframeTarget available simultaneously.

    // src/gl/targeted-torus.js
    
    render() {
      // Render wireframe version to wireframe render target
      this.scene.material.wireframe = true;
      Stage.renderer.setRenderTarget(this.targetWireframe);
      Stage.renderer.render(this.scene, this.camera);
      this.material.uniforms.u_texture_wireframe.value = this.targetWireframe.texture;
    
      // Render solid version to solid render target
      this.scene.material.wireframe = false;
      Stage.renderer.setRenderTarget(this.targetSolid);
      Stage.renderer.render(this.scene, this.camera);
      this.material.uniforms.u_texture_solid.value = this.targetSolid.texture;
    
      // Reset render target
      Stage.renderer.setRenderTarget(null);
    }

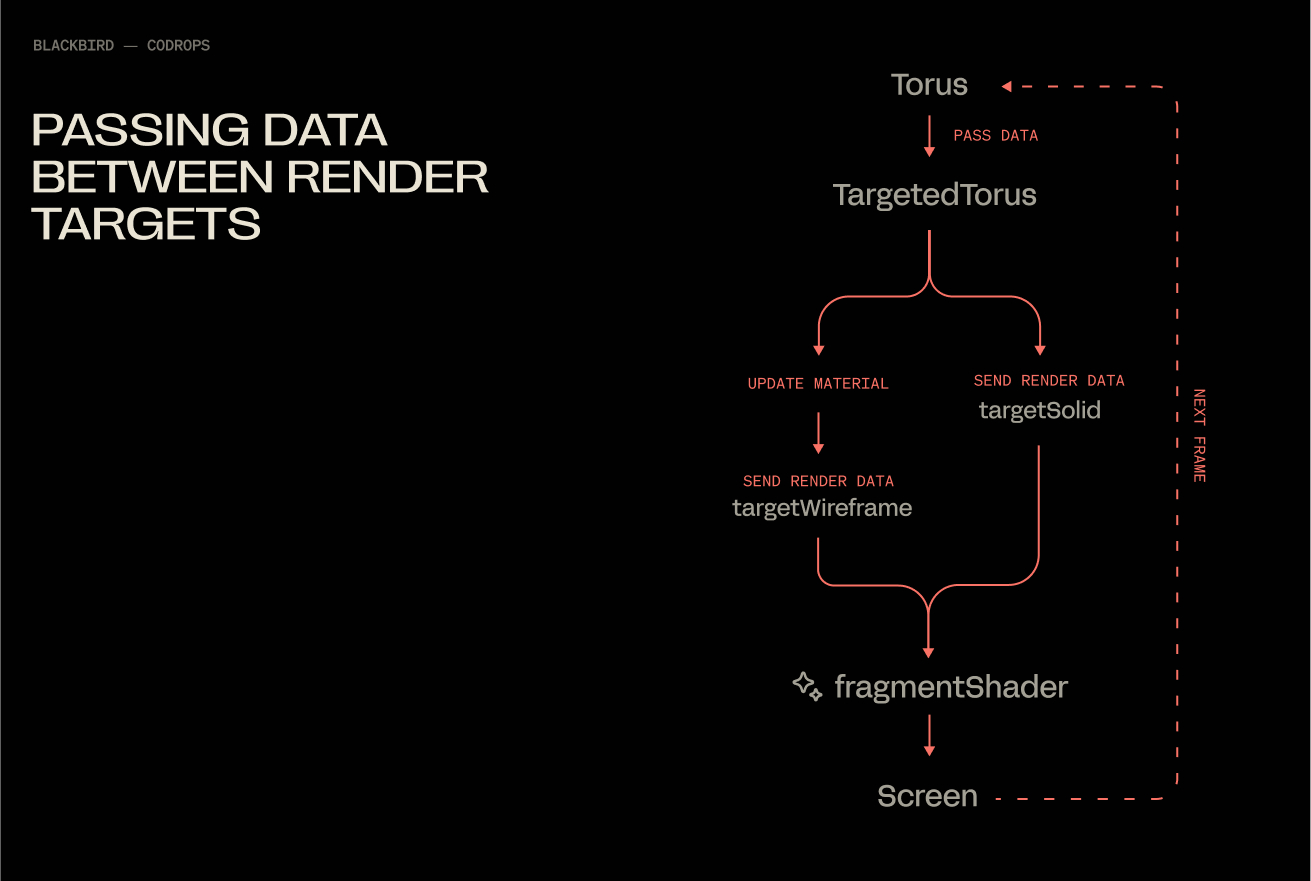
    With this, you end up with a flow that under the hood looks like this:

    Diagram with red lines describing data being passed around

    Fading Between Two Textures

    Our fragment shader will get a little update, 2 additions:

    • smoothstep creates a linear ramp between 2 values. UVs only go from 0 to 1, so in this case we use .15 and .65 as the limits (they look make the effect more obvious than 0 and 1). Then we use the x value of the uvs to define which value gets fed into smoothstep.
    • vec4 mixed = mix(wireframe_texture, solid_texture, blend); mix does exactly what it says, mixes 2 values together at a ratio determined by blend. .5 being a perfectly even split.
    // src/gl/targeted-torus.js
    
    fragmentShader: `
      varying vec2 v_uv;
      varying vec3 v_position;
    
      // declare 2 uniforms
      uniform sampler2D u_texture_solid;
      uniform sampler2D u_texture_wireframe;
    
      void main() {
        // declare 2 images
        vec4 wireframe_texture = texture2D(u_texture_wireframe, v_uv);
        vec4 solid_texture = texture2D(u_texture_solid, v_uv);
    
        float blend = smoothstep(0.15, 0.65, v_uv.x);
        vec4 mixed = mix(wireframe_texture, solid_texture, blend);        
    
        gl_FragColor = mixed;
      }
    `,

    And boom, MIXED:

    Rainbow torus knot with wireframe texture

    Let’s be honest with ourselves, this looks exquisitely boring being static so we can spice this up with little magic from GSAP.

    // src/gl/torus.js
    
    import {
      Mesh,
      MeshNormalMaterial,
      TorusKnotGeometry,
    } from 'three';
    import gsap from 'gsap';
    
    export default class Torus extends Mesh {
      constructor() {
        super();
    
        this.geometry = new TorusKnotGeometry(1, 0.285, 300, 26);
        this.material = new MeshNormalMaterial();
    
        this.position.set(0, 0, -8);
    
        // add me!
        gsap.to(this.rotation, {
          y: 540 * (Math.PI / 180), // needs to be in radians, not degrees
          ease: 'power3.inOut',
          duration: 4,
          repeat: -1,
          yoyo: true,
        });
      }
    }

    Thank You!

    Congratulations, you’ve officially spent a measurable portion of your day blending two materials together. It was worth it though, wasn’t it? At the very least, I hope this saved you some of the mental gymnastics orchestrating a pair of render targets.

    Have questions? Hit me up on Twitter!


    Source link

  • Interactive WebGL Backgrounds: A Quick Guide to Bayer Dithering

    Interactive WebGL Backgrounds: A Quick Guide to Bayer Dithering


    User experience relies on small, thoughtful details that fit well into the overall design without overpowering the user. This balance can be tricky, especially with technologies like WebGL. While they can create amazing visuals, they can also become too complicated and distracting if not handled carefully.

    One subtle but effective technique is the Bayer Dithering Pattern. For example, JetBrains’ recent Junie campaign page uses this approach to craft an immersive and engaging atmosphere that remains visually balanced and accessible.

    In this tutorial, I’ll introduce you to the Bayer Dithering Pattern. I’ll explain what it is, how it works, and how you can apply it to your own web projects to enhance visual depth without overpowering the user experience.

    Bayer Dithering

    The Bayer pattern is a type of ordered dithering, which lets you simulate gradients and depth using a fixed matrix.

    If we scale this matrix appropriately, we can target specific values and create basic patterns.

    Here’s a simple example:

    // 2×2 Bayer matrix pattern: returns a value in [0, 1)
    float Bayer2(vec2 a)
    {
        a = floor(a);                // Use integer cell coordinates
        return fract(a.x / 2.0 + a.y * a.y * 0.75);
        // Equivalent lookup table:
        // (0,0) → 0.0,  (1,0) → 0.5
        // (0,1) → 0.75, (1,1) → 0.25
    }

    Let’s walk through an example of how this can be used:

    // 1. Base mask: left half is a black-to-white gradient 
    float mask = uv.y;
    
    // 2. Right half: apply ordered dithering
    if (uv.x > 0.5) {
        float dither = Bayer2(fragCoord);
        mask += dither - 0.5;
        mask  = step(0.5, mask); // binary threshold
    }
    
    // 3. Output the result
    fragColor = vec4(vec3(mask), 1.0);

    So with just a small matrix, we get four distinct dithering values—essentially for free.

    See the Pen
    Bayer2x2 by zavalit (@zavalit)
    on CodePen.

    Creating a Background Effect

    This is still pretty basic—nothing too exciting UX-wise yet. Let’s take it further by creating a grid on our UV map. We’ll define the size of a “pixel” and the size of the matrix that determines whether each “pixel” is on or off using Bayer ordering.

    const float PIXEL_SIZE = 10.0; // Size of each pixel in the Bayer matrix
    const float CELL_PIXEL_SIZE = 5.0 * PIXEL_SIZE; // 5x5 matrix
    
     
    float aspectRatio = uResolution.x / uResolution.y;
       
    vec2 pixelId = floor(fragCoord / PIXEL_SIZE); 
    vec2 cellId = floor(fragCoord / CELL_PIXEL_SIZE); 
    vec2 cellCoord = cellId * CELL_PIXEL_SIZE;
    
    vec2 uv = cellCoord/uResolution * vec2(aspectRatio, 1.0);
    
    vec3 baseColor = vec3(uv, 0.0);       

    You’ll see a rendered UV grid with blue dots for pixels and white (and subsequent blocks of the same size) for the Bayer matrix.

    See the Pen
    Pixel & Cell UV by zavalit (@zavalit)
    on CodePen.

    Recursive Bayer Matrices

    Bayer’s genius was a recursively generated mask that keeps noise high-frequency and code low-complexity. So now let’s try it out, and apply also larger dithering matrix:

    float Bayer2(vec2 a) { a = floor(a); return fract(a.x / 2. + a.y * a.y * .75); }
    #define Bayer4(a)   (Bayer2(0.5 * (a)) * 0.25 + Bayer2(a))
    #define Bayer8(a)   (Bayer4(0.5 * (a)) * 0.25 + Bayer2(a))
    #define Bayer16(a)   (Bayer8(0.5 * (a)) * 0.25 + Bayer2(a))
    
    ...
      if(uv.x > .2) dither = Bayer2 (pixelId);   
      if(uv.x > .4) dither = Bayer4 (pixelId);
      if(uv.x > .6) dither = Bayer8 (pixelId);
      if(uv.x > .8) dither = Bayer16(pixelId);
    ...

    This gives us a nice visual transition from a basic UV grid to Bayer matrices of increasing complexity (2×2, 4×4, 8×8, 16×16).

    See the Pen
    Bayer Ranges Animation by zavalit (@zavalit)
    on CodePen.

    As you see, the 8×8 and 16×16 patterns are quite similar—beyond 8×8, the perceptual gain becomes minimal. So we’ll stick with Bayer8 for the next step.

    Now, we’ll apply Bayer8 to a UV map modulated by fbm noise to make the result feel more organic—just as we promised.

    See the Pen
    Bayer fbm noise by zavalit (@zavalit)
    on CodePen.

    Adding Interactivity

    Here’s where things get exciting: real-time interactivity that background videos can’t replicate. Let’s run a ripple effect around clicked points using the dithering pattern. We’ll iterate over all active clicks and compute a wave:

     for (int i = 0; i < MAX_CLICKS; ++i) {
    
        // convert this click to square‑unit UV
        vec2 pos = uClickPos[i];
        if(pos.x < 0.0 && pos.y < 0.0) continue; // skip empty clicks
            
        vec2 cuv = (((pos - uResolution * .5 - cellPixelSize * .5) / (uResolution) )) * vec2(aspectRatio, 1.0);
    
        float t = max(uTime - uClickTimes[i], 0.0);
        float r = distance(uv, cuv);
    
        float waveR = speed * t;
        float ring  = exp(-pow((r - waveR) / thickness, 2.0));
        float atten = exp(-dampT * t) * exp(-dampR * r);
    
        feed = max(feed, ring * atten);           // brightest wins
    }

    Try to click on the CodePen bellow:

    See the Pen
    Untitled by zavalit (@zavalit)
    on CodePen.

    Final Thoughts

    Because the entire Bayer-dither background is generated in a single GPU pass, it renders in under 0.2 ms even at 4K, ships in ~3 KB (+ Three.js in this case), and consumes zero network bandwidth after load. SVG can’t touch that once you have thousands of nodes, and autoplay video is two orders of magnitude heavier on bandwidth, CPU and battery. In short: this is the probably one of the lightest fully-interactive background effect you can build on the open web today.


    Source link

  • How to Create Responsive and SEO-friendly WebGL Text

    How to Create Responsive and SEO-friendly WebGL Text


    Responsive text article cover image

    Rendering text in WebGL opens up a whole new world of unique visual effects and creative possibilities that are often
    impossible to achieve with traditional HTML, CSS and JavaScript alone. By the end of this tutorial, we’ll have created
    WebGL-rendered text elements that perfectly mimic the underlying HTML structure. Since we’ll be taking an HTML-first
    approach, it will be responsive, SEO-friendly and accessible. We’ll be doing every step manually so you’ll gain a
    solid understanding of the principles behind merging HTML and WebGL, and text-specific stuff like how to translate CSS
    styles into the 3D world.

    We’ll be creating the below demo:

    We’ll start off with a standard styled HTML setup. Then we’ll recreate the text elements we have inside a 3D world.
    From there, we’ll position, scale and make the text responsive with the 3D space. Next, we’ll replicate the “mask
    reveal effect” in WebGL. And finally, we’ll apply some scroll-driven post processing effects to the scene.

    Below are the core steps we’ll follow to achieve the final result:

    1. Create the text as a HTML element and style it regularly using CSS
    2. Create a 3D world and recreate the text element within it
    3. Merge the 3D and 2D world, so that we can style the 3D text by using our viewport’s dimensions
    4. Sync the key properties like position, size and font — from the HTML element to the WebGL text element
    5. Hide the original HTML element
    6. Be left with only the 3D text, fully styled and positioned in sync with the hidden HTML structure
    7. Apply animations and post-processing to enhance our 3D scene

    Necessities and Prerequisites

    We’ll be using the Three.js library to create the 3D world, so you should already be familiar with its basics. For the
    creation of text meshes, we’ll be using the
    troika-three-text
    library, but you don’t have to be familiar with the library beforehand. If you’ve used HTML, CSS and JavaScript, know
    the basics of Three.JS,
    you’re good to go.

    Let’s get started.

    1. Creating the Regular HTML and Making it Responsive

    Before diving into the WebGL and Three.js implementation, we first need to create the HTML structure that we’ll later
    mimic in the 3D world. I’ve set up a very simple page with some quick responsive content — you can find the
    setup content
    in the demo repository under
    index.html
    and
    styles.css
    .

    HTML
    :

    <div class="content">
      <div class="container">
        <section class="section__heading">
          <h3 data-animation="webgl-text" class="text__2">THREE.JS</h3>
          <h2 data-animation="webgl-text" class="text__1">
            RESPONSIVE AND ACCESSIBLE TEXT
          </h2>
        </section>
        <section class="section__main__content">
          <p data-animation="webgl-text" class="text__2">
            THIS TEXT IS STYLED TO LOOK LIKE A TYPICAL BLOCK OF TEXT ON A STANDARD
            WEBSITE. BUT UNDER THE SURFACE, IT'S BEING RENDERED WITH WEBGL INSTEAD
            OF TRADITIONAL HTML.
          </p>
          <p data-animation="webgl-text" class="text__2">
            THIS OPENS THE DOOR TO CUSTOM SHADER EFFECTS AND INTERACTIONS THAT GO
            BEYOND WHAT'S POSSIBLE WITH TRADITIONAL HTML.
          </p>
          <p data-animation="webgl-text" class="text__2">
            WE KEEP THE UNDERYLING HTML STRUCTURE PRESENT IN THE DOM. RATHER THAN
            CREATING MESHES DIRECTLY IN THREE.JS, THE SCENE IS BUILT BY READING FROM
            THE EXISTING HTML CONTENT. THIS WAY, SCREEN READERS, SEARCH ENGINES, AND
            OTHER TOOLS CAN STILL INTERPRET THE PAGE AS EXPECTED.
          </p>
        </section>
        <section class="section__footer">
          <p data-animation="webgl-text" class="text__3">
            NOW GO CRAZY WITH THE SHADERS :)
          </p>
        </section>
      </div>
    </div>
    

    styles.css

    :root {
      --clr-text: #fdcdf9;
      --clr-selection: rgba(255, 156, 245, 0.3);
      --clr-background: #212720;
    }
    
    @font-face {
      font-family: "Humane";
      src: url("/fonts/Humane-Black.ttf") format("truetype");
      font-weight: 900;
      font-style: normal;
      font-display: swap;
    }
    
    @font-face {
      font-family: "Humane";
      src: url("/fonts/Humane-Bold.ttf") format("truetype");
      font-weight: 700;
      font-style: normal;
      font-display: swap;
    }
    
    @font-face {
      font-family: "Humane";
      src: url("/fonts/Humane-ExtraBold.ttf") format("truetype");
      font-weight: 800;
      font-style: normal;
      font-display: swap;
    }
    
    @font-face {
      font-family: "Humane";
      src: url("/fonts/Humane-ExtraLight.ttf") format("truetype");
      font-weight: 200;
      font-style: normal;
      font-display: swap;
    }
    
    @font-face {
      font-family: "Humane";
      src: url("/fonts/Humane-Light.ttf") format("truetype");
      font-weight: 300;
      font-style: normal;
      font-display: swap;
    }
    
    @font-face {
      font-family: "Humane";
      src: url("/fonts/Humane-Medium.ttf") format("truetype");
      font-weight: 500;
      font-style: normal;
      font-display: swap;
    }
    
    @font-face {
      font-family: "Humane";
      src: url("/fonts/Humane-Regular.ttf") format("truetype");
      font-weight: 400;
      font-style: normal;
      font-display: swap;
    }
    
    @font-face {
      font-family: "Humane";
      src: url("/fonts/Humane-SemiBold.ttf") format("truetype");
      font-weight: 600;
      font-style: normal;
      font-display: swap;
    }
    
    @font-face {
      font-family: "Humane";
      src: url("/fonts/Humane-Thin.ttf") format("truetype");
      font-weight: 100;
      font-style: normal;
      font-display: swap;
    }
    
    body {
      background: var(--clr-background);
    }
    
    canvas {
      position: fixed;
      top: 0;
      left: 0;
      width: 100vw;
      height: 100vh;
      pointer-events: none;
    }
    
    ::selection {
      background-color: var(--clr-selection);
      color: var(--clr-text);
    }
    
    ::-moz-selection {
      background-color: var(--clr-selection);
      color: var(--clr-text);
    }
    
    .text__1,
    .text__2,
    .text__3 {
      color: var(--clr-text);
      text-align: center;
      margin-block-start: 0;
      margin-block-end: 0;
    }
    
    .content {
      width: 100%;
      font-family: Humane;
      font-size: 0.825vw;
    
      @media (max-width: 768px) {
        font-size: 2vw;
      }
    }
    .container {
      display: flex;
      flex-direction: column;
      align-items: center;
    
      width: 70em;
      gap: 17.6em;
      padding: 6em 0;
    
      @media (max-width: 768px) {
        width: 100%;
      }
    }
    
    .container section {
      display: flex;
      flex-direction: column;
      align-items: center;
      height: auto;
    }
    
    .section__main__content {
      gap: 5.6em;
    }
    
    .text__1 {
      font-size: 19.4em;
      font-weight: 700;
      max-width: 45em;
    
      @media (max-width: 768px) {
        font-size: 13.979em;
      }
    }
    
    .text__2 {
      font-size: 4.9em;
      max-width: 7.6em;
      letter-spacing: 0.01em;
    }
    
    .text__3 {
      font-size: 13.979em;
      max-width: 2.4em;
    }
    

    A Few Key Notes about the Setup

    • The
      <canvas>
      element is set to cover the entire screen, fixed in place behind the main content. We want a full screen canvas
      covering the entire screen behind our main content at all times.
    • All text elements intended for WebGL rendering are marked with data-animation=”webgl-text” for clarity and easy
      selection when we begin scripting.

    The purpose of this setup is to function as the “placeholder” that we can mimic in our 3D implementation. So, it’s
    important to
    position and style your text at this stage
    to ensure it matches the final sizing and positioning that you want to achieve. All text formatting properties like
    font-size, letter-spacing, line-height etc. are the properties you want to focus on, because we’ll later read these
    computed styles directly from the DOM during the WebGL phase. Color is optional here, as we can handle text coloring
    later with shaders inside WebGL.

    That’s it for the HTML and CSS setup! It’s all we need for the foundation to move onto our JavaScript and WebGL
    implementation.

    2. Initial 3D World Setup

    Let’s move onto the JavaScript and WebGL implementation. I’ll be using TypeScript, but you can easily follow along
    with vanilla JavaScript if you prefer. I’m assuming you’re already familiar with the basics of Three.js, so I’ll focus
    on explaining the high-level setup rather than covering every detail.

    Below is the starter TypeScript and Three.JS base that I’ll be using for this demo.

    // main.ts
    
    import Commons from "./classes/Commons";
    import * as THREE from "three";
    
    /**
     * Main entry-point.
     * Creates Commons and Scenes
     * Starts the update loop
     * Eventually creates Postprocessing and Texts.
      */
    class App {
      private commons!: Commons;
    
      scene!: THREE.Scene;
    
      constructor() {
        document.addEventListener("DOMContentLoaded", async () => {
          await document.fonts.ready; // Important to wait for fonts to load when animating any texts.
    
          this.commons = Commons.getInstance();
          this.commons.init();
    
          this.createScene();
          
          this.addEventListeners();
    
          this.update();
        });
      }
    
      private createScene() {
        this.scene = new THREE.Scene();
      }
    
      /**
       * The main loop handler of the App
       * The update function to be called on each frame of the browser.
       * Calls update on all other parts of the app
       */
      private update() {
        this.commons.update();
    
        this.commons.renderer.render(this.scene, this.commons.camera);
    
        window.requestAnimationFrame(this.update.bind(this));
      }
    
      private addEventListeners() {
        window.addEventListener("resize", this.onResize.bind(this));
      }
    
      private onResize() {
        this.commons.onResize();
      }
    }
    
    export default new App();
    
    // Commons.ts
    
    import { PerspectiveCamera, WebGLRenderer, Clock } from "three";
    
    import Lenis from "lenis";
    
    export interface Screen {
      width: number;
      height: number;
      aspect: number;
    }
    
    export interface Sizes {
      screen: Screen;
      pixelRatio: number
    }
    
    /**
     * Singleton class for Common stuff.
     * Camera
     * Renderer
     * Lenis
     * Time
     */
    export default class Commons {
      private constructor() {}
      
      private static instance: Commons;
    
      lenis!: Lenis;
      camera!: PerspectiveCamera;
      renderer!: WebGLRenderer;
    
      private time: Clock = new Clock();
      elapsedTime!: number;
    
      sizes: Sizes = {
        screen: {
          width: window.innerWidth,
          height: window.innerHeight,
          aspect: window.innerWidth / window.innerHeight,
        },
        pixelRatio: this.getPixelRatio(),
      };
    
      private distanceFromCamera: number = 1000;
    
      /**
       * Function to be called to either create Commons Singleton instance, or to return existing one.
       * TODO AFTER: Call instances init() function.
       * @returns Commons Singleton Instance.
       */
      static getInstance() {
        if (this.instance) return this.instance;
    
        this.instance = new Commons();
        return this.instance;
      }
    
      /**
       * Initializes all-things Commons. To be called after instance is set.
       */
      init() {
        this.createLenis();
        this.createCamera();
        this.createRenderer();
      }
    
      /**
       * Creating Lenis instance.
       * Sets autoRaf to true so we don't have to manually update Lenis on every frame.
       * Resets possible saved scroll position.
       */
      private createLenis() {
        this.lenis = new Lenis({ autoRaf: true, duration: 2 });
      }
    
      private createCamera() {
        this.camera = new PerspectiveCamera(
          70,
          this.sizes.screen.aspect,
          200,
          2000
        );
        this.camera.position.z = this.distanceFromCamera;
        this.camera.updateProjectionMatrix();
      }
    
      /**
       * createRenderer(): Creates the common WebGLRenderer to be used.
       */
      private createRenderer() {
        this.renderer = new WebGLRenderer({
          alpha: true, // Sets scene background to transparent, so our body background defines the background color
        });
    
        this.renderer.setSize(this.sizes.screen.width, this.sizes.screen.height);
    
        this.renderer.setPixelRatio(this.sizes.pixelRatio);
    
    	  // Creating canvas element and appending to body element.
        document.body.appendChild(this.renderer.domElement); 
      }
    
      /**
       * Single source of truth to get pixelRatio.
       */
      getPixelRatio() {
        return Math.min(window.devicePixelRatio, 2);
      }
    
      /**
       * Resize handler function is called from the entry-point (main.ts)
       * Updates the Common screen dimensions.
       * Updates the renderer.
       * Updates the camera.
       */
      onResize() {
        this.sizes.screen = {
          width: window.innerWidth,
          height: window.innerHeight,
          aspect: window.innerWidth / window.innerHeight,
        };
        this.sizes.pixelRatio = this.getPixelRatio();
    
        this.renderer.setSize(this.sizes.screen.width, this.sizes.screen.height);
        this.renderer.setPixelRatio(this.sizes.pixelRatio);
    
        this.onResizeCamera();
      }
    
      /**
       * Handler function that is called from onResize handler.
       * Updates the perspective camera with the new adjusted screen dimensions
       */
      private onResizeCamera() {
        this.camera.aspect = this.sizes.screen.aspect;
        this.camera.updateProjectionMatrix();
      }
    
      /**
       * Update function to be called from entry-point (main.ts)
       */
      update() {
        this.elapsedTime = this.time.getElapsedTime();
      }
    }
    

    A Note About Smooth Scroll

    When syncing HTML and WebGL worlds,
    you should use a custom scroll
    . This is because the native scroll in browsers updates the scroll position at irregular intervals and does not thus
    guarantee frame-perfect updates with our requestAnimationFrame loop and our WebGL world, causing a
    jittery and unsynchronized movement
    .

    By integrating a custom scroll (Lenis in this case), we ensure our scroll updates perfectly match the frame updates of
    our WebGL world.

    Right now we are seeing an empty 3D world, continuously being rendered.

    We’re only missing one thing to get something visible in our 3D world: the creation of the text elements. So let’s
    move onto creating our WebGLText class next.

    3. Creating WebGLText Class and Texts Meshes

    For the creation of the text meshes, we’ll be using
    troika-three-text
    library.

    npm i troika-three-text

    We’ll now create a reusable

    WebGLText
    class

    . This will handle turning each HTML element into a 3D text mesh, using Troika and our Three.js scene.

    Here’s the basic setup:

    // WebGLText.ts
    
    import Commons from "./Commons";
    import * as THREE from "three";
    
    // @ts-ignore
    import { Text } from "troika-three-text";
    
    interface Props {
      scene: THREE.Scene;
      element: HTMLElement;
    }
    
    export default class WebGLText {
      commons: Commons;
    
      scene: THREE.Scene;
      element: HTMLElement;
    
      computedStyle: CSSStyleDeclaration;
      font!: string; // Path to our .ttf font file.
      bounds!: DOMRect;
      color!: THREE.Color;
      material!: THREE.ShaderMaterial;
      mesh!: Text;
    
      // We assign the correct font bard on our element's font weight from here
      weightToFontMap: Record<string, string> = {
        "900": "/fonts/Humane-Black.ttf",
        "800": "/fonts/Humane-ExtraBold.ttf",
        "700": "/fonts/Humane-Bold.ttf",
        "600": "/fonts/Humane-SemiBold.ttf",
        "500": "/fonts/Humane-Medium.ttf",
        "400": "/fonts/Humane-Regular.ttf",
        "300": "/fonts/Humane-Light.ttf",
        "200": "/fonts/Humane-ExtraLight.ttf",
        "100": "/fonts/Humane-Thin.ttf",
      };
      
      private y: number = 0; // Scroll-adjusted bounds.top
      
      private isVisible: boolean = false;
    
      constructor({ scene, element }: Props) {
        this.commons = Commons.getInstance();
    
        this.scene = scene;
        this.element = element;
    
        this.computedStyle = window.getComputedStyle(this.element); // Saving initial computed style.
      }
    }
    

    We have access to the
    Text class
    from Troika, which allows us to create text meshes elements and apply styling to it using familiar properties like
    fontSize, letterSpacing, and font. I’ll cover everything you need to style your text responsively in this tutorial,
    but I implore you to take a look at the full documentation and its possibilities
    here
    .

    Troika doesn’t ship with TypeScript definitions out of the box, so if you’re using TS, you can quickly get around this
    by creating a type declaration file in the root of your project. It’s not pretty, but it gets the job done while
    keeping TypeScript happy.

    // troika.d.ts
    
    declare module "troika-three-text" {
      const value: any;
      export default value;
    }

    Let’s start by creating new methods called createFont(), createColor() and createMesh().

    createFont()
    : Selects the appropriate .ttf file based on the DOM element’s font-weight. If a match isn’t found, we fall back to
    the regular weight. Adjust the mapping to match your own font files and multiple font families if needed.

    // WebGLText.ts 
    
    private createFont() {
        this.font =
          this.weightToFontMap[this.computedStyle.fontWeight] ||
          "/fonts/Humane-Regular.ttf";
    }

    createColor()
    : Converts the computed CSS color into a THREE.Color instance:

    // WebGLText.ts 
    
    private createColor() {
        this.color = new THREE.Color(this.computedStyle.color);
    }

    createMesh():
    Instantiates the text mesh and sets some basic properties. Copies the text’s inner text and sets it onto the mesh.
    Adds the mesh to our Three.JS scene. We anchor the text from the left-center to match typical HTML layout
    expectations.

    // WebGLText.ts 
    private createMesh() {
      this.mesh = new Text();
    
      this.mesh.text = this.element.innerText; // Copying HTML content over to the mesh
      this.mesh.font = this.font;
    
      // Anchor the text to the left-center (instead of center-center)
      this.mesh.anchorX = "0%";
      this.mesh.anchorY = "50%";
    
      this.mesh.color = this.color;
    
      this.scene.add(this.mesh);
    }

    ⚠️ When copying text contents over to the Mesh, avoid using innerHTML or textContent and use innerText instead as it
    gives the most layout-accurate and consistent results.

    setStaticValues
    (): Let’s also create a baby setStaticValues() method which will set the critical properties of our text mesh based on
    the computedStyle.

    We sets values like font size based on computed CSS. We’ll expand this more as we sync more styles down the line.

    We want to call all these methods in the constructor like this:

    // WebGLText.ts 
     constructor({ scene, element }: Props) {
      this.commons = Commons.getInstance();
    
      this.scene = scene;
      this.element = element;
    
      this.computedStyle = window.getComputedStyle(this.element); // Saving initial computed style.
    
      this.createFont();
      this.createColor();
      this.createMesh();
      this.setStaticValues();
    }

    Instantiating Text Elements from DOM

    Finally, let’s update our App class (main.ts), and hook this all up by scanning for DOM elements with a
    data-animation=”webgl-text” attribute — creating a WebGLText instance for each one:

    // main.ts
    
    texts!: Array<WebGLText>;
    
    // ...
    
    private createWebGLTexts() {
      const texts = document.querySelectorAll('[data-animation="webgl-text"]');
    
      if (texts) {
        this.texts = Array.from(texts).map((el) => {
          const newEl = new WebGLText({
            element: el as HTMLElement,
            scene: this.scene,
          });
    
          return newEl;
        });
      }
    }
    

    Make sure to call this method in the constructor on initialization. This will populate our scene with styled text
    meshes based on our DOM content.

    That’s all we need to have our text meshes visible, it’s not the prettiest sight to behold, but at least we got
    everything working:

    Next Challenge: Screen vs. 3D Space Mismatch

    Even though we copy the font size directly from the DOM, the scale looks different in 3D. That’s because
    WebGL units don’t map 1:1 with screen pixels
    , and they operate in different coordinate systems. This mismatch will become even more obvious if we start
    positioning and animating elements.

    To get true visual parity between our DOM elements and WebGL text, we need to bridge the gap between screen space and
    3D space. Let’s tackle that next so our text sizes and positions actually match with what we see in the browser.

    4. Syncing Dimensions

    The major problem when syncing HTML and WebGL dimensions is that things between them aren’t exactly pixel-perfect.
    This is because the DOM and WebGL don’t “speak the same units” by default.

    • Web browsers work in screen pixels.
    • WebGL uses arbitrary units

    Our goal is simple:

    💡 Make one unit in the WebGL scene equal one pixel on the screen.

    To achieve this, we’ll adjust the camera’s field of view (FOV) so that visible area through the camera exactly matches
    the dimensions of the browser window in pixels.

    So, we’ll create a
    syncDimensions()
    function under our Commons class, which calculates our camera’s field of view such that 1 unit in the WebGL scene
    corresponds to 1 pixel on the screen —
    at a given distance from the camera.

     // Commons.ts 
    /**
      * Helper function that is called upon creation and resize
      * Updates the camera's fov according to the new dimensions such that the window's pixels match with that of WebGL scene
      */
    private syncDimensions() {
      this.camera.fov =
        2 *
        Math.atan(this.sizes.screen.height / 2 / this.distanceFromCamera) *
        (180 / Math.PI);
    }

    This function will be called once when we create the camera, and every time that the screen is resized.

    
    //Commons.ts
    
    private createCamera() {
      this.camera = new PerspectiveCamera(
        70,
        this.sizes.screen.aspect,
        200,
        2000
      );
      this.camera.position.z = this.distanceFromCamera;
      this.syncDimensions(); // Syncing dimensions
      this.camera.updateProjectionMatrix();
    }
    
    // ...
    
    private onResizeCamera() {
      this.syncDimensions(); // Syncing dimensions
    
      this.camera.aspect = this.sizes.screen.aspect;
      this.camera.updateProjectionMatrix();
    }

    Let’s break down what’s actually going on here using the image below:

    We know:

    • The height of the screen
    • The distance from camera (Z)
    • The FOV of the camera is the vertical angle (fov y in the image)

    So our main goal is to set how wide (vertical angle) we see according to our screen height.

    Because the Z (distance from camera) and half of the screen height
    forms a right triangle
    (distance + height), we can solve for the angle using some basic trigonometry, and compute the FOV using the inverse
    tangent (
    atan
    ) of this triangle.

    Step-by-step Breakdown of the Formula

    this.sizes.screen.height / 2

    → This gives us half the screen’s pixel height — the opposite side of our triangle.

    this.distanceFromCamera

    → This is the adjacent side of the triangle — the distance from the camera to the 3D scene.

    Math.atan(opposite / adjacent)

    → Calculates half of the vertical FOV (in radians).

    *2

    → Since atan only gives half of the angle, we multiply it by 2 to get the full FOV.

    * (180 / Math.PI)

    → Converts the angle from radians to degrees (Three.js expects degrees for PerspectiveCamera’s fov)

    So the final formula comes down to:

    this.camera.fov =
      2 *
      Math.atan(this.sizes.screen.height / 2 / this.distanceFromCamera) *
      (180 / Math.PI);

    That’s all we need to sync our dimensions, and this setup ensures that 1 unit in WebGL = 1 pixel on screen.

    Let’s move back to the text implementation.

    5. Setting Text Properties and Positioning

    Now that we’ve synced the WebGL scene to our screen’s pixel dimensions, we can start mapping HTML styles to our 3D
    text.

    If everything’s wired up correctly, you should see that the font size of the WebGL-rendered text matches the size of
    the underlying HTML, although the positioning is still off.

    Let’s sync more styling properties and positioning.

    Before we can position the 3D text, we need to get the DOM element’s position and size. We’ll create a new method in
    the WebGLText class called
    createBounds()
    ,
    and use the browser’s built-in getBoundingClientRect() method:

    // WebGLText.ts
    
    private createBounds() {
      this.bounds = this.element.getBoundingClientRect();
      this.y = this.bounds.top + this.commons.lenis.actualScroll;
    }

    And call this in the constructor:

      // WebGLText.ts
    
    constructor({ scene, element }: Props) {
      this.commons = Commons.getInstance();
    
      this.scene = scene;
      this.element = element;
    
      this.computedStyle = window.getComputedStyle(this.element); // Saving initial computed style.
    
      this.createFont();
      this.createColor();
      this.createBounds(); // Creating bounds
      this.createMesh();
      this.setStaticValues();
    }

    Next, we’ll pull important typographic properties from the DOM (computed style) and pass them to the 3D mesh, so that
    it behaves like our native HTML text. (Again, you can see the full documentation and possible properties of troika
    here
    ). Below I’ve included the most important ones.

      // WebGLText.ts 
    
    private setStaticValues() {
      const { fontSize, letterSpacing, lineHeight, whiteSpace, textAlign } =
        this.computedStyle;
    
      const fontSizeNum = window.parseFloat(fontSize);
    
      this.mesh.fontSize = fontSizeNum;
    
      this.mesh.textAlign = textAlign;
    
      // Troika defines letter spacing in em's, so we convert to them
      this.mesh.letterSpacing = parseFloat(letterSpacing) / fontSizeNum;
    
      // Same with line height
      this.mesh.lineHeight = parseFloat(lineHeight) / fontSizeNum;
    
      // Important to define maxWidth for the mesh, so that our text doesn't overflow
      this.mesh.maxWidth = this.bounds.width;
    
      // Match whiteSpace behavior (e.g., 'pre', 'nowrap')
      this.mesh.whiteSpace = whiteSpace;
    }

    Troika accepts some of the properties in local em units, so we have to convert pixels into em’s by dividing the pixel
    values by the font size.

    Also, it’s important to set a maximum width (in pixels) to constrain the mesh’s layout — this prevents text from
    overflowing and ensures proper text wrapping.

    And finally, let’s create an
    update()
    function to be called on each frame that consistently positions our mesh according to the underlying DOM position.

    This is what it looks like:

    //WebGLText.ts
    
    update() {
      this.mesh.position.y =
        -this.y +
        this.commons.lenis.animatedScroll +
        this.commons.sizes.screen.height / 2 -
        this.bounds.height / 2;
    
      this.mesh.position.x =
        this.bounds.left - this.commons.sizes.screen.width / 2;
    }

    Breakdown:

    • this.y
      shifts the mesh upward by the element’s absolute Y offset.
    • lenis.animatedScroll
      re-applies the live animated scroll position.
    • Together, they give the current relative position inside the viewport.

    Since our WebGL coordinate system is centered in the middle of the screen (Y = 0 is center), we also:

    • Add half the screen height (to convert from DOM top-left origin to WebGL center origin)
    • Subtract half the text height to vertically center the text
    • Subtract half the screen width

    Now, we call this update function for each of the text instances in our entry-file:

      // main.ts
    
    private update() {
      this.commons.update();
    
      this.commons.renderer.render(this.scene, this.commons.camera);
    
    
      if (this.texts) {
        this.texts.forEach((el) => el.update());
      }
    
      window.requestAnimationFrame(this.update.bind(this));
    }

    And now, the
    texts will perfectly follow DOM counterparts
    , even as the user scrolls.

    Let’s finalize our base text class implementation before diving into effects:

    Resizing

    We need to ensure that our WebGL text updates correctly on window resize events. This means
    recreating the computedStyle, bounds, and static values
    whenever the window size changes.

    Here’s the resize event handler:

     // WebGLText.ts
    
    onResize() {
      this.computedStyle = window.getComputedStyle(this.element);
      this.createBounds();
      this.setStaticValues();
    }

    And, call it in the entry-point for each of the text instances:

      // main.ts
    
    private onResize() {
      this.commons.onResize();
    
      // Resizing texts
      if (this.texts) {
        this.texts.forEach((el) => el.onResize());
      }
    }

    Once everything is working responsively and perfectly synced with the DOM, we can finally
    hide the original HTML text by setting it transparent
    — but we’ll keep it in place so it’s still selectable and accessible to the user.

    // WebGLText.ts
    
    this.createFont();
    this.createColor();
    this.createBounds();
    this.createMesh();
    this.setStaticValues();
    
    this.element.style.color = "transparent"; // Hide DOM element

    We should now have our perfectly responsive text meshes, and the user only sees the rendered WebGL text, while the DOM
    element remains fully intact for accessibility.

    Let’s add some effects!

    6. Adding a Custom shader and Replicating Mask Reveal Animations

    Troika also lets us use custom shader materials for meshes, giving us the flexibility to create complex effects beyond
    just setting colors.

    Let’s set up our initial custom shaders:

    Fragment Shader:

    // text.frag
    
    uniform vec3 uColor;
    varying vec2 vUv;
    
    void main() {
      gl_FragColor = vec4(uColor, 1.0); // Applying our custom color.
    }

    The fragment shader defines the color of the text using the uColor uniform.

    Vertex Shader:

    // text.vert
    varying vec2 vUv;
    
    void main() {
      vUv = uv;
      gl_Position = projectionMatrix * modelViewMatrix * vec4(position, 1.0);
    }

    The vertex shader passes the texture coordinates (uv) to the fragment shader for the text rendering.

    Shader File Imports using Vite

    To handle shader files more easily, we can use the
    vite-plugin-glsl
    plugin together with Vite to directly import shader files like .frag and .vert in code:

    npm i vite-plugin-glsl -D
    // vite.config.ts
    
    import { defineConfig } from "vite";
    import glsl from "vite-plugin-glsl";
    
    export default defineConfig({
      plugins: [
        glsl({
          include: [
            "**/*.glsl",
            "**/*.wgsl",
            "**/*.vert",
            "**/*.frag",
            "**/*.vs",
            "**/*.fs",
          ],
          warnDuplicatedImports: true,
          defaultExtension: "glsl",
          watch: true,
          root: "/",
        }),
      ],
    });
    

    If you’re using TypeScript, you also need to declare the modules for shader files so TypeScript can understand how to
    import them:

    // shaders.d.ts
    
    declare module "*.frag" {
      const value: string;
      export default value;
    }
    
    declare module "*.vert" {
      const value: string;
      export default value;
    }
    
    declare module "*.glsl" {
      const value: string;
      export default value;
    }

    Creating Custom Shader Materials

    Let’s now create our custom ShaderMaterial and apply it to our mesh:

    // WebGLText.ts
    
    // Importing shaders
    import fragmentShader from "../../shaders/text/text.frag";
    import vertexShader from "../../shaders/text/text.vert";
    
    //...
    
    this.createFont();
    this.createColor();
    this.createBounds();
    this.createMaterial(); // Creating material
    this.createMesh();
    this.setStaticValues();
    
    //...
    
    private createMaterial() {
       this.material = new THREE.ShaderMaterial({
         fragmentShader,
         vertexShader
           uniforms: {
           uColor: new THREE.Uniform(this.color), // Passing our color to the shader
         },
       });
     }

    In the
    createMaterial()
    method, we define the
    ShaderMaterial
    using the imported shaders and pass in the uColor uniform, which allows us to dynamically control the color of the
    text based on our DOM-element.

    And now, instead of setting the color directly on the default mesh material, we apply our new custom material:

      // WebGLText.ts
    
    private createMesh() {
      this.mesh = new Text();
    
      this.mesh.text = this.element.innerText; // Always use innerText (not innerHTML or textContent).
      this.mesh.font = this.font;
    
      this.mesh.anchorX = "0%";
      this.mesh.anchorY = "50%";
    
      this.mesh.material = this.material; //Using custom material instead of color
    }

    At this point, we are using our custom shader material, but so far, nothing in our output has changed. Let’s now setup
    show and hide animations using our custom shader, and replicate the mask reveal effect.

    Setting up Reveal Animations

    We’ll create an animation that uses a progress uniform (uProgress) to control the visibility and reveal progress of
    the text. The animation will be controlled using the motion library.

    First, we must install
    motion
    and import its
    animate
    and
    inView
    functions to our WebGLText class.

    npm i motion
    // WebGLText.ts
    
    import { inView, animate } from "motion";

    Now, let’s configure our class so that when the text steps into view,
    the show() function is called
    , and when it steps away,
    the hide() function is called
    . These methods also control the current visibility variable
    this.isVisible
    . These functions will control the uProgress variable, and animate it between 0 and 1.

    For this, we also must setup an addEventListeners() function:

     // WebGLText.ts
    
    /**
      * Inits visibility tracking using motion's inView function.
      * Show is called when the element steps into view, and hide is called when the element steps out of view
      */
    private addEventListeners() {
      inView(this.element, () => {
        this.show();
    
        return () => this.hide();
      });
    }
    
    show() {
      this.isVisible = true;
    
      animate(
        this.material.uniforms.uProgress,
        { value: 1 },
        { duration: 1.8, ease: [0.25, 1, 0.5, 1] }
      );
    }
    
    hide() {
      animate(
        this.material.uniforms.uProgress,
        { value: 0 },
        { duration: 1.8, onComplete: () => (this.isVisible = false) }
      );
    }

    Just make sure to call addEventListeners() in your constructor after setting up the class.

    Updating the Shader Material for Animation

    We’ll also add two additional uniform variables in our material for the animations:

    • uProgress
      : Controls the reveal progress (from 0 to 1).
    • uHeight
      : Used by the vertex shader to calculate vertical position offset.

    Updated
    createMaterial()
    method:

     // WebGLText.ts
    
    private createMaterial() {
      this.material = new THREE.ShaderMaterial({
        fragmentShader,
        vertexShader,
        uniforms: {
          uProgress: new THREE.Uniform(0),
          uHeight: new THREE.Uniform(this.bounds.height),
          uColor: new THREE.Uniform(this.color),
        },
      });
    }

    Since the uHeight is dependent on bounds, we also want to update the uniform variable upon resizing:

      // WebGLText.ts
    
    onResize() {
      this.computedStyle = window.getComputedStyle(this.element);
      this.createBounds();
      this.setStaticValues();
      this.material.uniforms.uHeight.value = this.bounds.height;
    }

    We now have the text class instance automatically calling show() and hide(), and animating the uProgress according to
    the visibility of our underlying DOM-element.

    For performance, you might want to update the update() method to only calculate a new position when the mesh is
    visible:

    update() {
      if (this.isVisible) {
        this.mesh.position.y =
          -this.y +
          this.commons.lenis.animatedScroll +
          this.commons.sizes.screen.height / 2 -
          this.bounds.height / 2;
    
        this.mesh.position.x =
          this.bounds.left - this.commons.sizes.screen.width / 2;
      }
    }

    Mask Reveal Theory and Shader Implementation

    Creating a mask reveal effect with custom shaders in WebGL is surprisingly simple when we break it down into two
    separate movements: one happening in the fragment shader and the other in the vertex shader. You might’ve seen this
    effect happen in WebGL on the page of
    Zajno
    , for example.

    Instead of overcomplicating the concept with complex masks or thinking about “lifting it up” behind a window (as we do
    in traditional HTML), we can think of it as two distinct actions that work together.

    1. Fragment Shader
      : We clip the text vertically, revealing it gradually from top to bottom.
    2. Vertex Shader
      : We translate the text’s position from the bottom to the top by its height.

    Together these two movements create the illusion of the text lifting itself up from behind a mask.

    Let’s update our fragment shader code:

    //text.frag
    
    uniform float uProgress; // Our progress value between 0 and 1
    
    uniform vec3 uColor;
    varying vec2 vUv;
    
    void main() {
      // Calculate the reveal threshold (bottom to top reveal)
      float reveal = 1.0 - vUv.y;
      
      // Discard fragments above the reveal threshold based on progress
      if (reveal > uProgress) discard;
    
      // Apply the color to the visible parts of the text
      gl_FragColor = vec4(uColor, 1.0);
    }
    
    • When uProgress is 0, the mesh is fully clipped out, and nothing is visible
    • When uProgress increases towards 1, the mesh reveals itself from top to bottom.

    For the vertex shader, we can simply pass the new uniform called uHeight, which stands for the height of our
    DOM-element (this.bounds.height), and translate the output vertically according to it and uProgress.

    //text.vert
    
    uniform float uProgress;
    uniform float uHeight; // Total height of the mesh passed in from JS
    
    varying vec2 vUv;
    
    void main() {
      vUv = uv;
      
      vec3 transformedPosition = position;
    
      // Push the mesh upward as it reveals
      transformedPosition.y -= uHeight * (1.0 - uProgress);
      
      gl_Position = projectionMatrix * modelViewMatrix * vec4(transformedPosition, 1.0);
    }
    • uHeight
      : Total height of the DOM-element (and mesh), passed in from JS.
    • When
      uProgress
      is
      0
      , the mesh is fully pushed down.
    • As
      uProgress
      reaches
      1
      , it resolves to its natural position.

    Now, we should have a beautifully on-scroll animating scene, where the texts reveal themselves as in regular HTML when
    they scroll into view.

    To spice things up, let’s add some scroll-velocity based post processing effects to our scene as the final step!

    7. Adding Post-processing

    Now that we’ve built our animated WebGL text with custom shaders and scroll-triggered reveals, we can push the visuals
    further with
    post-processing
    .

    Post-processing allows us to apply full-screen visual effects after the scene has been rendered. This is done by
    passing the final image through a series of custom shader passes.

    So, in this final section, we’ll:

    • Set up a PostProcessing class using Three.js’s EffectComposer
    • Add a custom RGB shift and wave distortion effect
    • Drive the distortion strength dynamically using the scroll velocity from our Lenis custom scroll instance

    Creating a PostProcessing class with EffectComposer

    Let’s create a PostProcessing class that will be intialized from our entry-point, and which will handle everything
    regarding postprocessing using Three.JS’s EffectComposer. Read more about the EffectComposer class
    here from Three.js’s documentation
    . We’ll also create new fragment and vertex shaders for the postprocessing class to use.

    // PostProcessing.ts
    
    import {
      EffectComposer,
      RenderPass,
      ShaderPass,
    } from "three/examples/jsm/Addons.js";
    import Commons from "./Commons";
    import * as THREE from "three";
    
    // Importing postprocessing shaders
    import fragmentShader from "../../shaders/postprocessing/postprocessing.frag";
    import vertexShader from "../../shaders/postprocessing/postprocessing.vert";
    
    interface Props {
      scene: THREE.Scene;
    }
    
    export default class PostProcessing {
      // Scene and utility references
      private commons: Commons;
      private scene: THREE.Scene;
    
      private composer!: EffectComposer;
    
      private renderPass!: RenderPass;
      private shiftPass!: ShaderPass;
    
      constructor({ scene }: Props) {
        this.commons = Commons.getInstance();
    
        this.scene = scene;
    
        this.createComposer();
        this.createPasses();
      }
    
      private createComposer() {
        this.composer = new EffectComposer(this.commons.renderer);
        this.composer.setPixelRatio(this.commons.sizes.pixelRatio);
        this.composer.setSize(
          this.commons.sizes.screen.width,
          this.commons.sizes.screen.height
        );
      }
    
      private createPasses() {
        // Creating Render Pass (final output) first.
        this.renderPass = new RenderPass(this.scene, this.commons.camera);
        this.composer.addPass(this.renderPass);
    
        // Creating Post-processing shader for wave and RGB-shift effect.
        const shiftShader = {
          uniforms: {
            tDiffuse: { value: null },      // Default input from previous pass
            uVelocity: { value: 0 },        // Scroll velocity input
            uTime: { value: 0 },            // Elapsed time for animated distortion
          },
          vertexShader,
          fragmentShader,
        };
    
        this.shiftPass = new ShaderPass(shiftShader);
        this.composer.addPass(this.shiftPass);
      }
    
      /**
       * Resize handler for EffectComposer, called from entry-point.
       */
      onResize() {
        this.composer.setPixelRatio(this.commons.sizes.pixelRatio);
        this.composer.setSize(
          this.commons.sizes.screen.width,
          this.commons.sizes.screen.height
        );
      }
    
      update() {
        this.shiftPass.uniforms.uTime.value = this.commons.elapsedTime;
    
        this.composer.render();
      }
    }
    

    Since we don’t have our postprocessing shaders created yet, make sure you create placeholder postprocessing.frag and
    postprocessing.vert shaders so the imports don’t fail.

    Example placeholders below:

    //postprocessing.frag
    
    uniform sampler2D tDiffuse;
    uniform float uVelocity;
    uniform float uTime;
    
    varying vec2 vUv;
    
    void main() {
        gl_FragColor = texture2D(tDiffuse, vUv);
    }
    
    //postprocessing.vert
    varying vec2 vUv;
    
    void main() {
        vUv = uv;
            
        gl_Position = projectionMatrix * modelViewMatrix * vec4(position, 1.0);
    }

    Breakdown of the PostProcessing class

    Constructor:
    Initializes the class by storing the provided scene, grabbing the shared Commons instance, and then calling
    createComposer()
    and
    createPasses()
    .

    createComposer():
    Sets up the EffectComposer with the correct pixel ratio and canvas size:

    • EffectComposer wraps the WebGL renderer and allows chaining of multiple render passes.
    • Sized according to current viewport dimensions and pixel ratio

    createPasses():
    This method sets up all rendering passes applied to the scene.

    • RenderPass
      : The first pass that simply renders the scene with the main camera as regular.
    • ShaderPass (shiftPass)
      : A custom full-screen shader pass that we’ll create and which will create the RGB shift and wavy distortion
      effects.

    update():
    Method called on every frame. Updates the uTime uniform so we can animate effects over time, and renders the final
    post-processed image using
    composer.render()

    Initializing Post-processing

    To wire the post-processing system into our existing app, we update our main.ts:

      //main.ts
    private postProcessing!: PostProcessing;
    
    //....
    
    constructor() {
      document.addEventListener("DOMContentLoaded", async () => {
        await document.fonts.ready;
    
        this.commons = Commons.getInstance();
        this.commons.init();
    
        this.createScene();
        this.createWebGLTexts();
        this.createPostProcessing(); // Creating post-processing
        this.addEventListeners();
    
        this.update();
      });
    }
    
    // ...
    
    private createPostProcessing() {
      this.postProcessing = new PostProcessing({ scene: this.scene });
    }
    
    // ...
    
    private update() {
      this.commons.update();
      
      if (this.texts) {
        this.texts.forEach((el) => el.update());
      }
      
      // Don't need line below as we're rendering everything using EffectComposer.
      // this.commons.renderer.render(this.scene, this.commons.camera);
      
      this.postProcessing.update(); // Post-processing class handles rendering of output from now on
    
      
      window.requestAnimationFrame(this.update.bind(this));
    }
    
    
    private onResize() {
      this.commons.onResize();
    
      if (this.texts) {
        this.texts.forEach((el) => el.onResize());
      }
    
      this.postProcessing.onResize(); // Resize post-processing
    }

    So in the new update() function, instead of rendering directly from there, we now hand off rendering responsibility to
    the PostProcessing class.

    Creating Post-processing Shader and Wiring Scroll Velocity

    We want to modify the PostProcessing class further, so that we update the postprocessing fragment shader with the
    current scroll velocity from Lenis.

    For this, I’m adding a new property lerpedVelocity and lerpFactor, which control the smoothed out velocity. The raw
    velocity values from lenis can be spiky and sudden, especially with fast scrolling or scroll jumps. If we pass that
    raw value directly into a shader, it can cause a really jittery output.

    private lerpedVelocity = 0; // Smoothed scroll velocity for post-processing.
    private lerpFactor = 0.05; // Controls how quickly lerpedVelocity follows the real velocity
    
    // ...
    
    update() {
        this.shiftPass.uniforms.uTime.value = this.commons.elapsedTime;
    
      // Reading current velocity form lenis instance.
      const targetVelocity = this.commons.lenis.velocity;
    
      // We use the lerped velocity as the actual velocity for the shader, just for a smoother experience.
      this.lerpedVelocity +=
        (targetVelocity - this.lerpedVelocity) * this.lerpFactor;
    
      this.shiftPass.uniforms.uVelocity.value = this.lerpedVelocity;
    
      this.composer.render();
    }

    Post-processing Shaders

    For the vertex shader, we can keep all things default, we pass the texture coordinates to the fragment shader.

    //postprocessing.vert
    
    varying vec2 vUv;
    
    void main() {
      vUv = uv;
            
      gl_Position = projectionMatrix * modelViewMatrix * vec4(position, 1.0);
    }

    And for the fragment shader:

    //postprocessing.frag
    
    uniform sampler2D tDiffuse;
    uniform float uVelocity;
    uniform float uTime;
    
    varying vec2 vUv;
    
    void main() {
      vec2 uv = vUv;
      
      // Calculating wave distortion based on velocity
      float waveAmplitude = uVelocity * 0.0009;
      float waveFrequency = 4.0 + uVelocity * 0.01;
      
      // Applying wave distortion to the UV coordinates
      vec2 waveUv = uv;
      waveUv.x += sin(uv.y * waveFrequency + uTime) * waveAmplitude;
      waveUv.y += sin(uv.x * waveFrequency * 5. + uTime * 0.8) * waveAmplitude;
      
      // Applying the RGB shift to the wave-distorted coordinates
      float r = texture2D(tDiffuse, vec2(waveUv.x, waveUv.y + uVelocity * 0.0005)).r;
      vec2 gb = texture2D(tDiffuse, waveUv).gb;
    
      gl_FragColor = vec4(r, gb, r);
    }

    Breakdown

    // Calculating wave distortion based on velocity
    float waveAmplitude = uVelocity * 0.0009;
    float waveFrequency = 4.0 + uVelocity * 0.01;

    Wave amplitude controls how strongly the wave effect distorts the screen according to our scroll velocity.

    Wave frequency controls how frequently the waves occur.

    Next, we distort the UV-coordinates using sin functions and the uTime uniform:

    // Applying wave distortion to the UV coordinates
    vec2 waveUv = uv;
    waveUv.x += sin(uv.y * waveFrequency + uTime) * waveAmplitude;
    waveUv.y += sin(uv.x * waveFrequency * 5. + uTime * 0.8) * waveAmplitude;

    The red channel is offset slightly based on the velocity, creating the RGB shift effect.

    // Applying the RGB shift to the wave-distorted coordinates
    float r = texture2D(tDiffuse, vec2(waveUv.x, waveUv.y + uVelocity * 0.0005)).r;
    vec2 gb = texture2D(tDiffuse, waveUv).gb;
    
    gl_FragColor = vec4(r, gb, r);

    This will create a subtle color separation in the final image that shifts according to our scroll velocity.

    Finally, we combine red, green, blue, and alpha into the output color.

    8. Final Result

    And there you have it! We’ve created a responsive text scene, with scroll-triggered mask reveal animations and
    wavy/rgb shifted post-processing.

    This setup provides a solid, modular foundation for building more advanced WebGL text effects. If you’re curious to explore further, consider adding particles, fluid simulations, audio reactivity, or more complex materials and shaders. If you’re interested in breakdowns of any of these, feel free to reach out on X.

    Thanks so much for following along 🙌


    Source link