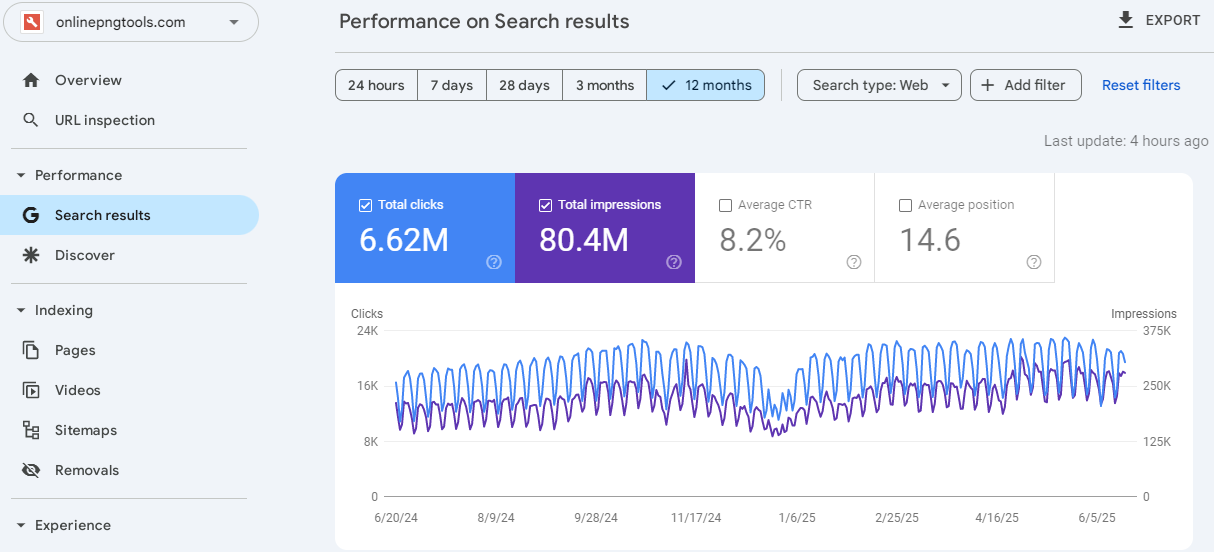
Yesterday Online PNG Tools smashed through 6.60M Google clicks and today it’s smashed through 6.61M Google clicks! That’s 10,000 new clicks in a single day – the smash train keeps on rollin’!
What Are Online PNG Tools?
Online PNG Tools offers a collection of easy-to-use web apps that help you work with PNG images right in your browser. It’s like a Swiss Army Knife for anything PNG-related. On this site, you can create transparent PNGs, edit icons, clean up logos, crop stamps, change colors of signatures, and customize stickers – there’s a tool for it all. The best part is that you don’t need to install anything or be a graphic designer. All tools are made for regular people who just want to get stuff done with their images. No sign-ups, no downloads – just quick and easy PNG editing tools.
Who Created Online PNG Tools?
Online PNG Tools were created by me and my team at Browserling. We’ve build simple, browser-based tools that anyone can use without needing to download or install anything. Along with PNG tools, we also work on cross-browser testing to help developers make sure their websites work great on all web browsers. Our mission is to make online tools that are fast, easy to use, and that are helpful for everyday tasks like editing icons, logos, and signatures.
Who Uses Online PNG Tools?
Online PNG Tools and Browserling are used by everyone – from casual users to professionals and even Fortune 100 companies. Casual users often use them to make memes, edit profile pictures, or remove backgrounds. Professionals use them to clean up logos, design icons, or prepare images for websites and apps.
When building the basement studio site, we wanted to add 3D characters without compromising performance. We used instancing to render all the characters simultaneously. This post introduces instances and how to use them with React Three Fiber.
Introduction
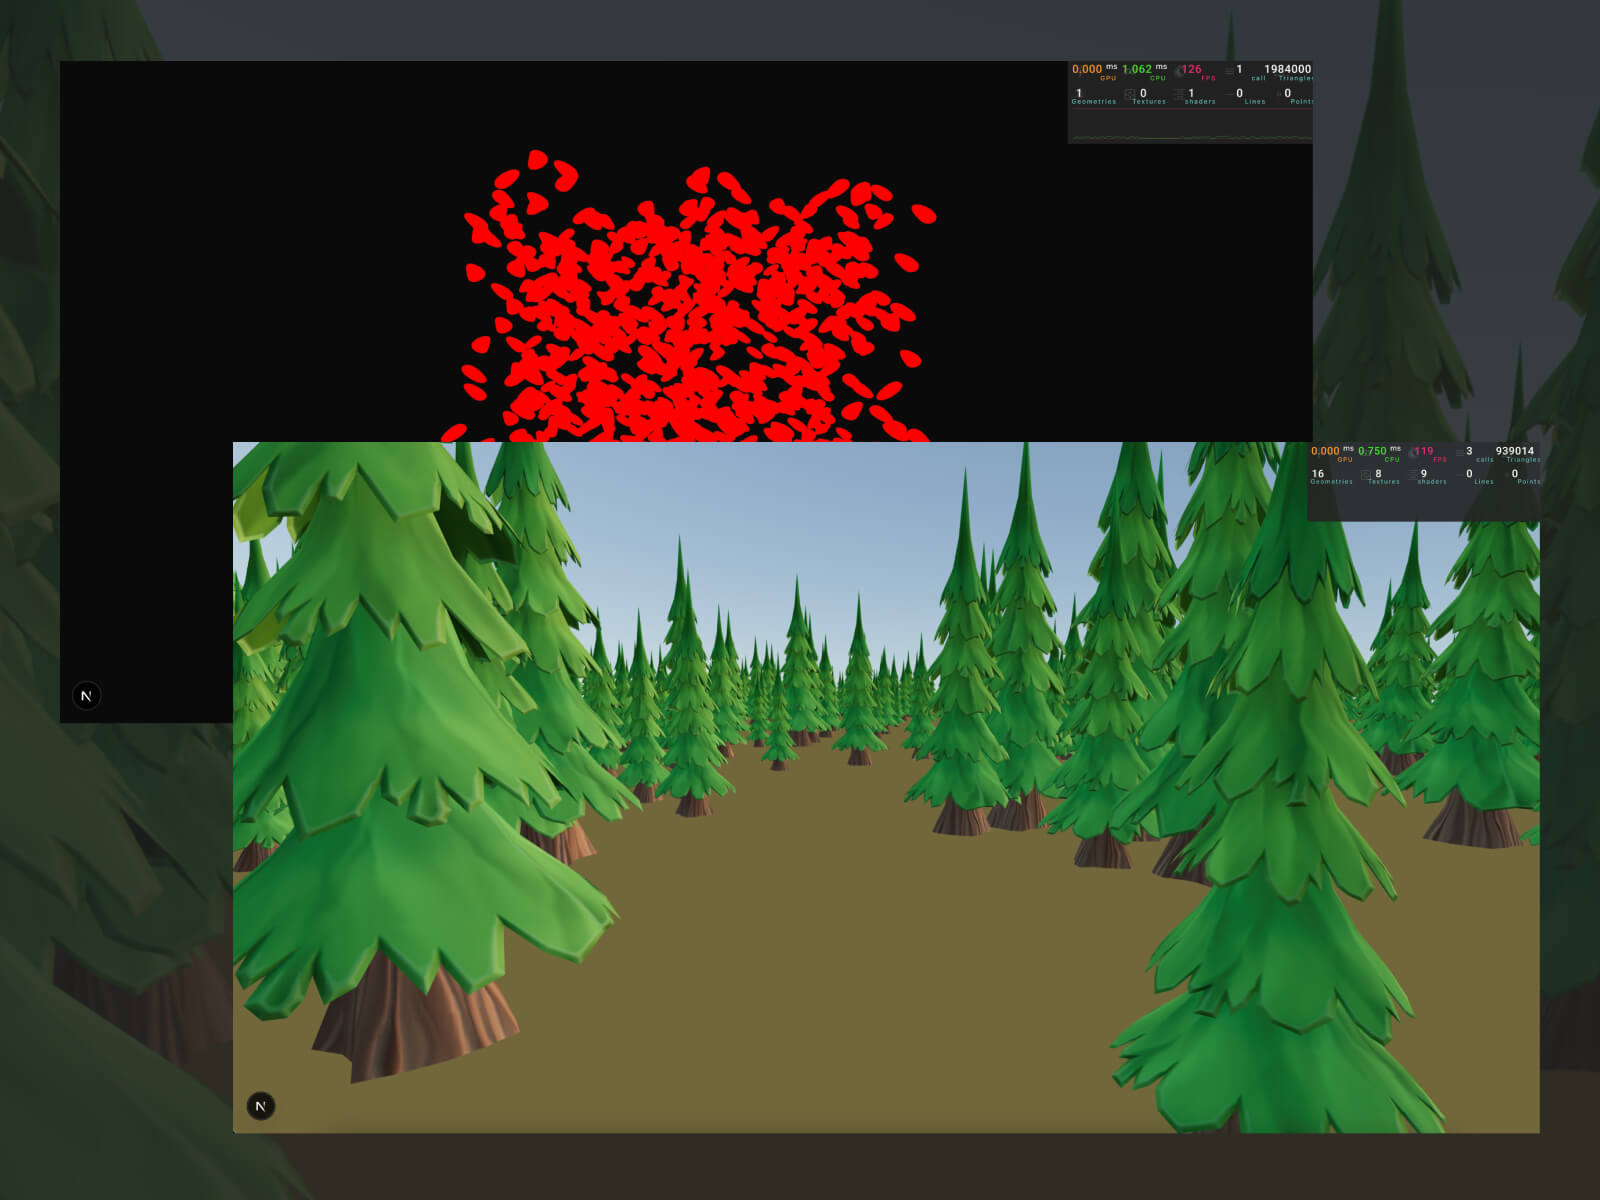
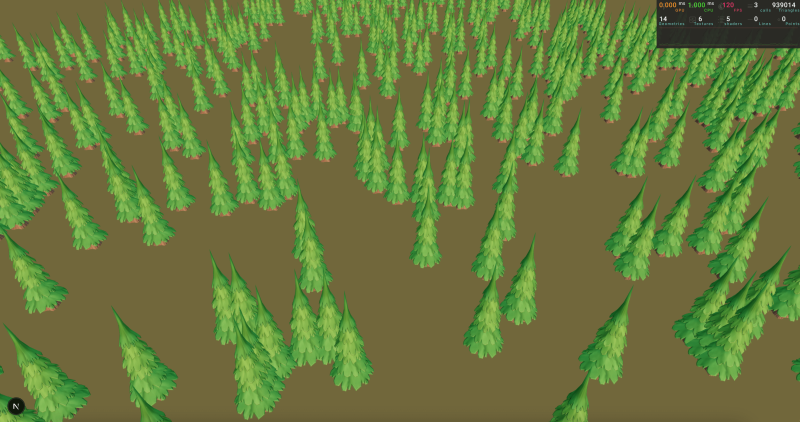
Instancing is a performance optimization that lets you render many objects that share the same geometry and material simultaneously. If you have to render a forest, you’d need tons of trees, rocks, and grass. If they share the same base mesh and material, you can render all of them in a single draw call.
A draw call is a command from the CPU to the GPU to draw something, like a mesh. Each unique geometry or material usually needs its own call. Too many draw calls hurt performance. Instancing reduces that by batching many copies into one.
Basic instancing
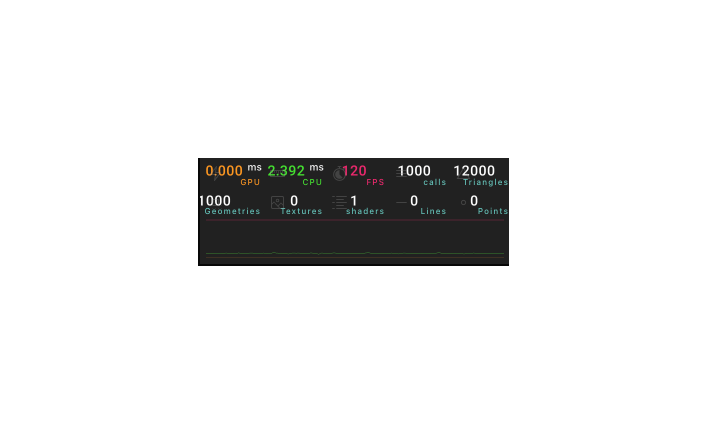
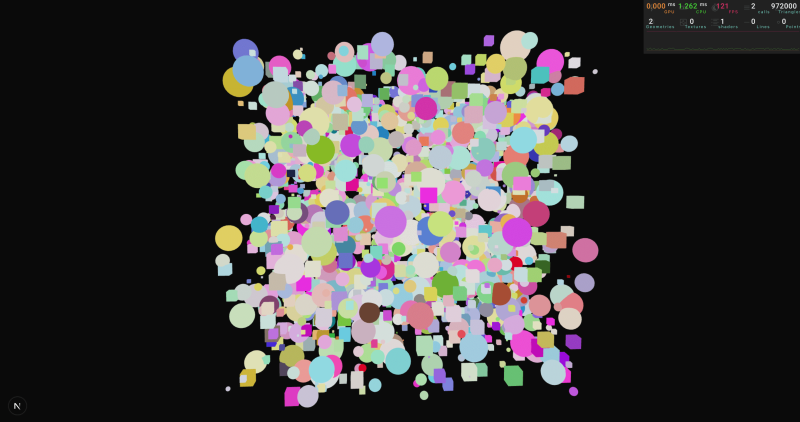
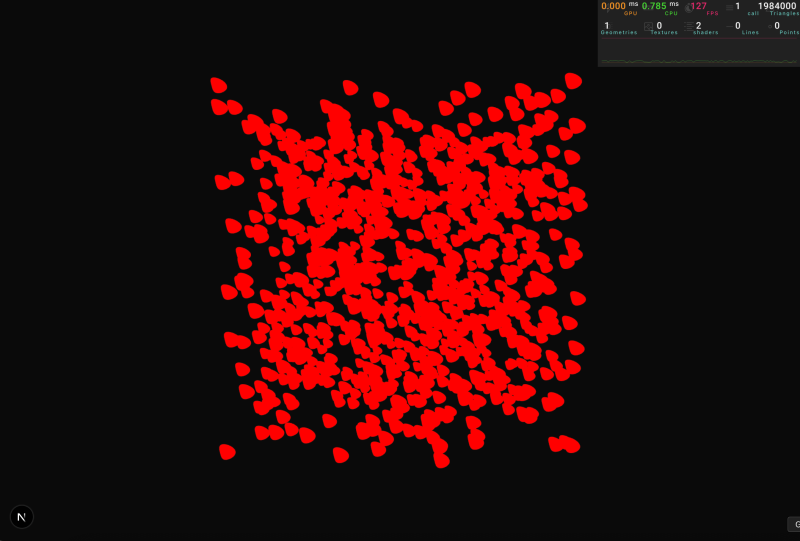
As an example, let’s start by rendering a thousand boxes in a traditional way, and let’s loop over an array and generate some random boxes:
If we add a performance monitor to it, we’ll notice that the number of “calls” matches our boxCount.
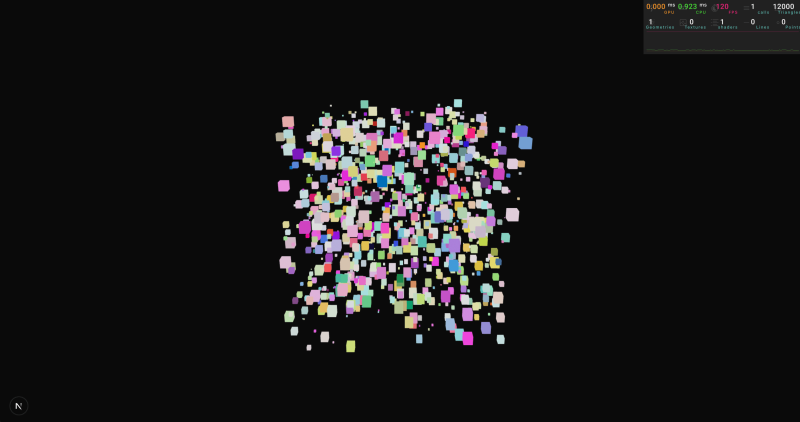
A quick way to implement instances in our project is to use drei/instances.
The Instances component acts as a provider; it needs a geometry and materials as children that will be used each time we add an instance to our scene.
The Instance component will place one of those instances in a particular position/rotation/scale. Every Instance will be rendered simultaneously, using the geometry and material configured on the provider.
What is happening here? We are sending the geometry of our box and the material just once to the GPU, and ordering that it should reuse the same data a thousand times, so all boxes are drawn simultaneously.
Notice that we can have multiple colors even though they use the same material because Three.js supports this. However, other properties, like the map, should be the same because all instances share the exact same material.
We’ll see how we can hack Three.js to support multiple maps later in the article.
Having multiple sets of instances
If we are rendering a forest, we may need different instances, one for trees, another for rocks, and one for grass. However, the example from before only supports one instance in its provider. How can we handle that?
The creteInstnace() function from drei allows us to create multiple instances. It returns two React components, the first one a provider that will set up our instance, the second, a component that we can use to position one instance in our scene.
Until now, all the examples have used Three.js’ built-in materials to add our meshes to the scene, but sometimes we need to create our own materials. How can we add support for instances to our shaders?
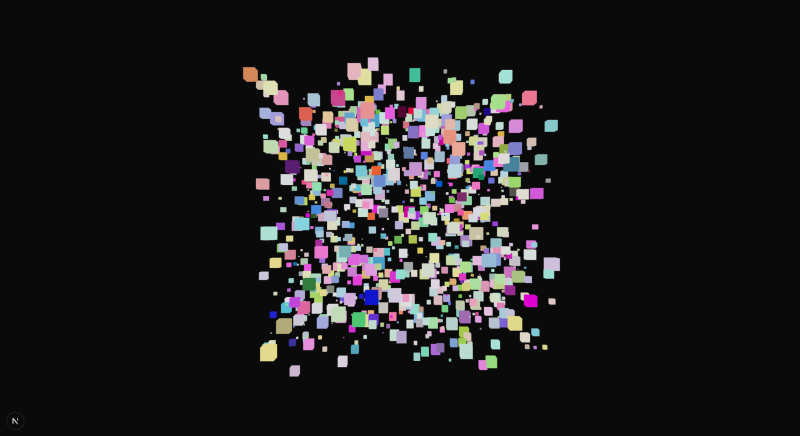
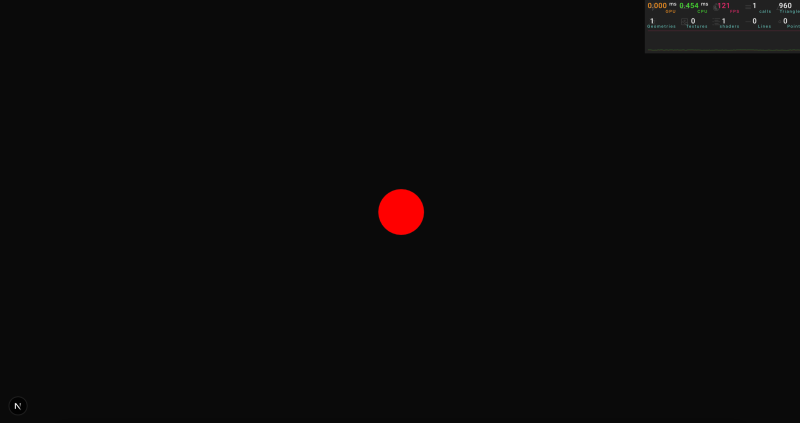
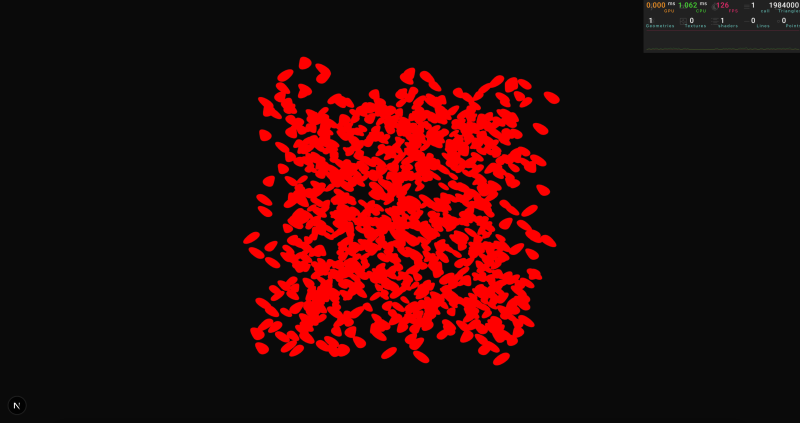
The code runs successfully, but all spheres are in the same place, even though we added different positions.
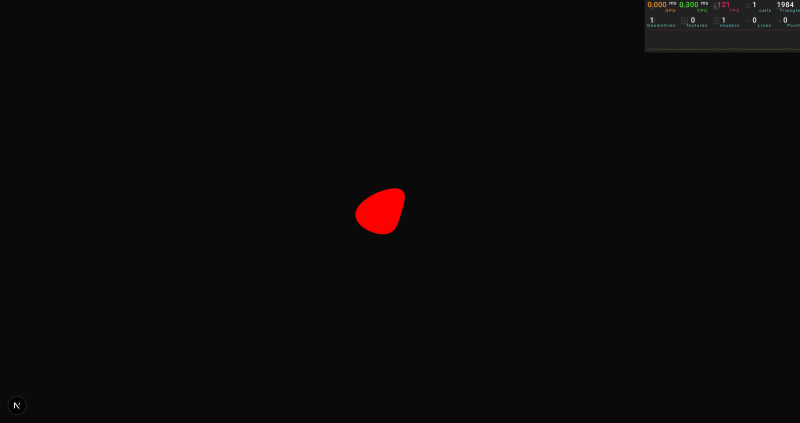
This is happening because when we calculated the position of each vertex in the vertexShader, we returned the same position for all vertices, all these attributes are the same for all spheres, so they end up in the same spot:
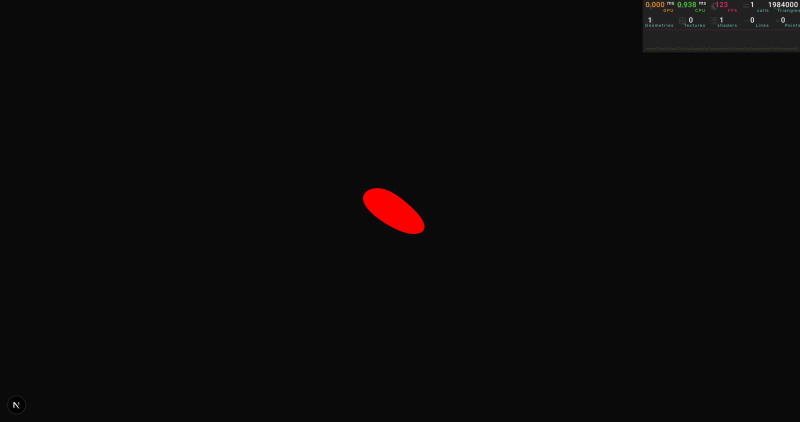
We managed to render all the blobs in different positions, but since the uniforms are shared across all instances, they all end up having the same animation.
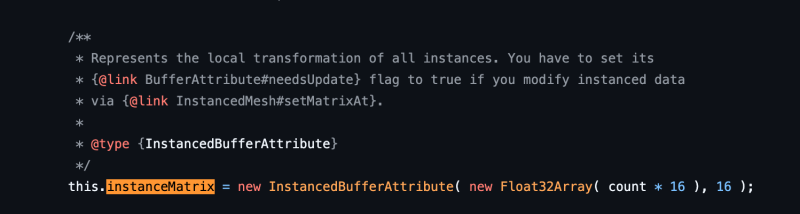
To solve this issue, we need a way to provide custom information for each instance. We actually did this before, when we used the instanceMatrix to move each instance to its corresponding location. Let’s debug the magic behind instanceMatrix, so we can learn how we can create own instanced attributes.
Taking a look at the implementation of instancedMatrix we can see that it is using something called InstancedAttribute:
import { useGLTF } from "@react-three/drei"
import * as THREE from "three"
import { GLTF } from "three/examples/jsm/Addons.js"

// I always like to type the models so that they are safer to work with
interface TreeGltf extends GLTF {
  nodes: {
    tree_low001_StylizedTree_0: THREE.Mesh<
      THREE.BufferGeometry,
      THREE.MeshStandardMaterial
    >
  }
}

function Scene() {

  // Load the model
  const { nodes } = useGLTF(
    "/stylized_pine_tree_tree.glb"
  ) as unknown as TreeGltf

  return (
    <group>
      {/* add one tree to our scene */ }
      <mesh
        scale={0.02}
        geometry={nodes.tree_low001_StylizedTree_0.geometry}
        material={nodes.tree_low001_StylizedTree_0.material}
      />
    </group>
  )
}
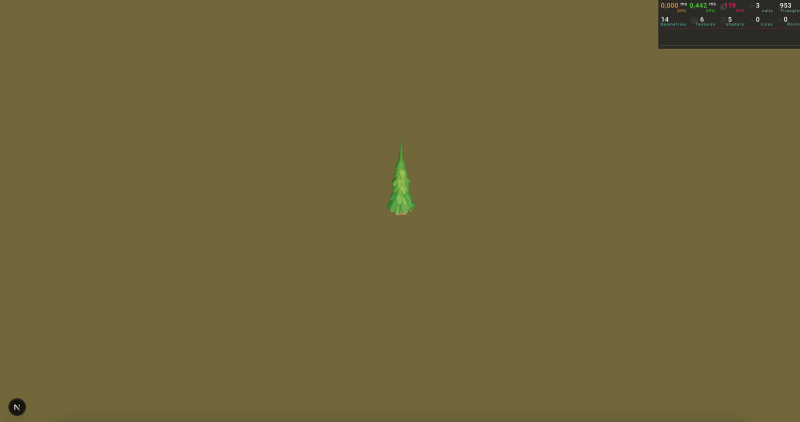
(I added lights and a ground in a separate file.)
Now that we have one tree, let’s apply instancing.
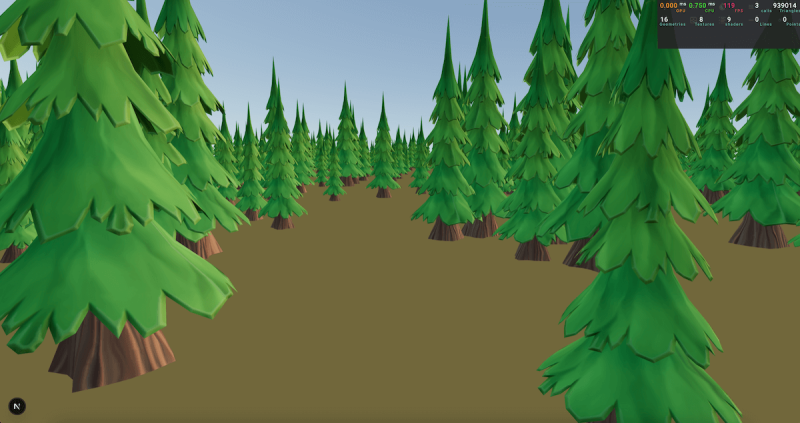
Our entire forest is being rendered in only three draw calls: one for the skybox, another one for the ground plane, and a third one with all the trees.
To make things more interesting, we can vary the height and rotation of each tree:
There are some topics that I didn’t cover in this article, but I think they are worth mentioning:
Batched Meshes: Now, we can render one geometry multiple times, but using a batched mesh will allow you to render different geometries at the same time, sharing the same material. This way, you are not limited to rendering one tree geometry; you can vary the shape of each one.
Skeletons: They are not currently supported with instancing, to create the latest basement.studio site we managed to hack our own implementation, I invite you to read our implementation there.
Morphing with batched mesh: Morphing is supported with instances but not with batched meshes. If you want to implement it yourself, I’d suggest you read these notes.
Yesterday Online PNG Tools smashed through 6.61M Google clicks and today it’s smashed through 6.62M Google clicks! That’s 10,000 new clicks in a single day – the smash train keeps on rollin’!
What Are Online PNG Tools?
Online PNG Tools offers a collection of easy-to-use web apps that help you work with PNG images right in your browser. It’s like a Swiss Army Knife for anything PNG-related. On this site, you can create transparent PNGs, edit icons, clean up logos, crop stamps, change colors of signatures, and customize stickers – there’s a tool for it all. The best part is that you don’t need to install anything or be a graphic designer. All tools are made for regular people who just want to get stuff done with their images. No sign-ups, no downloads – just quick and easy PNG editing tools.
Who Created Online PNG Tools?
Online PNG Tools were created by me and my team at Browserling. We’ve build simple, browser-based tools that anyone can use without needing to download or install anything. Along with PNG tools, we also work on cross-browser testing to help developers make sure their websites work great on all web browsers. Our mission is to make online tools that are fast, easy to use, and that are helpful for everyday tasks like editing icons, logos, and signatures.
Who Uses Online PNG Tools?
Online PNG Tools and Browserling are used by everyone – from casual users to professionals and even Fortune 100 companies. Casual users often use them to make memes, edit profile pictures, or remove backgrounds. Professionals use them to clean up logos, design icons, or prepare images for websites and apps.
TLDR: You can browse the Internet safely and anonymously using a virtual browser at browserling.com/browse. It runs in your browser, so there’s nothing to download or install.
What Is a Virtual Browser?
It’s a real browser running on a remote machine that you control through your browser. Everything you do happens on a secure server, so your device never touches the website directly.
Is It Safe to Visit Weird Websites With It?
Yes, because the risky stuff stays on the remote machine, not your own. Malware, pop-ups, viruses, and trackers never get near your real computer.
Can I Test Suspicious Links With It?
Yes, it’s made for testing suspicious URLs without risking your system. Just paste the link into the virtual browser and see what it does.
Can I Open Dangerous Email Attachments?
Yes, you can upload attachments to the virtual browser and open them there. This helps protect your actual files and avoids infecting your computer with malware hidden in shady attachments.
Is It Good for Cybersecurity Testing?
Totally. Virtual browsers are often used in security testing, link analysis, sandboxing, and checking how websites behave under different conditions without exposing a real system.
How Is This Different From Incognito Mode?
Incognito just hides your history. It doesn’t protect you from viruses or sketchy websites. A virtual browser, on the other hand, acts like a shield, running everything remotely and keeping your device safe.
Do I Need to Install Anything?
Nope, it works straight from your browser. Just open a virtual browser in your browser and start browsing!
Can It Help With Online Privacy?
Absolutely. Since all browsing happens on a remote server, your IP address, cookies, and local data are never exposed to the sites you visit.
Can I Use It to Test Different Browsers?
Yeah, you can pick Chrome, Firefox, Edge, Safari, and others. It’s super helpful for developers, QA testers, or curious users who want to see how sites look in different browsers.
Is It Free?
There’s a free version with limited time, and paid plans for more features. If you just need quick tests or occasional safe browsing, the free plan is usually enough.
Is It On GitHub?
Absolutely. You can contribute to virtual browser repository on GitHub.
What Is Browserling?
Browserling is a virtual browser service that lets you use real web browsers on other computers, right from your own browser. It’s great for testing websites or visiting stuff safely without messing up your device.
Who Uses Browserling?
Browserling is a popular virtual browser tool used by people in tech, like cybersecurity pros, IT teams, and even researchers who check out the dark web. It’s trusted by millions of users every month, including big names like banks, governments, schools, news sites, and huge companies around the world.
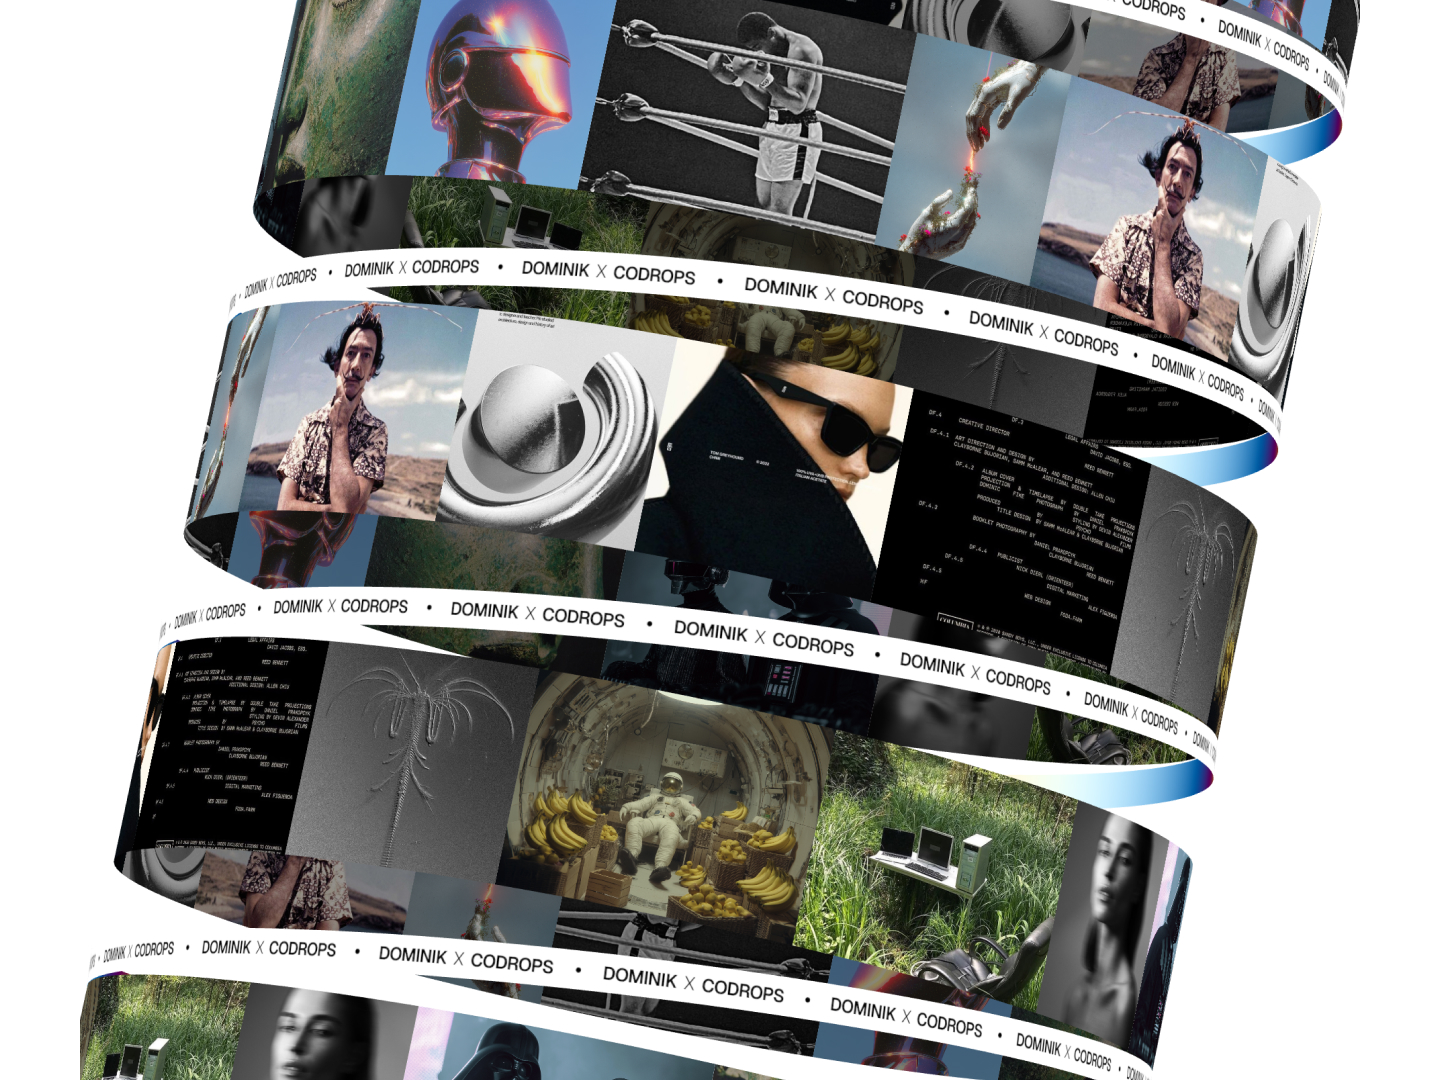
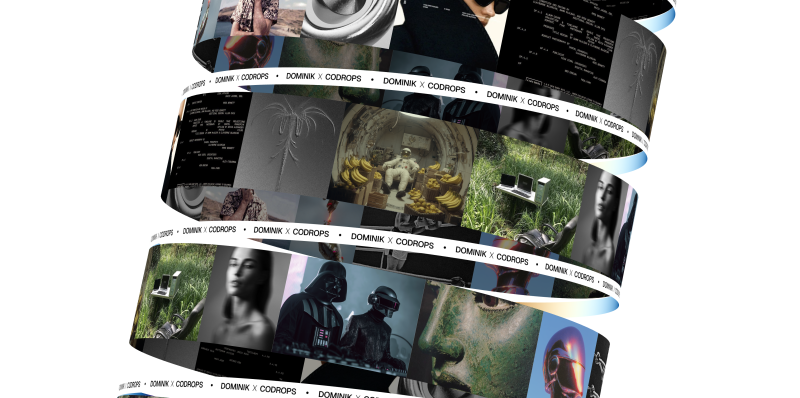
For the past few months, I’ve been exploring different kinetic motion designs with text and images. The style looks very intriguing, so I decided to create some really cool organic animations using images and React Three Fiber.
In this article, we’ll learn how to create the following animation using Canvas2D and React Three Fiber.
Setting Up the View & Camera
The camera’s field of view (FOV) plays a huge role in this project. Let’s keep it very low so it looks like an orthographic camera. You can experiment with different perspectives later. I prefer using a perspective camera over an orthographic one because we can always try different FOVs. For more detailed implementation check source code.
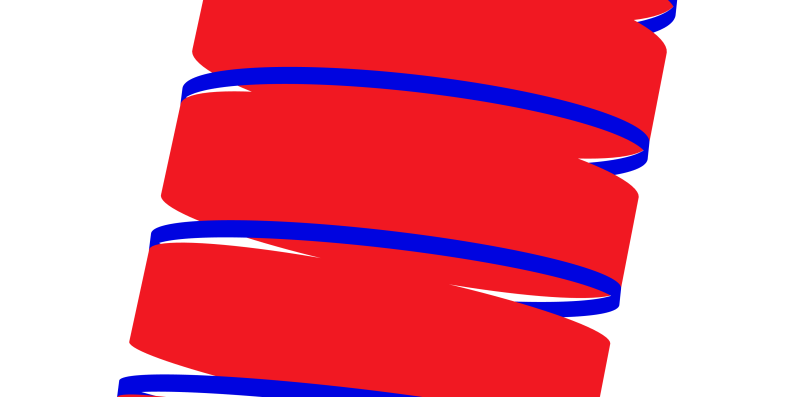
4. Add some rotation – Let’s rotate things a bit! First, I’ll hard-code the rotation of our banners to make them more curved and fit nicely with the Billboard component. We’ll also make the radius a bit bigger.
page.jsx
'use client';

import styles from './page.module.scss';
import Billboard from '@/components/webgl/Billboard/Billboard';
import Banner from '@/components/webgl/Banner/Banner';
import { View } from '@/webgl/View';
import { PerspectiveCamera } from '@react-three/drei';

const COUNT = 10;
const GAP = 3.2;

export default function Home() {
    return (
        <div className={styles.page}>
            <View className={styles.view} orbit={false}>
            <PerspectiveCamera makeDefault fov={7} position={[0, 0, 70]} near={0.01} far={100000} />
                <group>
                    {Array.from({ length: COUNT }).map((_, index) => [
                        <Billboard
                        key={`billboard-${index}`}
                        radius={5}
                        position={[0, (index - (Math.ceil(COUNT / 2) - 1)) * GAP, 0]}
                        rotation={[0, index * Math.PI * 0.5, 0]} // <-- rotation of the billboard
                        />,
                        <Banner
                        key={`banner-${index}`}
                        radius={5}
                        rotation={[0, 0, 0.085]} // <-- rotation of the banner
                        position={[0, (index - (Math.ceil(COUNT / 2) - 1)) * GAP - GAP * 0.5, 0]}
                        />,
                    ])}
                </group>
            </View>
        </div>
    );
}
5. Tilt the whole thing – Now let’s rotate our entire group to make it look like the Leaning Tower of Pisa.
page.jsx
'use client';

import styles from './page.module.scss';
import Billboard from '@/components/webgl/Billboard/Billboard';
import Banner from '@/components/webgl/Banner/Banner';
import { View } from '@/webgl/View';
import { PerspectiveCamera } from '@react-three/drei';

const COUNT = 10;
const GAP = 3.2;

export default function Home() {
    return (
        <div className={styles.page}>
            <View className={styles.view} orbit={false}>
            <PerspectiveCamera makeDefault fov={7} position={[0, 0, 70]} near={0.01} far={100000} />
                <group rotation={[-0.15, 0, -0.2]}> // <-- rotate the group
                    {Array.from({ length: COUNT }).map((_, index) => [
                        <Billboard
                        key={`billboard-${index}`}
                        radius={5}
                        position={[0, (index - (Math.ceil(COUNT / 2) - 1)) * GAP, 0]}
                        rotation={[0, index * Math.PI * 0.5, 0]}
                        />,
                        <Banner
                        key={`banner-${index}`}
                        radius={5}
                        rotation={[0, 0, 0.085]}
                        position={[0, (index - (Math.ceil(COUNT / 2) - 1)) * GAP - GAP * 0.5, 0]}
                        />,
                    ])}
                </group>
            </View>
        </div>
    );
}
6. Perfect! – Our 3D shapes are all set up. Now we can add our images to them.
Creating a Texture from Our Images Using Canvas
Here’s the cool part: we’ll put all our images onto a canvas, then use that canvas as a texture on our Billboard shape.
To make this easier, I created some helper functions that simplify the whole process.
getCanvasTexture.js
import * as THREE from 'three';

/**
* Preloads an image and calculates its dimensions
*/
async function preloadImage(imageUrl, axis, canvasHeight, canvasWidth) {
    const img = new Image();

    img.crossOrigin = 'anonymous';

    await new Promise((resolve, reject) => {
        img.onload = () => resolve();
        img.onerror = () => reject(new Error(`Failed to load image: ${imageUrl}`));
        img.src = imageUrl;
    });

    const aspectRatio = img.naturalWidth / img.naturalHeight;

    let calculatedWidth;
    let calculatedHeight;

    if (axis === 'x') {
        // Horizontal layout: scale to fit canvasHeight
        calculatedHeight = canvasHeight;
        calculatedWidth = canvasHeight * aspectRatio;
        } else {
        // Vertical layout: scale to fit canvasWidth
        calculatedWidth = canvasWidth;
        calculatedHeight = canvasWidth / aspectRatio;
    }

    return { img, width: calculatedWidth, height: calculatedHeight };
}

function calculateCanvasDimensions(imageData, axis, gap, canvasHeight, canvasWidth) {
    if (axis === 'x') {
        const totalWidth = imageData.reduce(
        (sum, data, index) => sum + data.width + (index > 0 ? gap : 0), 0);

        return { totalWidth, totalHeight: canvasHeight };
    } else {
        const totalHeight = imageData.reduce(
        (sum, data, index) => sum + data.height + (index > 0 ? gap : 0), 0);

        return { totalWidth: canvasWidth, totalHeight };
    }
}

function setupCanvas(canvasElement, context, dimensions) {
    const { totalWidth, totalHeight } = dimensions;
    const devicePixelRatio = Math.min(window.devicePixelRatio || 1, 2);

    canvasElement.width = totalWidth * devicePixelRatio;
    canvasElement.height = totalHeight * devicePixelRatio;

    if (devicePixelRatio !== 1) context.scale(devicePixelRatio, devicePixelRatio);

    context.fillStyle = '#ffffff';
    context.fillRect(0, 0, totalWidth, totalHeight);
}

function drawImages(context, imageData, axis, gap) {
    let currentX = 0;
    let currentY = 0;

    context.save();

    for (const data of imageData) {
        context.drawImage(data.img, currentX, currentY, data.width, data.height);

        if (axis === 'x') currentX += data.width + gap;
        else currentY += data.height + gap;
    }

    context.restore();
}

function createTextureResult(canvasElement, dimensions) {
    const texture = new THREE.CanvasTexture(canvasElement);
    texture.needsUpdate = true;
    texture.wrapS = THREE.RepeatWrapping;
    texture.wrapT = THREE.ClampToEdgeWrapping;
    texture.generateMipmaps = false;
    texture.minFilter = THREE.LinearFilter;
    texture.magFilter = THREE.LinearFilter;

    return {
        texture,
        dimensions: {
            width: dimensions.totalWidth,
            height: dimensions.totalHeight,
            aspectRatio: dimensions.totalWidth / dimensions.totalHeight,
        },
    };
}

export async function getCanvasTexture({
    images,
    gap = 10,
    canvasHeight = 512,
    canvasWidth = 512,
    canvas,
    ctx,
    axis = 'x',
}) {
    if (!images.length) throw new Error('No images');

    // Create canvas and context if not provided
    const canvasElement = canvas || document.createElement('canvas');
    const context = ctx || canvasElement.getContext('2d');

    if (!context) throw new Error('No context');

    // Preload all images in parallel
    const imageData = await Promise.all(
        images.map((image) => preloadImage(image.url, axis, canvasHeight, canvasWidth))
    );

    // Calculate total canvas dimensions
    const dimensions = calculateCanvasDimensions(imageData, axis, gap, canvasHeight, canvasWidth);

    // Setup canvas
    setupCanvas(canvasElement, context, dimensions);

    // Draw all images
    drawImages(context, imageData, axis, gap);

    // Create and return texture result
    return createTextureResult(canvasElement, dimensions)
}
Then we can also create a useCollageTexture hook that we can easily use in our components.
Now let’s use our useCollageTexture hook on our page. We’ll create some simple loading logic. It takes a second to fetch all the images and put them onto the canvas. Then we’ll pass our texture and dimensions of canvas into the Billboard component.
page.jsx
'use client';

import styles from './page.module.scss';
import Billboard from '@/components/webgl/Billboard/Billboard';
import Banner from '@/components/webgl/Banner/Banner';
import Loader from '@/components/ui/modules/Loader/Loader';
import images from '@/data/images';
import { View } from '@/webgl/View';
import { PerspectiveCamera } from '@react-three/drei';
import { useCollageTexture } from '@/hooks/useCollageTexture';

const COUNT = 10;
const GAP = 3.2;

export default function Home() {
    const { texture, dimensions, isLoading } = useCollageTexture(images); // <-- getting the texture and dimensions from the useCollageTexture hook

    if (isLoading) return <Loader />; // <-- showing the loader when the texture is loading

    return (
        <div className={styles.page}>
            <View className={styles.view} orbit={false}>
                <PerspectiveCamera makeDefault fov={7} position={[0, 0, 100]} near={0.01} far={100000} />
                <group rotation={[-0.15, 0, -0.2]}>
                    {Array.from({ length: COUNT }).map((_, index) => [
                        <Billboard
                            key={`billboard-${index}`}
                            radius={5}
                            rotation={[0, index * Math.PI * 0.5, 0]}
                            position={[0, (index - (Math.ceil(COUNT / 2) - 1)) * GAP, 0]}
                            texture={texture} // <--passing the texture to the billboard
                            dimensions={dimensions} // <--passing the dimensions to the billboard
                        />,
                        <Banner
                            key={`banner-${index}`}
                            radius={5.035}
                            rotation={[0, 0, 0.085]}
                            position={[
                                0,
                                (index - (Math.ceil(COUNT / 2) - 1)) * GAP - GAP * 0.5,
                                0,
                            ]}
                        />,
                    ])}
                </group>
            </View>
        </div>
    );
}
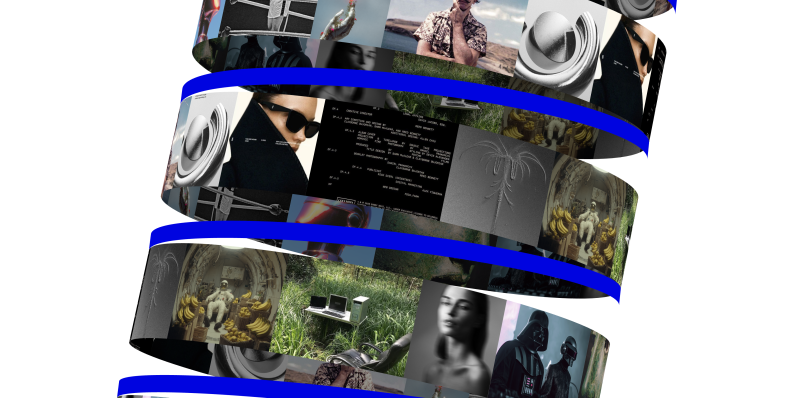
Inside the Billboard component, we need to properly map this texture to make sure everything fits correctly. The width of our canvas will match the circumference of the cylinder, and we’ll center the y position of the texture. This way, all the images keep their resolution and don’t get squished or stretched.
Now let’s animate them using the useFrame hook. The trick to animating these images is to just move the X offset of the texture. This gives us the effect of a rotating mesh, when really we’re just moving the texture offset.
I think it would look even better if we made the back of the images a little darker. To do this, I created MeshImageMaterial – it’s just an extension of MeshBasicMaterial that makes our backface a bit darker.
MeshImageMaterial.js
import * as THREE from 'three';
import { extend } from '@react-three/fiber';

export class MeshImageMaterial extends THREE.MeshBasicMaterial {
    constructor(parameters = {}) {
        super(parameters);
        this.setValues(parameters);
    }

    onBeforeCompile = (shader) => {
        shader.fragmentShader = shader.fragmentShader.replace(
            '#include <color_fragment>',
            /* glsl */ `#include <color_fragment>
            if (!gl_FrontFacing) {
            vec3 blackCol = vec3(0.0);
            diffuseColor.rgb = mix(diffuseColor.rgb, blackCol, 0.7);
            }
            `
        );
    };
}

extend({ MeshImageMaterial });
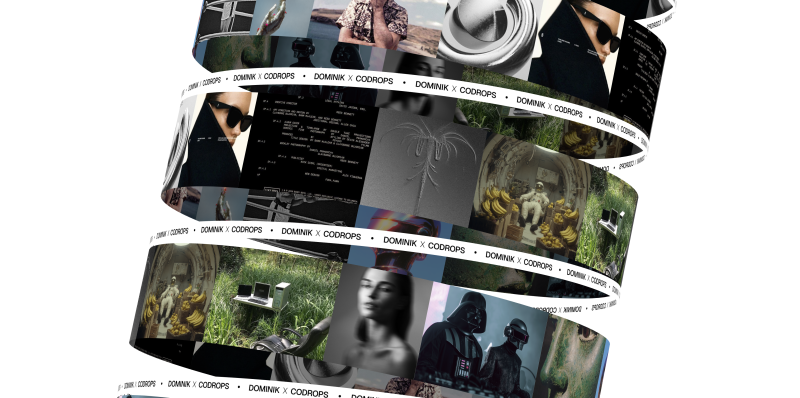
And now we have our images moving around cylinders. Next, we’ll focus on banners (or marquees, whatever you prefer).
Adding Texture to the Banner
The last thing we need to fix is our Banner component. I wrapped it with this texture. Feel free to take it and edit it however you want, but remember to keep the proper dimensions of the texture.
We simply import our texture using the useTexture hook, map it onto our material, and animate the texture offset just like we did in our Billboard component.
Billboard.jsx
'use client';

import * as THREE from 'three';
import bannerTexture from '@/assets/images/banner.jpg';
import { useTexture } from '@react-three/drei';
import { useFrame } from '@react-three/fiber';
import { useRef } from 'react';

function Banner({ radius = 1.6, ...props }) {
    const ref = useRef(null);

    const texture = useTexture(bannerTexture.src);
    texture.wrapS = texture.wrapT = THREE.RepeatWrapping;

    useFrame((state, delta) => {
        if (!ref.current) return;
        const material = ref.current.material;
        if (material.map) material.map.offset.x += delta / 30;
    });

    return (
        <mesh ref={ref} {...props}>
            <cylinderGeometry
                args={[radius, radius, radius * 0.07, radius * 80, radius * 10, true]}
            />
            <meshBasicMaterial
                map={texture}
                map-anisotropy={16}
                map-repeat={[15, 1]}
                side={THREE.DoubleSide}
                toneMapped={false}
                backfaceRepeatX={3}
            />
        </mesh>
    );
}

export default Banner;
Nice! Now we have something cool, but I think it would look even cooler if we replaced the backface with something different. Maybe a gradient? For this, I created another extension of MeshBasicMaterial called MeshBannerMaterial. As you probably guessed, we just put a gradient on the backface. That’s it! Let’s use it in our Banner component.
We replace the MeshBasicMaterial with MeshBannerMaterial and now it looks like this!
MeshBannerMaterial.js
import * as THREE from 'three';
import { extend } from '@react-three/fiber';

export class MeshBannerMaterial extends THREE.MeshBasicMaterial {
    constructor(parameters = {}) {
        super(parameters);
        this.setValues(parameters);

        this.backfaceRepeatX = 1.0;

        if (parameters.backfaceRepeatX !== undefined)

        this.backfaceRepeatX = parameters.backfaceRepeatX;
    }

    onBeforeCompile = (shader) => {
        shader.uniforms.repeatX = { value: this.backfaceRepeatX * 0.1 };
        shader.fragmentShader = shader.fragmentShader
        .replace(
            '#include <common>',
            /* glsl */ `#include <common>
            uniform float repeatX;

            vec3 pal( in float t, in vec3 a, in vec3 b, in vec3 c, in vec3 d ) {
                return a + b*cos( 6.28318*(c*t+d) );
            }
            `
        )
        .replace(
            '#include <color_fragment>',
            /* glsl */ `#include <color_fragment>
            if (!gl_FrontFacing) {
            diffuseColor.rgb = pal(vMapUv.x * repeatX, vec3(0.5,0.5,0.5),vec3(0.5,0.5,0.5),vec3(1.0,1.0,1.0),vec3(0.0,0.10,0.20) );
            }
            `
        );
    };
}

extend({ MeshBannerMaterial });
Banner.jsx
'use client';

import * as THREE from 'three';
import bannerTexture from '@/assets/images/banner.jpg';
import { useTexture } from '@react-three/drei';
import { useFrame } from '@react-three/fiber';
import { useRef } from 'react';
import '@/webgl/materials/MeshBannerMaterial';

function Banner({ radius = 1.6, ...props }) {
const ref = useRef(null);

const texture = useTexture(bannerTexture.src);

texture.wrapS = texture.wrapT = THREE.RepeatWrapping;

useFrame((state, delta) => {
    if (!ref.current) return;

    const material = ref.current.material;

    if (material.map) material.map.offset.x += delta / 30;
});

return (
    <mesh ref={ref} {...props}>
        <cylinderGeometry
            args={[radius, radius, radius * 0.07, radius * 80, radius * 10, true]}
        />
        <meshBannerMaterial
            map={texture}
            map-anisotropy={16}
            map-repeat={[15, 1]}
            side={THREE.DoubleSide}
            toneMapped={false}
            backfaceRepeatX={3}
        />
    </mesh>
);
}

export default Banner;
You can experiment with this method in lots of ways. For example, I created 2 more examples with shapes I made in Blender, and mapped canvas textures on them. You can check them out here:
Final Words
Check out the final versions of all demos:
I hope you enjoyed this tutorial and learned something new!
Feel free to check out the source code for more details!
In today’s oversaturated landscape of production service companies vying for attention, Bloom Paris TV approached our studio with an extraordinarily bold ambition: to distinguish themselves through an uncompromising combination of refined style and substantive expertise. Strategically positioned in the cultural and creative heart of Paris, Bloom offers international productions comprehensive and seamless on-the-ground support throughout France — meticulously handling everything from complex technical logistics to complex administrative workflows and regulatory requirements.
But what truly sets Bloom apart is that they don’t merely facilitate shoots — they orchestrate them with exceptional precision, artistic vision, and unwavering reliability. In an industry where every minute counts, their discerning clients demand speed without sacrificing quality, complete trust in execution, and uncompromising excellence at every touchpoint. Bloom consistently delivers all three elements — seemingly effortlessly and with characteristic French sophistication.
Our mission became crystal clear: design and develop a digital experience that authentically reflects the remarkable sharpness of their creative eye, the methodical structure of their production process, and the sophisticated elegance of their flawless execution across every project they undertake.
The Concept
We approached the website design with one unambiguous and defining intention: make an immediate, memorable impact upon first impression.
Operating in a fast-paced industry where critical decisions are often made in mere seconds, we recognized that the digital experience needed to be simultaneously bold, fluid, and instantaneously engaging. Our strategic approach centered on minimalism with deliberate intent — methodically stripping away all superfluous elements while preserving only the absolute essentials, then thoughtfully amplifying Bloom’s distinctive core identity throughout the interface.
At the conceptual heart of Bloom’s sophisticated logo lies a deceptively simple dot — subtle in appearance yet powerful in significance. We strategically extended this symbolic element across the entire user interface: integrating it within interactive buttons, intuitive navigation elements, typographic superscripts, and responsive interaction states. This visual motif evolved into the unifying thread throughout the experience, functioning as a recurring punctuation mark that guides users through a clean, cinematic narrative journey.
Typography & Color System
After careful consideration, we selected a commanding, contemporary sans-serif typeface specifically chosen to convey professional confidence and exceptional clarity. This distinctive font effectively anchors the entire site within a precisely calibrated, almost editorial layout structure — creating a harmonious balance between the dynamically asymmetric grid system and the meticulously structured, authoritative tone of voice that characterizes Bloom’s communication style.
The carefully curated color palette features a sophisticated high-contrast dialogue between rich soft black and warm, inviting light grey, consciously avoiding the harshness of traditional monochrome combinations. A strategically placed vibrant yellow accent punctuates key interactive elements throughout the interface — subtly referencing cinematic film titles and professional cue markers, while simultaneously introducing a welcome sense of warmth, energy and approachability to the otherwise restrained interface design.
Technology Stack
Beneath the visually striking surface, the site is meticulously constructed with a powerful combination of technologies:
WordPress implemented as a robust, infinitely customizable content management system, providing Bloom with comprehensive control over their content strategy and presentation
GSAP for implementing buttery-smooth, cinematically-inspired animations and seamless page transitions throughout the experience
Custom-developed SVG masking techniques meticulously crafted to achieve elegantly seamless panel-based transitions between content sections
A fully responsive, thoroughly performance-optimized front-end architecture that ensures consistent excellence across all devices and connection speeds
Loader & Page Transitions
From the earliest conceptual discussions, we were determined to ensure that every transition moment within the experience would feel authentically cinematic and emotionally resonant.
Each individual page opens with a dynamically animated panel that dramatically reveals the upcoming section title with a sweeping, theatrical gesture. This carefully choreographed visual sequence not only significantly enhances user orientation within the site architecture, but deliberately sets the sophisticated tone for a fluid, immersive journey through Bloom’s professional world.
The distinctive homepage loader was specifically designed to create instant emotional resonance and connection: a fullscreen mask elegantly opens to dramatically reveal Bloom’s captivating showreel — creating an unforgettable first impression that immediately communicates their production capabilities. Thoughtfully combined with an interactive progress indicator, this element transforms into an engaging interactive curtain, gracefully inviting users to step into Bloom’s compelling narrative universe.
Project Grid & Hover States
Throughout the portfolio section, Bloom’s impressive projects are presented within a sophisticated asymmetric editorial grid structure, deliberately breaking the predictable monotony of conventional layouts while thoughtfully echoing the dynamic rhythm of visual storytelling. Individual content sizes and positions shift intuitively throughout the composition, creating intentional moments of both contemplative pause and energetic flow.
During user interaction, the signature dot elegantly reappears as an intuitive focus indicator, while a smoothly animated marquee title gracefully glides over the preview image — simultaneously drawing attention and adding perceptual depth to the experience. This carefully considered combination creates a remarkably tactile, multi-layered effect that meaningfully rewards user interaction without overwhelming the visual hierarchy or distracting from the exceptional quality of Bloom’s project portfolio.
Footer
Thoughtfully designed as a final memorable touchpoint rather than an afterthought, the site’s footer functions as much more than a mere sign-off — it serves as an compelling invitation to further engagement.
The footer section artfully reprises elements from the initial showreel presentation, elegantly contained within a precisely masked frame that maintains consistent visual language throughout the experience. Both functionally informative and poetically expressive, this distinctive footer ensures that Bloom’s powerful brand experience lingers in the user’s memory — even long after the final scroll action concludes their immediate journey.
Who We Are
We proudly define ourselves as a specialized digital design studio operating at the fascinating intersection of compelling narrative, intuitive interaction design, and cutting-edge technology implementation. We fundamentally believe in the transformative power of crafting digital interfaces that move with deliberate intention and purpose, thoughtfully combining minimalist aesthetic principles with boldly distinctive creative identity expressions.
With each project we undertake, we consistently strive to create memorable digital experiences that communicate with exceptional clarity, move with captivating beauty, and feel genuinely alive and responsive to human interaction.
TLDR: You can get instant access to an online browser at browserling.com/browse. It runs entirely in your own browser. No downloads, no installs.
What’s An Online Browser?
It’s a browser hosted elsewhere, streamed to you in real time. You use it like any regular browser, but it runs safely outside your device on a remote server.
Is It Safe For Sketchy Sites?
Absolutely. Any harmful scripts or shady behavior stay isolated on the remote machine. Your computer stays untouched and safe from viruses, malware, and phishing traps.
Can I Test Suspicious Links?
Yes, you can open any link inside an online browser without risking your own device. Using an online browser is one of the safest ways to check unknown URLs, especially if you’re worried about phishing or malware.
What About Email Attachments?
You can use an online browser to open files or attachments from emails without downloading them locally. This is a smart trick for checking PDFs or Office files that might contain malicious scripts.
Is It Good For Cybersecurity?
Absolutely. Online browsers are a big help for threat hunters and analysts. They let you investigate risky sites, test exploits, and open shady content without ever touching your network.
Do I Need To Install Anything?
No installation needed. It works instantly in your browser. Just click and go. No plugins, no setup, nothing to configure.
Can I Test Different Browsers?
Yes! You can choose from Chrome, Firefox, Edge, Safari, and more to test how sites look and behave across platforms. This is super useful for developers checking cross-browser compatibility, or QA testers fixing layout bugs.
Is It Free?
There’s a free version with time limits, and paid plans that unlock full access and extra features. The free plan is good for quick tasks, and the premium plans are built for teams, security testing, and daily use.
Is It On GitHub?
Yes. You can contribute to online browser repository on GitHub.
What Is Browserling?
Browserling is an online browser service that gives you instant access to real browsers running on remote systems. It’s made for testing, development, and secure browsing.
Who Uses Browserling?
Tech professionals around the world rely on Browserling. From cybersecurity experts and IT teams to cybersecurity experts exploring high-risk parts of the web. It’s trusted by millions each month, including major banks, universities, media outlets, government agencies, and Fortune 100 companies.
TLDR: Want to browse the web safely without messing up your computer? Try a browser sandbox at browserling.com/browse. It runs straight in your browser. No installs, no downloads.
What’s a Browser Sandbox?
A browser sandbox is like a “browser inside a browser”. It runs on another computer in the cloud, and you control it from your own screen. You get to surf the web, but the websites never touch your actual device.
Is It Safe to Use?
Yep! You can click on sketchy links or check out weird websites without any risk. All the dangerous stuff stays far away – on the remote computer, not yours. Even if a site tries to install a virus or download something, it won’t reach your actual system.
Can I Open Suspicious Emails Safely?
Yes, with a browser sandbox you can open sketchy emails or attachments without danger. If the attachment contains malware, it gets trapped inside the sandbox and can’t harm your real device.
What About Testing Suspicious URLs?
Absolutely. A browser sandbox is the safest way to test unknown URLs. It keeps malicious scripts, drive-by downloads, and tracking attempts locked away from your real system.
Can I Use It for Digital Forensics?
Yes, browser sandboxes are super useful for digital forensics work. Investigators can safely open phishing emails, suspicious websites, or malware links without risking their machines or leaking any data.
Do I Need to Download Anything?
Nope. Just open the sandbox, pick a browser, and start browsing. It’s that easy. Everything runs in your web browser via HTML5, JavaScript, and WebSockets, so there’s no software setup or weird permissions needed.
Can I Try Different Browsers?
Totally. You can switch between Chrome, Firefox, Edge, Safari, and even older versions if you’re testing an exploit that detonates in a particular browser version. This makes it useful for developers, bug bounty hunters, and cybersecurity researchers.
Is It Free?
There’s a free version with limited time. If you need more time or features, then there are paid plans too. The paid plans offer longer sessions, more browsers, and even persistent browser sessions.
What Is Browserling?
Browserling is an online tool that gives you access to real sandboxed browsers running on remote machines. Its use cases include safe browsing, testing websites in different browsers, and opening suspicious files and PDFs.
Who Uses Browserling?
Millions of people! Tech experts, digital forensics teams, IT departments, schools, and even government workers use Browserling. Big companies and researchers trust it too. Especially when checking out risky sites or testing code in different browsers.
India has officially entered a new era of digital governance with the enactment of the Digital Personal Data Protection (DPDP) Act, 2023. For businesses, the clock is ticking.
The Act mandates how organizations handle personal data and introduces significant penalties for non-compliance. It’s not just an IT issue anymore; it’s a boardroom concern that cuts across legal, HR, marketing, and product teams.
This blog provides an essential compliance checklist to help Indian businesses understand and align with the DPDP Act before enforcement begins.
Understand What Qualifies as Digital Personal Data
Under the DPDP Act, personal data refers to any data about an identifiable individual. The law applies to data:
Collected digitally, or
Digitized from non-digital sources and then processed.
Whether you’re storing customer details, employee information, or vendor records, it’s covered if it’s personal and digital.
Appoint a Data Protection Officer (DPO)
You’ll need a Data Protection Officer (DPO) if your organization processes large volumes of personal data. This person must:
Act as the point of contact for the Data Protection Board of India.
Ensure compliance across departments.
Handle grievance redressal from data principals (users).
Map and Classify Your Data
Before securing or managing personal data, you must know what you have. Conduct a complete data discovery and classification exercise:
Identify where personal data resides (servers, cloud apps, local drives).
Categorize it by sensitivity and usage.
Tag data to individuals (data principals) and note the purpose of collection.
This is foundational to compliance, enabling you to correctly apply retention, consent, and deletion rules.
Implement Robust Consent Mechanisms
The DPDP Act emphasizes informed, specific, and granular consent. Ensure your systems can:
Capture affirmative user consent before data collection.
Clearly state the purpose for which the data is collected.
Allow easy withdrawal of consent at any time.
Dark patterns, pre-checked boxes, or vague terms won’t cut it anymore.
Enable Data Principal Rights
The Act grants every individual (data principal) the right to:
Know what personal data is being collected.
Access and correct their data.
Request deletion of their data.
Nominate someone to exercise rights posthumously.
You must build systems that can fulfill such requests within a reasonable timeframe. A sluggish or manual process here could result in reputational damage and fines.
Revamp Your Privacy Policy
Your privacy policy must reflect your compliance posture. It should be:
Written in clear, simple language (avoid legalese).
Updated to include new consent practices and rights.
Accessible on all platforms where data is collected.
Transparency builds trust and aligns with the DPDP mandate for fair processing.
Review and Redefine Data Sharing Agreements
If your company works with third parties (vendors, cloud providers, agencies), it’s time to revisit all data processing agreements:
Ensure contracts specify responsibilities and liabilities under the DPDP Act.
Avoid sharing data with parties that cannot ensure compliance.
Include clauses about breach notification and data retention.
Establish a Breach Response Protocol
The law mandates reporting data breaches to the Data Protection Board and affected users. Prepare by:
Setting up a dedicated incident response team.
Creating SOPs for breach detection, containment, and reporting.
Running breach simulation drills for preparedness.
Time is critical; delays in breach reporting can attract harsh penalties.
Train Your Teams
Compliance isn’t just about tools; it’s about people. Conduct mandatory training sessions for all employees, especially those in:
IT and data management
Sales and marketing (who handles customer data)
HR (who manage employee records)
Awareness is your first line of defense against accidental data misuse.
Invest in Technology for Automation and Governance
Manual compliance is error-prone and unsustainable. Consider deploying:
Data Discovery & Classification tools to auto-tag and manage personal data.
Consent Management Platforms (CMPs) to handle user permissions.
Access Control & Encryption solutions to protect data at rest and in transit.
Platforms like Seqrite Data Privacy offer end-to-end visibility and control, ensuring you stay audit-ready and compliant.
The Bottom Line
The DPDP Act is not a one-time checkbox—it demands continuous, demonstrable accountability. Indian businesses must view it as a catalyst for digital transformation, not just a regulatory hurdle.
By acting now, you avoid penalties and earn consumer trust in an era where privacy is a competitive differentiator.
Is your business ready for the DPDP Act? Talk to Seqrite today to explore how our data privacy solutions can streamline your compliance journey.